Archive: July 31, 2023

PDF

graphing and data analysis worksheet pdf

Graphing and data analysis are essential tools for understanding and interpreting information. This guide provides a comprehensive introduction to visual representation of data, making complex information accessible and easy to analyze.

1.1 Importance of Graphing in Data Analysis

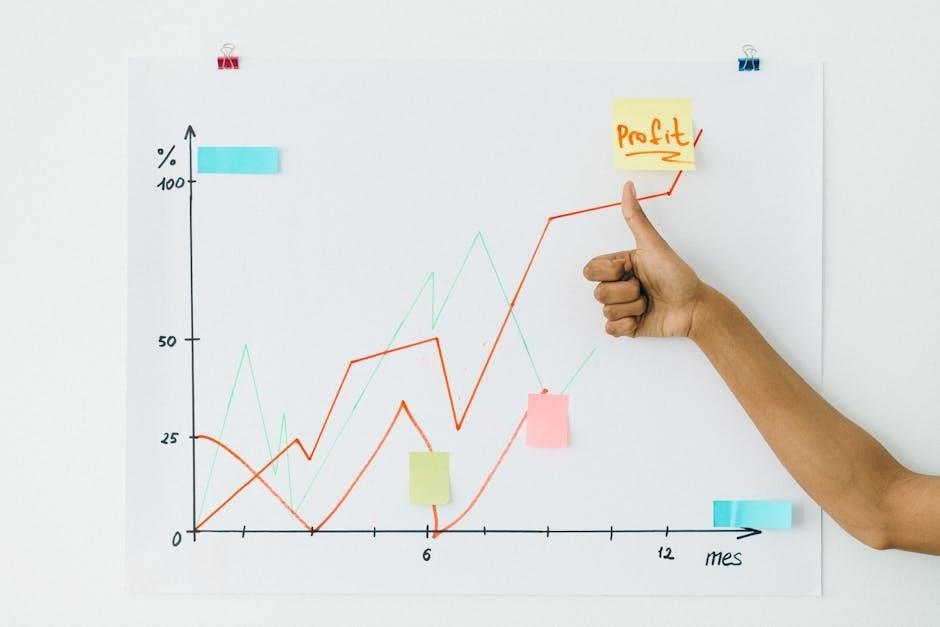
Graphing plays a crucial role in data analysis by transforming raw data into visual representations, making it easier to understand and interpret. It helps identify patterns, trends, and relationships within datasets, enabling informed decision-making. Various types of graphs, such as bar charts and pie charts, cater to different analytical needs, simplifying complex information. Effective graphing enhances clarity, facilitates comparison, and supports the extraction of meaningful insights, making it an indispensable tool in both educational and real-world applications.

1.2 Overview of Data Analysis Worksheets

Data analysis worksheets are structured tools designed to guide students and professionals in organizing, interpreting, and visualizing data. They often include exercises for collecting data, creating graphs, and drawing conclusions. These worksheets cover various techniques, such as bar charts, pictographs, and line graphs, to help develop analytical skills. By using these resources, learners can practice transforming raw data into meaningful insights, enhancing their ability to solve problems and make informed decisions. They are widely used in educational settings to reinforce data analysis concepts and promote hands-on learning.

Types of Graphs Used in Data Analysis

Common graphs include bar graphs, pictographs, line graphs, circle graphs, and Venn diagrams. Each type serves unique purposes in visualizing and interpreting data effectively.

  • Bar graphs compare quantities.
  • Pictographs use icons for visualization.
  • Line graphs show trends over time.
  • Circle graphs display proportions.
  • Venn diagrams illustrate relationships.

2.1 Bar Graphs

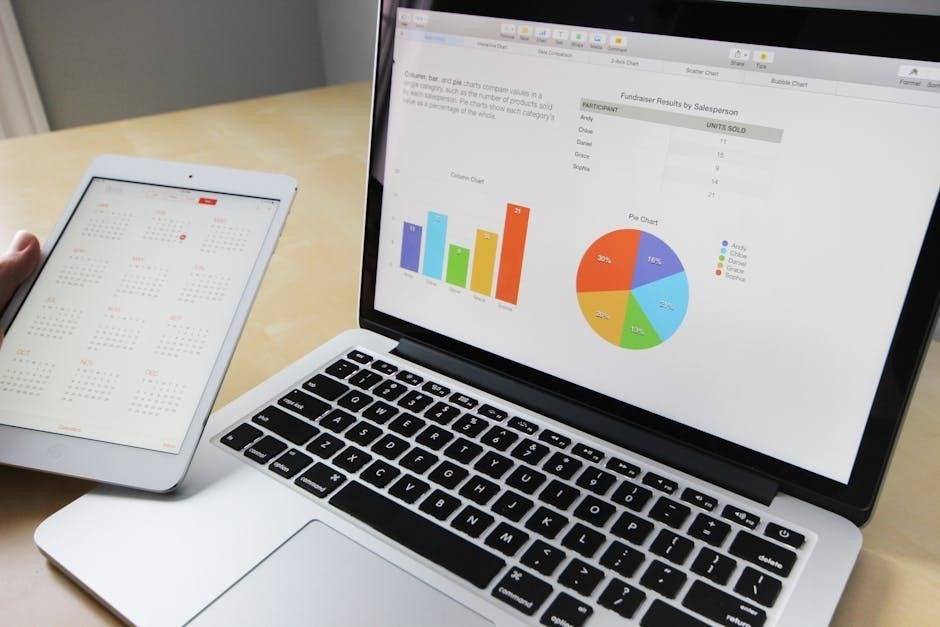
Bar graphs are a popular visualization tool used to compare quantities across different categories. They consist of rectangular bars, where the length corresponds to the value. These graphs are ideal for displaying categorical data, such as sales figures, survey results, or experimental outcomes. Bar graphs can be vertical or horizontal, with labels on the axes for clarity. They are widely used in education and research due to their simplicity and effectiveness in conveying information. This section explores how to create and interpret bar graphs accurately.

2.2 Pictographs

Pictographs, or pictograms, use icons or images to represent data, making information visually engaging and easy to understand. They are particularly effective for conveying simple comparisons or trends. Each symbol corresponds to a specific value, and multiple symbols are used to show larger quantities. Pictographs are ideal for audiences who prefer visual learning, as they simplify complex data into recognizable images. They are commonly used in education, marketing, and presentations to capture attention and enhance clarity. This section explains how to design and interpret pictographs effectively for various purposes.

2.3 Line Graphs

Line graphs are powerful tools for displaying trends over time or across categories. They consist of a series of data points connected by a continuous line, making it easy to observe patterns, increases, or decreases. These graphs are particularly useful for showing changes in values such as temperature, stock prices, or growth rates. By plotting points on a grid and drawing a line through them, line graphs provide a clear visual representation of data progression, helping users identify trends and make informed decisions effectively.

2.4 Circle Graphs

Circle graphs, also known as pie charts, are used to display parts of a whole, making it easy to compare proportions. Each section’s angle corresponds to its proportion of the total data. These graphs are ideal for showing percentages or fractions, such as market share, survey results, or budget allocations. By visually representing data in segments, circle graphs help users quickly understand relationships between categories. They are particularly effective for highlighting the contribution of each part to the entire dataset, offering a clear and intuitive way to analyze composition and distribution.

2.5 Venn Diagrams

Venn diagrams are visual tools used to show relationships between groups or sets of data. They consist of overlapping circles, where each circle represents a category. The overlapping areas indicate common elements between the groups, while the non-overlapping sections show unique elements. Venn diagrams are particularly useful for comparing and contrasting datasets, such as customer preferences or survey responses. They provide a clear and intuitive way to identify similarities and differences, making them an effective tool for educational and analytical purposes.

The Graphing Process

Graphing involves plotting data points, labeling axes, and titling the graph to ensure clarity and accuracy in data representation. This process helps visualize trends and patterns effectively.

3.1 Plotting Data Points

Plotting data points involves accurately placing dots or markers on the graph to represent each value. Ensure alignment with the correct axes, using a ruler for precision. For multiple datasets, use distinct colors or symbols to avoid confusion. Always label the axes clearly, indicating the dependent variable on the y-axis and the independent variable on the x-axis. This step is fundamental for creating clear and interpretable graphs, enabling effective data visualization and analysis.

3.2 Labeling Axes and Titling the Graph

Labeling axes and titling the graph are crucial steps for clarity. The x-axis typically represents the independent variable, while the y-axis represents the dependent variable. Labels should be concise and descriptive, ensuring the graph’s purpose is clear. The title should briefly summarize the graph’s content, making it easy to understand at a glance. Proper labeling and titling enhance the graph’s readability, ensuring that data is interpreted correctly and efficiently by the viewer. This attention to detail is essential for effective data communication.

Data Analysis and Interpretation

Data analysis involves extracting insights from graphs to understand trends, patterns, and relationships. Clear interpretation enables informed decision-making by communicating findings effectively and accurately.

4.1 Extracting Insights from Graphs

Extracting insights from graphs involves identifying trends, patterns, and relationships within the data. By carefully analyzing the visual representation, one can determine increases, decreases, or stability. Comparing different data sets can reveal correlations or discrepancies. Clear labeling and titles on graphs ensure accurate interpretation. Skills in data analysis help individuals draw meaningful conclusions, making informed decisions based on the information presented. This process is essential in various fields, including science, business, and education, where data-driven insights are crucial for success and understanding.

4.2 Comparing Data Sets

Comparing data sets allows for identifying similarities, differences, and patterns between groups. Graphs like bar graphs and line graphs facilitate visual comparisons, highlighting trends or discrepancies. Techniques such as analyzing slopes, peaks, and plateaus help in understanding relationships. Clear labeling ensures accurate interpretations. This process is vital in decision-making, enabling individuals to evaluate performance, track changes, and make informed choices. By comparing data, one can uncover insights that might otherwise remain hidden, making it a critical skill in fields like business, science, and education.

Educational Resources for Graphing and Data Analysis

Free PDF worksheets, educational workbooks, and classroom activities are available to help students master graphing and data analysis skills through interactive and structured learning experiences.

5.1 Free PDF Worksheets and Manuals

Free PDF worksheets and manuals are widely available for graphing and data analysis. These resources provide comprehensive exercises, covering topics like bar graphs, pictographs, and line plots. They include step-by-step guides for plotting data points, labeling axes, and interpreting results. Many worksheets are designed for educational purposes, helping students develop essential skills in organizing and analyzing data; Seasonal math packs and additional materials are often included, offering a variety of activities to reinforce learning. These PDF resources are easily downloadable, making them accessible for both classroom and independent study.

5.2 Classroom Activities and Lessons

Classroom activities and lessons on graphing and data analysis involve hands-on exercises to help students master data visualization. These activities include creating bar graphs, pictographs, and line plots, as well as interpreting and comparing different types of graphs. Interactive tools and group projects encourage collaboration and problem-solving. Lessons often incorporate real-world examples, enabling students to apply their skills to practical scenarios. These activities are designed to build confidence in recording, displaying, and analyzing data, making complex concepts accessible and engaging for learners of all levels.

Tools and Technology for Graphing

Advanced software and apps simplify data visualization, enabling users to create precise graphs and analyze data efficiently. Tools like OriginLab and specialized graphing apps enhance productivity and accuracy.

6.1 Software for Data Visualization

Software tools like OriginLab, Excel, and Google Sheets are widely used for data visualization, offering features to create bar graphs, line plots, and pie charts. These programs provide intuitive interfaces for plotting data points, labeling axes, and customizing graphs. They also support advanced analysis, such as trendline calculations and data comparison. Specialized apps and platforms further enhance graphing capabilities, enabling users to design clear and concise visual representations of data. These tools are indispensable for both educational and professional settings, streamlining the process of transforming raw data into meaningful insights.

6.2 Apps for Creating Graphs

Apps like Graphing Calculator, Desmos, and GeoGebra provide interactive tools for creating graphs. These apps support bar graphs, line plots, and circle graphs, offering touch-friendly interfaces and real-time data visualization. They allow users to plot points, label axes, and customize graphs with ease. Many apps also enable 3D graphing and data analysis, making them versatile for educational and professional use. These tools are accessible on mobile devices and web browsers, providing convenience for students and researchers to visualize and interpret data effectively.

Best Practices for Effective Graphing

Best practices include clear titles, proper axis labels, choosing appropriate graph types, minimizing clutter, and using color effectively to ensure clarity and readability.

7.1 Designing Clear and Concise Graphs

Designing clear and concise graphs involves using appropriate titles, labeling axes clearly, and selecting the right graph type for the data. Avoid clutter by minimizing unnecessary elements. Ensure consistency in colors, fonts, and styles to enhance readability. Use color effectively to highlight key trends without overwhelming the viewer. Proper spacing and alignment are crucial for professional presentation. These practices ensure that graphs communicate data insights effectively, making them easy to interpret and analyze.

7.2 Avoiding Common Mistakes

Avoiding common mistakes in graphing ensures accurate data representation. Ensure scales are appropriate and axes are correctly labeled. Avoid 3D effects unless necessary, as they can distort data perception. Steer clear of overly complex designs, focusing on clarity. Verify that data points align with gridlines and avoid misleading visuals. Double-check for typographical errors in titles and labels. Properly attribute sources and avoid data manipulation. These practices help maintain integrity and reliability in data analysis, ensuring graphs are both accurate and trustworthy.

Real-World Applications of Graphing and Data Analysis

Graphing and data analysis are vital in scientific research for presenting experimental results and in business for visualizing sales trends and market data.

8.1 Scientific Research

Graphing is a critical tool in scientific research for presenting experimental data. Scientists use bar graphs, line graphs, and pictographs to illustrate trends and patterns. Properly formatted graphs with labeled axes and clear titles ensure accurate interpretation. This helps researchers communicate findings effectively and identify relationships between variables. Data analysis worksheets often include exercises for plotting and interpreting scientific data, emphasizing the importance of clear visualization in drawing meaningful conclusions. Effective graphing enhances the reliability and accessibility of scientific results, making it indispensable in research settings.

8.2 Business and Statistics

Graphing plays a vital role in business and statistics by enabling professionals to visualize trends and patterns. Bar graphs and pie charts are commonly used to represent financial data, such as sales trends or market share. Line graphs are effective for showing changes over time, like revenue growth. Data analysis worksheets help businesses interpret these graphs to make informed decisions. Free PDF resources provide exercises for mastering these skills, ensuring accurate and efficient data interpretation in statistical and business contexts.

fiamma f45s anti flap kit instructions

The Fiamma F45S Anti-Flap Kit is designed to enhance the stability and durability of your awning by minimizing fabric flapping in windy conditions. Ideal for motorhomes and caravans, this kit ensures a secure and quiet camping experience. Easy to install, it is compatible with various Fiamma awning models, providing a reliable solution to prevent wind damage.

Overview of the Fiamma F45S Anti-Flap Kit

The Fiamma F45S Anti-Flap Kit is a specialized solution designed to reduce fabric flapping on Fiamma awnings, enhancing stability and durability. Suitable for awnings from 300cm to 550cm in length, it includes a clip system and a fix kit tailored to your awning’s case height. The kit ensures secure installation, minimizing wind-induced movement. It is compatible with various Fiamma awning models and requires a minimum roll-out of 2.45 meters for proper functionality. This system is ideal for motorhomes and caravans, providing a reliable and durable solution to prevent damage from harsh weather conditions.

Importance of Using the Anti-Flap Kit

Using the Fiamma F45S Anti-Flap Kit is crucial for maintaining the structural integrity and longevity of your awning. Wind-induced flapping can cause significant damage, leading to costly repairs. This kit minimizes fabric wear and tear, ensuring a quiet and secure camping experience. It also prevents potential safety hazards caused by flapping awnings in windy conditions. By installing the kit, you protect your investment and enhance the overall performance of your awning, making it a essential accessory for motorhome and caravan owners.

Understanding the Fiamma F45S Anti-Flap Kit

The Fiamma F45S Anti-Flap Kit is a specially designed system to stabilize awnings, preventing fabric flapping caused by wind. It enhances durability and ensures secure operation.

What is Included in the Kit

The Fiamma F45S Anti-Flap Kit includes a Fiamma Clip System (98661-010) and a Fix Kit tailored to your awning’s case height. The Fix Kit must be selected based on the specific measurements of your awning to ensure proper fitment. Additionally, the kit comes with necessary hardware and instructions for installation. The components work together to securely attach to your awning’s rails, providing a stable and durable solution to prevent flapping. Proper assembly and installation are essential for optimal performance.

Key Components and Their Functions

The Fiamma F45S Anti-Flap Kit features a Fiamma Clip System (98661-010), which includes mounting brackets and adapters designed to securely attach to your awning’s rails. These brackets provide a sturdy base for the anti-flap mechanism. The kit also includes adjustable arms or rafters that connect to the awning fabric, preventing excessive movement caused by wind. Each component is engineered to work in harmony, ensuring stability and durability. The system is lightweight yet robust, making it an effective solution for minimizing fabric wear and tear during windy conditions.

Benefits of Installing the Anti-Flap Kit

Installing the Fiamma F45S Anti-Flap Kit significantly enhances your awning’s performance by reducing fabric flapping caused by wind. This not only minimizes wear and tear but also prevents noise and potential damage. The kit improves stability, ensuring a quieter and more secure camping experience. It extends the lifespan of your awning fabric and frame, saving you from costly repairs. Additionally, the kit is lightweight and easy to install, making it a practical solution for motorhomes and caravans. It provides peace of mind during windy conditions, allowing you to enjoy your outdoor space without interruptions.

Compatibility and Requirements

The Fiamma F45S Anti-Flap Kit is compatible with awnings from 300cm to 550cm in length; It requires a minimum roll-out of 2.45 meters and a specific case height. Proper installation demands accurate measurements to ensure compatibility with your awning model, guaranteeing optimal performance and stability.

Awnings Suitable for the Fiamma F45S Anti-Flap Kit

The Fiamma F45S Anti-Flap Kit is specifically designed for Fiamma awnings measuring 300cm to 550cm in length. It is compatible with both manual and automatic Fiamma F45 and F45S models. The kit enhances stability for motorhomes and caravans, ensuring optimal performance in windy conditions. Compatibility depends on the awning’s case height, requiring accurate measurements to match the correct Fix Kit. This ensures a secure fit and effective anti-flap functionality, making it a reliable choice for various Fiamma awning setups.

Minimum Roll-Out Requirements

The Fiamma F45S Anti-Flap Kit requires a minimum awning roll-out of 2.45 meters to function effectively. This ensures proper tension and stability, preventing flapping in windy conditions. Awnings with shorter roll-outs may not achieve optimal results. Before installation, measure your awning’s full extension to confirm it meets this requirement. If your awning rolls out less than 2.45 meters, consult the manufacturer or supplier for alternative solutions to ensure compatibility and performance.

Awnings Case Height Considerations

The Fiamma F45S Anti-Flap Kit requires careful consideration of your awning’s case height to ensure proper installation and functionality. Measure your awning case height accurately to select the correct Fix Kit, as mismatched components may compromise performance. The kit is designed to accommodate various case heights, but improper sizing can lead to poor fitment or reduced effectiveness. Always consult the supplier or manufacturer’s guidelines to confirm compatibility and ensure the Anti-Flap Kit functions optimally with your specific awning model.

Gathering Tools and Materials

Ensure you have a screwdriver, hex key, and measuring tape for installation. Additional materials like brackets and fix kits may be required based on your awning’s specifications.

Tools Needed for Installation

To install the Fiamma F45S Anti-Flap Kit, you will need a screwdriver, hex key, and measuring tape. A spirit level ensures proper alignment, while pliers may assist with securing components. A wrench could be necessary for tightening bolts. Ensure all tools are readily available to streamline the process. These tools are essential for securely fitting the brackets and attaching the anti-flap components to your awning, ensuring stability and preventing flapping in windy conditions.

Additional Materials Required

Beyond the tools, you may need sealant for weatherproofing bracket mounting points; Protective gloves can prevent injuries, while touch-up paint can cover any scratches during installation. A ladder may be necessary for safe access to the awning. Ensure you have all materials ready to avoid delays. These items complement the kit’s components, aiding in a secure and professional installation. Optional items like a drill or additional fasteners might also be useful, depending on your specific setup or awning type.

Step-by-Step Installation Guide

This guide provides a clear, structured approach to installing the Fiamma F45S Anti-Flap Kit. It outlines preparing the awning, mounting brackets, and attaching components securely. Follow the instructions closely for a proper fit, ensuring stability and reducing fabric flapping in windy conditions. Each step is designed to be straightforward, allowing you to enhance your awning’s performance effectively. By adhering to the process, you can achieve a professional-grade installation and enjoy improved durability and functionality of your awning system. Safety precautions and tool readiness are essential for a smooth experience.

Preparing the Awning for Installation

Begin by fully extending the awning to ensure proper access to the components. Wind the awning out slightly from its fully closed position to create tension. Clean the awning arms and case to ensure a smooth installation process. Check for any obstructions or debris that may interfere with the Anti-Flap Kit. Verify that the awning case height matches the kit’s requirements. If necessary, consult the manual to adjust the awning’s position. Proper preparation ensures a seamless and effective installation of the Fiamma F45S Anti-Flap Kit.

Mounting the Brackets

Mounting the brackets is a critical step in the installation process. Begin by positioning the brackets on the awning arms, ensuring they align with the pre-drilled holes. Use the provided screws and washers to secure them tightly. For awnings with case heights exceeding standard measurements, adapters may be required to achieve proper fitment. Ensure the brackets are evenly spaced and aligned to distribute weight evenly. Tighten all fasteners firmly but avoid overtightening, which could damage the awning frame. Double-check the alignment before moving on to the next step for optimal stability and performance. Consult the manual for specific torque recommendations if unsure.

Attaching the Anti-Flap Kit Components

After mounting the brackets, attach the Anti-Flap Kit components by sliding the clip system onto the awning arms. Ensure the clips are securely fastened using the provided knobs or screws. Insert the adaptors into the awning track, aligning them with the pre-installed brackets. Gently wind the awning out to test the fit and ensure no movement or gaps. Tighten all connections firmly, following the manufacturer’s torque specifications. Finally, retract the awning slightly to verify proper alignment and functionality of the Anti-Flap Kit components. This step ensures optimal stability and prevents flapping in windy conditions.

Common Mistakes to Avoid

Avoid incorrect bracket placement and improper tightening, as these can compromise the kit’s stability and effectiveness. Ensure all components are securely fastened to prevent flapping issues.

Incorrect Bracket Placement

Incorrect bracket placement is a common mistake that can lead to reduced effectiveness of the Anti-Flap Kit. Ensure brackets are aligned with the awning’s rail and case. Misalignment can cause uneven stress, potentially damaging the awning fabric or the kit itself. Always measure carefully and follow the installation guide to secure brackets correctly. Proper alignment ensures optimal performance and prevents premature wear. Double-check the fitment before tightening to avoid costly repairs or compromised stability. Accurate placement is crucial for the kit to function as intended, providing the stability and durability you expect from the Fiamma F45S Anti-Flap Kit.

Improper Tightening of Components

Improper tightening of components is another common issue that can compromise the effectiveness of the Fiamma F45S Anti-Flap Kit. Over-tightening can damage the brackets or strip screws, while under-tightening may lead to loose parts that fail to secure the awning properly. Always follow the recommended torque specifications in the installation manual to ensure components are snug but not overly tightened. This prevents damage to the awning and ensures the kit performs as intended. Proper tightening is essential for maintaining stability and extending the lifespan of the Anti-Flap Kit.

Troubleshooting Common Issues

This section addresses common problems encountered with the Fiamma F45S Anti-Flap Kit, such as persistent flapping or bracket misalignment. Solutions ensure optimal performance and stability.

Addressing Flapping After Installation

If flapping persists after installing the Anti-Flap Kit, check for loose components or misaligned brackets. Tighten all connections firmly and ensure proper alignment with the awning’s rail. Verify that the awning is fully rolled out and the kit is evenly distributed. If issues remain, refer to the installation manual or contact customer support for further guidance. Proper adjustment ensures optimal performance and eliminates flapping, providing a stable and secure awning experience.

Fixing Bracket Alignment Problems

If bracket alignment issues arise, loosen the mounting screws slightly and adjust the brackets to ensure proper alignment with the awning’s rail. Use a spirit level to verify straightness and evenly space the Anti-Flap Kit components. Over-tightening can cause misalignment, so tighten gradually while checking positioning. Once aligned, secure the screws firmly. If problems persist, refer to the installation manual or consult a professional for assistance. Proper alignment ensures optimal performance and prevents further issues with the Anti-Flap Kit.

Maintenance and Care

Regularly clean the Anti-Flap Kit with mild soap and water to remove dirt and debris. Inspect components for wear and tear, ensuring all parts are securely tightened without over-tightening.

Cleaning the Anti-Flap Kit

To maintain the Fiamma F45S Anti-Flap Kit, clean it regularly using mild soap and warm water. Avoid harsh chemicals or abrasive materials that could damage the components. Use a soft-bristle brush to gently remove dirt or debris from the brackets and rails. Rinse thoroughly with clean water to ensure no soap residue remains. Allow the kit to air-dry completely before use. Regular cleaning prevents corrosion and ensures optimal performance. Avoid using high-pressure washes, as they may dislodge or damage the components. Keep the kit clean to maintain its durability and effectiveness in reducing awning flapping.

Regular Inspections for Durability

Regular inspections are crucial for maintaining the durability of the Fiamma F45S Anti-Flap Kit. Check all brackets, bolts, and connections for tightness and signs of wear. Inspect the kit for any damage or corrosion, especially after exposure to harsh weather. Lubricate moving parts if necessary to ensure smooth operation. Clean any debris that may interfere with the kit’s performance. Addressing issues promptly prevents further damage and ensures the anti-flap system remains effective. Regular inspections also help maintain the structural integrity of your awning, providing long-term reliability and stability.

nesco gardenmaster food dehydrator manual

The Nesco Gardenmaster Food Dehydrator is a top choice for gardeners and home cooks‚ offering efficient food preservation with its expandable design and advanced drying technology.

1.1 Overview of the Product

The Nesco Gardenmaster Food Dehydrator is a versatile kitchen appliance designed for efficient food preservation. It comes with four trays‚ expandable up to 30 trays‚ making it ideal for large batches of fruits‚ vegetables‚ herbs‚ and spices. Each tray holds up to one square foot of produce‚ ensuring ample space for drying. Perfect for gardeners and home cooks‚ this dehydrator is a reliable tool for preserving harvests and creating healthy snacks year-round. Its expandability and robust design cater to both casual and frequent users.

1.2 Importance of Food Dehydration for Gardeners and Home Cooks

Food dehydration is a practical way to preserve garden harvests and extend the shelf life of fresh produce. For gardeners‚ it reduces waste by transforming surplus crops into durable snacks. Home cooks benefit by creating healthy‚ homemade alternatives to store-bought products. Dehydration retains nutrients and flavors‚ making it ideal for crafting custom recipes like jerky‚ fruit rolls‚ and herb blends. This method is cost-effective‚ sustainable‚ and ensures year-round access to seasonal flavors‚ making it a valuable skill for any kitchen enthusiast.

Key Features and Specifications of the Nesco Gardenmaster

The Nesco Gardenmaster features an expandable design with up to 30 trays‚ allowing users to dry large quantities of food efficiently. Each tray holds up to one square foot of produce‚ making it ideal for gardeners and home cooks who preserve fruits‚ herbs‚ and jerky. Its advanced drying system ensures even dehydration‚ while the durable construction supports frequent use for flowers‚ spices‚ and more.

2.1 Technical Specifications and Design

The Nesco Gardenmaster Food Dehydrator features a robust design with 4-30 adjustable trays‚ offering versatility for various drying needs. Its compact footprint and durable construction ensure long-term reliability‚ while the powerful motor efficiently circulates air for consistent drying results. The unit includes a digital temperature control‚ allowing precise adjustments between 95°F and 160°F to preserve nutrients and flavors. The transparent door provides easy monitoring‚ and the dishwasher-safe trays simplify cleanup. Built with safety in mind‚ it includes automatic shut-off and overheat protection for worry-free operation.

2.2 Expandability and Accessories (Up to 30 Trays)

The Nesco Gardenmaster Food Dehydrator is highly expandable‚ accommodating up to 30 trays with the Add-A-Tray accessory. This feature allows users to dry large quantities of produce‚ flowers‚ or herbs simultaneously. Each tray holds up to one square foot of material‚ making it ideal for bulk preservation. The expandability ensures the dehydrator grows with your needs‚ whether you’re a home cook or an avid gardener. Accessories like additional trays and jerky kits enhance its functionality‚ offering endless possibilities for creative dehydration projects.

Setting Up and Preparing the Dehydrator

Proper setup involves unboxing‚ placing the dehydrator on a stable surface‚ and ensuring it is away from water sources. Initial cleaning and safety checks are essential.

3.1 Unboxing and Initial Setup

Carefully unpack the Nesco Gardenmaster Food Dehydrator‚ ensuring all components‚ including the base unit‚ trays‚ and power cord‚ are intact. Place the dehydrator on a stable‚ heat-resistant surface‚ away from water sources. Before first use‚ wash the trays with mild soap and dry thoroughly. Inspect the unit for any damage or defects. Follow the manual’s guidelines to ensure proper assembly and initial setup‚ which are crucial for safe and optimal performance.

3.2 Placement and Safety Precautions

Place the Nesco Gardenmaster Food Dehydrator on a stable‚ heat-resistant surface‚ ensuring it is away from water sources. Avoid positioning it near flammable materials or in humid environments. Keep children and pets at a safe distance while the unit is in operation; Ensure proper ventilation by placing it in an open area‚ not in enclosed spaces‚ to prevent moisture buildup. Never operate the dehydrator near open flames or sparks. Always follow the manual’s safety guidelines to avoid accidents.

3.3 Preparing the Unit for First Use

Before first use‚ unbox and inspect the Nesco Gardenmaster Food Dehydrator for any damage. Wash all trays and components with mild soap and warm water‚ then dry thoroughly. Place the dehydrator on a heat-resistant surface and ensure all parts are securely assembled. Plug in the unit and allow it to run for 30 minutes to an hour to eliminate any manufacturing odors. This ensures it is ready for safe and effective food dehydration.

Operating the Nesco Gardenmaster Dehydrator

The Nesco Gardenmaster Food Dehydrator operates efficiently with adjustable temperature settings and a built-in timer‚ ensuring precise control over the drying process for optimal results.

4.1 Step-by-Step Guide to Drying Foods

To dry foods effectively with the Nesco Gardenmaster‚ start by washing and preparing your ingredients. Slice fruits‚ vegetables‚ or meats evenly for consistent drying. Place food in a single layer on the trays‚ avoiding overlap. Set the temperature according to the food type‚ typically between 135°F for meats and 135°F–150°F for fruits and vegetables. Allow the dehydrator to run‚ monitoring progress and flipping foods if needed. Once dry‚ turn off the unit‚ let it cool‚ and store foods in airtight containers.

4.2 Temperature Control and Settings

The Nesco Gardenmaster features precise temperature control‚ allowing you to adjust settings between 135°F and 150°F. Lower temperatures are ideal for delicate foods like herbs‚ while higher settings suit meats for jerky. Use the preset temperature guide for specific foods: 135°F for meats‚ 140°F for vegetables‚ and 150°F for fruits. For optimal results‚ maintain consistent temperatures throughout the drying cycle. Adjust settings as needed to ensure even drying and preserve nutrients in your food.

4.3 Recommended Drying Times for Common Foods

Drying times vary depending on the food type and desired consistency. Fruits typically take 6-8 hours‚ while vegetables require 4-6 hours. Herbs dry quickly‚ needing just 2-4 hours. For meats‚ 3-4 hours is ideal for jerky. Always preheat the dehydrator before adding food and monitor progress to achieve the perfect texture. Follow the manual’s guidelines for specific foods to ensure crispy‚ nutrient-rich results.

Dehydrator Recipes and Cooking Ideas

Create healthy snacks like fruit rolls‚ trail mix‚ and jerky. Make potpourri or dry herbs for crafts. Perfect for gardeners and outdoor enthusiasts seeking tasty‚ nutrient-rich options.

5.1 Healthy Snacks: Fruit Rolls and Trail Mix

Transform fresh fruits into delicious fruit rolls by slicing them thinly and dehydrating at 135°F for 3-4 hours. Perfect for kids and on-the-go meals. For trail mix‚ combine dried fruits‚ nuts‚ and even chocolate for a wholesome snack. The Nesco Gardenmaster’s even drying ensures fruit remains chewy and flavorful. Experiment with different fruit combinations like strawberries‚ apples‚ and mangoes for varied tastes. These snacks are ideal for health-conscious individuals and outdoor enthusiasts seeking nutrient-rich options.

5.2 Making Jerky and Protein-Rich Snacks

Create delicious jerky using lean meats like beef‚ turkey‚ or chicken. Marinate slices in your favorite seasonings before dehydration. Set the Nesco Gardenmaster to 160°F for 3-4 hours. Ensure even drying by slicing meat thinly and avoiding overcrowding trays. For protein-rich snacks‚ try drying tofu or edamame. Achieve perfect texture by monitoring dehydration time and using a meat thermometer for safety. These snacks are perfect for hikes‚ picnics‚ or quick energy boosts‚ offering a healthy and tasty alternative to store-bought options;

5.3 Creative Uses: Potpourri and Herb Drying

Beyond food‚ the Nesco Gardenmaster excels at drying flowers and herbs for homemade potpourri. Simply place petals‚ lavender‚ or rosemary on trays and dehydrate at a low temperature to preserve color and fragrance. For herbs‚ set the dehydrator to 95-100°F to retain flavor and aroma. Store dried herbs in airtight containers for year-round use. This creative approach extends the dehydrator’s utility‚ allowing you to craft natural potpourri blends or preserve garden herbs for cooking and crafts.

Maintenance and Care of the Dehydrator

Regularly clean the dehydrator and trays to prevent food residue buildup. Check for blockages in air vents and ensure proper sanitation after each use for optimal performance and longevity.

6.1 Cleaning the Unit and Trays

Regular cleaning is essential for maintaining the efficiency and longevity of the Nesco Gardenmaster Food Dehydrator. After each use‚ unplug the unit and wipe the exterior with a damp cloth. For tougher stains‚ a mild detergent can be used. Trays should be washed with warm soapy water or placed in the dishwasher. Ensure all parts are dry before storage to prevent moisture buildup. Cleaning the air vents and fan periodically will also ensure optimal airflow and even drying performance.

6.2 Storage and Longevity Tips

For optimal longevity‚ store the Nesco Gardenmaster Food Dehydrator in a cool‚ dry place away from direct sunlight. After cleaning‚ ensure the unit and trays are completely dry before storage. Avoid exposure to extreme temperatures or moisture‚ as this can damage electrical components. Covering the dehydrator when not in use protects it from dust and pests. Regularly inspecting and maintaining the unit will ensure years of efficient performance. Proper storage and care will extend the lifespan of your dehydrator.

Troubleshooting Common Issues

Troubleshooting the Nesco Gardenmaster Food Dehydrator involves identifying symptoms like uneven drying or no heat‚ then consulting the manual for solutions or contacting customer support for assistance.

7.1 Common Problems and Solutions

Common issues with the Nesco Gardenmaster include uneven drying‚ food not dehydrating fully‚ or the unit not heating; Solutions involve checking power supply‚ ensuring proper air circulation‚ and verifying temperature settings. Clean the dehydrator regularly to avoid residue buildup. For persistent problems‚ refer to the manual or contact Nesco’s customer support; Always follow safety guidelines to prevent accidents and maintain optimal performance. Proper troubleshooting ensures efficient food dehydration and extends the product’s longevity.

7.2 Dehydrator Not Heating: Possible Causes

If the Nesco Gardenmaster dehydrator fails to heat‚ check the power cord connection and ensure it’s plugged into a functioning outlet. Verify the thermostat is set correctly and not blocked. Debris or food residue might obstruct airflow‚ preventing heating. Clean the unit thoroughly‚ especially vents and trays. Faulty heating elements or thermostats may require replacement. Consult the manual or contact customer support for assistance. Addressing these issues promptly ensures optimal performance and food safety. Regular maintenance can prevent such problems.

Frequently Asked Questions (FAQs)

How many trays does the Nesco Gardenmaster include? It comes with four trays and is expandable up to 30. Can I use trays in an oven? No‚ trays are designed exclusively for the dehydrator. Are there any food restrictions? Avoid dehydrating foods marinated in alcohol for safety and optimal performance.

8.1 General Queries About the Gardenmaster

Customers often inquire about the Gardenmaster’s capacity and versatility. It comes with four trays‚ expandable to thirty‚ making it ideal for large batches. Users ask if trays can be used in ovens‚ but they’re specifically designed for the dehydrator. Another common question is about food restrictions—foods marinated in alcohol should be avoided. Many also ask about drying times and temperatures‚ which vary by food type. The manual provides detailed guidelines for optimal results.

8.2 Customer Support and Warranty Information

For any queries or issues‚ customers can contact Nesco’s customer support at 1-800-288-4545 or visit their official website. The Gardenmaster dehydrator typically comes with a one-year limited warranty covering defects in materials and workmanship. Users are advised to register their product and refer to the manual for specific warranty details. Proper maintenance and adherence to the manual’s guidelines are essential to ensure warranty validity and optimal performance of the dehydrator.

free lsat practice test pdf

Free LSAT practice tests are essential for law school preparation, helping aspirants assess logical reasoning, analytical thinking, and reading comprehension skills․ Accessible resources like LSAC’s free PrepTests and sample questions enable candidates to practice effectively without financial barriers, ensuring equal opportunities for all․

Importance of LSAT Practice Tests

LSAT practice tests are crucial for law school aspirants, as they provide a realistic assessment of one’s readiness for the exam․ These tests help identify strengths and weaknesses, allowing focused study strategies․ By simulating actual test conditions, they build time management and stamina․ Free LSAT practice tests, such as those from LSAC, Princeton Review, and 7Sage, offer equal access to high-quality resources․ They familiarize candidates with the test format and question types, reducing anxiety and improving performance․ Regular practice also enhances logical reasoning, analytical thinking, and reading comprehension skills essential for success․ Utilizing free LSAT practice tests is a cost-effective way to achieve a competitive edge in law school admissions․ They empower candidates to track progress and refine strategies, ensuring optimal preparation for the actual LSAT․

Where to Find Free LSAT Practice Tests

Free LSAT practice tests are readily available online, including official LSAC resources, educational websites, and platforms offering downloadable PDFs for convenient access and preparation․

LSAC Free Resources

The Law School Admission Council (LSAC) provides free LSAT practice tests and resources to help candidates prepare effectively․ Through their official website, LSAC offers sample LSAT questions, PrepTests, and study materials that mimic the actual exam format․ The LSAC LawHub platform is particularly notable, offering free access to past LSAT exams, including PrepTest 71, which is widely used for practice․ Additionally, LSAC provides section overviews and sample problems for Reading Comprehension, Analytical Reasoning, and Logical Reasoning․ These resources are designed to give test-takers a clear understanding of the exam structure and content․ Best of all, many of these materials are available without registration or payment, making them accessible to everyone․ This ensures that aspirants can practice with authentic questions and strategies, enhancing their readiness for the actual LSAT․

LSAC LawHub

LSAC LawHub is a comprehensive platform designed to support LSAT preparation, offering a variety of free resources․ It provides access to three free LSAT practice tests, including PrepTest 71, which is widely used by aspirants․ These tests are official and reflect the actual exam format, allowing candidates to gauge their readiness․ Additionally, LawHub includes detailed answer explanations and performance analytics, enabling users to identify strengths and areas for improvement․ The platform also offers sample questions and section overviews for Reading Comprehension, Analytical Reasoning, and Logical Reasoning․ Furthermore, LawHub’s test-day simulation ensures that candidates familiarize themselves with the exam environment․ These resources are accessible without registration, making it an invaluable tool for anyone preparing for the LSAT․ LawHub’s features are tailored to enhance study strategies and provide a realistic practice experience, helping aspirants achieve their goals effectively․

Other Reputable Providers of Free LSAT Practice Tests

The Princeton Review and 7Sage offer free LSAT practice tests, providing realistic exam simulations․ Their resources include sample questions and full-length tests in PDF format for convenient practice․

The Princeton Review

The Princeton Review is a well-known provider of free LSAT practice tests, offering high-quality resources to help students prepare effectively․ Their practice tests are designed to mimic the actual LSAT, providing students with a realistic experience of the exam format and content․ These tests cover all sections of the LSAT, including logical reasoning, analytical reasoning, and reading comprehension; The Princeton Review’s free resources are accessible without registration, making them a convenient option for students who want to assess their skills and identify areas for improvement․ Additionally, their practice tests include detailed answer explanations, allowing students to understand their mistakes and refine their strategies․ This makes The Princeton Review a valuable resource for anyone seeking to excel on the LSAT without incurring additional costs․ Their commitment to providing free, accessible practice materials underscores their dedication to helping students achieve their law school aspirations․ Furthermore, the structure and content of their tests align closely with official LSAT materials, ensuring that students receive a comprehensive and accurate preparation experience․ By utilizing The Princeton Review’s free LSAT practice tests, students can gain confidence and improve their performance in a stress-free environment․ Overall, The Princeton Review stands out as a trusted source for free LSAT practice tests, offering both quality and convenience to aspiring law students․

7Sage LSAT

7Sage LSAT offers free practice tests that are highly regarded for their quality and realism․ These tests are designed to closely resemble the actual LSAT, providing students with an accurate assessment of their skills․ One of the standout features of 7Sage’s free resources is the availability of official LSAT PrepTests, such as PrepTest 81, which can be downloaded as a PDF․ This allows students to practice under timed conditions and gain a true understanding of the exam’s format․ Additionally, 7Sage provides detailed answer explanations and analysis tools, enabling students to identify their strengths and weaknesses․ The website also offers a community-driven platform where users can discuss strategies and share tips, creating a supportive environment for LSAT preparation․ By leveraging 7Sage’s free LSAT practice tests, students can enhance their performance without financial constraints, making it an invaluable resource for aspiring law students․ The combination of authentic test materials and comprehensive study aids makes 7Sage a top choice for effective LSAT preparation․ Furthermore, the ability to access these resources without registration adds to the convenience, ensuring that students can start their preparation journey seamlessly․ Overall, 7Sage LSAT’s free practice tests are a cornerstone of any successful LSAT study plan, offering both accessibility and excellence in test preparation․

Features of Free LSAT Practice Tests

Free LSAT practice tests are designed to mirror the actual exam, offering realistic question formats and time constraints․ They include sections like Logical Reasoning, Analytical Reasoning, and Reading Comprehension, ensuring comprehensive preparation․ Many tests, such as PrepTest 71 and 81, are available as downloadable PDFs, allowing students to simulate test-day conditions․ These resources often include answer explanations, enabling students to review and improve their performance․ Some platforms also provide scoring tools and performance analytics to help identify areas for improvement․ Additionally, free LSAT practice tests typically do not require registration, making them easily accessible․ These features make free practice tests a valuable tool for students preparing for the LSAT, especially those on a limited budget․ The availability of both timed and untimed modes further enhances their utility for tailored study sessions․

Tips for Using Free LSAT Practice Tests

  • Simulate test-day conditions to build stamina and timing skills․
  • Review answer explanations to understand mistakes and improve strategies․
  • Focus on weaknesses identified through practice test performance․
  • Use scoring tools to track progress and set goals․

Study Strategies

Utilizing free LSAT practice tests effectively requires a structured study plan․ Start by identifying your strengths and weaknesses through practice test results․ Focus on improving logical reasoning and analytical thinking by reviewing answer explanations․ Dedicate time to mastering logic games, a critical component of the LSAT․ Practice under timed conditions to simulate the actual test experience․ Reviewing mistakes and understanding common question types can significantly enhance performance․ Additionally, incorporate sample questions into your daily study routine to build familiarity with the test format․ Consistency and thorough analysis of practice tests are key to achieving a high score․ By leveraging these strategies, aspirants can maximize the benefits of free LSAT resources and prepare confidently for the exam․

Common Mistakes to Avoid

When using free LSAT practice tests, avoid skipping the review of incorrect answers, as this hinders improvement․ Many candidates neglect to analyze their mistakes, missing opportunities to address weaknesses․ Additionally, failing to simulate real test conditions, such as timing, can lead to poor performance․ Overocusing on one section while ignoring others is another pitfall, as the LSAT requires balanced skills․ Neglecting to practice logic games regularly can weaken problem-solving abilities․ Candidates should also avoid relying solely on free resources without exploring additional materials․ Lastly, ignoring the test format and instructions can cause confusion and time wastage during the actual exam․ By avoiding these mistakes, aspirants can maximize the benefits of free LSAT practice tests and achieve better results․

Free LSAT practice tests are a valuable resource for law school aspirants, offering insights into the exam’s format and content․ By utilizing these tests, candidates can enhance their problem-solving skills and build confidence․ Regular practice helps identify strengths and weaknesses, enabling targeted study strategies․ As shown, resources like LSAC LawHub and Princeton Review provide accessible materials for effective preparation․ Avoiding common mistakes, such as neglecting to review errors, is crucial for improvement․ Ultimately, leveraging free LSAT practice tests is a cost-effective way to achieve a competitive edge, ensuring readiness for the actual exam and fostering success in law school admissions․ Consistent practice and strategic planning are key to maximizing these resources and securing desired outcomes․

delta toddler bed instructions

Welcome to the Delta Toddler Bed guide! This manual provides step-by-step instructions for assembling and safely using the Delta Toddler Bed, ensuring a smooth transition from crib to big-kid bed.

1.1 Overview of the Delta Toddler Bed

The Delta Toddler Bed is a sturdy, low-to-the-ground bed designed for toddlers transitioning from cribs. It features a classic wood construction with molding details on the headboard and footboard. The bed includes two attached guardrails for safety and accommodates a standard crib mattress. Suitable for children aged 15 months to 5 years, it offers a safe and stylish solution for little ones learning to climb in and out of bed independently.

1.2 Importance of Proper Assembly and Safety

Proper assembly and adherence to safety guidelines are crucial to ensure the Delta Toddler Bed’s stability and your child’s well-being. Incorrect assembly can lead to structural instability, posing risks like entrapment or injury. Always follow the manufacturer’s instructions and verify all parts are securely fastened; Guardrails must be correctly installed to prevent falls, and the mattress should fit snugly to avoid gaps. Regular inspections and adherence to weight and age limits are essential for long-term safety and durability.

Safety Considerations for Toddler Beds

Ensuring your child’s safety is paramount when setting up a toddler bed. Proper assembly, using guardrails, and following age and weight guidelines are essential to prevent accidents and injuries.

2.1 Age and Weight Limits for the Delta Toddler Bed

The Delta Toddler Bed is designed for children aged 15 months to 5 years, with a maximum weight capacity of 50 lbs. Adhering to these limits ensures safety and prevents structural damage. Proper usage within these guidelines guarantees optimal performance and longevity of the product, aligning with safety standards and manufacturer recommendations for toddler beds.

2.2 Guardrail Installation and Usage

Guardrails are essential for your child’s safety, preventing falls and entrapment. They must be securely attached to the bed frame to ensure stability. Always follow the manufacturer’s instructions for proper installation, tightening all bolts and screws firmly.

Use the provided guardrails consistently, as they are designed to protect your child while they sleep or play. Never omit or remove them, as this could create safety hazards. Regularly inspect the guardrails for damage or loosening and adjust as needed to maintain safety standards.

Step-by-Step Assembly Instructions

Begin by unpacking all components and organizing them. Follow the manual to attach the headboard and footboard securely. Next, install the side rails and support slats for stability.

3.1 Unpacking and Organizing Components

Start by carefully unpacking the Delta Toddler Bed components from the box. Lay out all pieces, including hardware, on a flat surface. Match each part with the assembly diagram in the manual to ensure everything is accounted for. Organize screws, bolts, and Allen keys separately to streamline the assembly process. Double-check for any missing or damaged items before proceeding.

3.2 Attaching the Headboard and Footboard

Align the headboard and footboard with the side rails, ensuring pre-drilled holes match. Use the provided bolts to secure them tightly. Tighten gradually to maintain alignment. Double-check stability before moving on. Ensure all connections are firm to prevent wobbling. Refer to the diagram for correct bolt placement. Avoid over-tightening to prevent damage to the wood or hardware.

3.3 Installing the Side Rails and Support Slats

Attach the side rails to the headboard and footboard using the provided screws. Ensure they are aligned properly and secured tightly. Next, place the support slats evenly across the side rails. Screw them into position, making sure they are flush with the bed frame. Tighten all connections firmly to ensure stability and prevent sagging. Double-check that all slats are evenly spaced for optimal support.

3.4 Securing the Guardrails

Attach the guardrails to the side rails using the provided screws and bolts. Align the guardrail brackets with the pre-drilled holes on the side rails and tighten securely. Ensure the guardrails are at the correct height, typically level with the mattress, to prevent gaps. Tighten all connections firmly to ensure stability and safety. Double-check that the guardrails are properly aligned and secured to avoid any movement or shifting during use.

Tools and Materials Needed

An Allen wrench, screws, and bolts are essential. A drill may be required for additional support. Refer to the Delta assembly video for detailed guidance.

4.1 List of Required Tools

  • An Allen wrench for securing bolts and joints.
  • A drill (optional, for additional stability).
  • A screwdriver for tightening screws.
  • Pliers for gripping small parts.
  • A wrench for securing brackets.

Ensure all tools are readily available before starting assembly for a smooth process.

4.2 Additional Materials for Stability

For enhanced stability, ensure the mattress fits snugly within the bed frame to prevent gaps. Use wall anchors to secure the bed and prevent tip-overs. A drill may be needed for extra stability when attaching parts. Always follow the manufacturer’s guidelines for any additional materials to ensure safety and durability.

Common Assembly Issues and Solutions

Common issues include loose joints or missing parts. Tighten joints with an Allen key and ensure all components are included. Contact customer support if needed.

5.1 Troubleshooting Tight or Loose Joints

Loose or tight joints can occur during assembly. Use an Allen key to tighten or loosen bolts as needed. Ensure all parts are properly aligned. If joints remain loose, inspect for obstructions or damage. Avoid over-tightening to prevent stripping. If issues persist, refer to the manual or contact customer support for assistance. Proper joint alignment is crucial for stability and safety.

5.2 Addressing Missing or Damaged Parts

If any parts are missing or damaged during assembly, refer to the provided inventory list. Contact Delta Children’s customer support for replacements. Avoid using damaged parts, as this can compromise safety. Do not proceed with assembly until all components are in good condition. For missing items, request a replacement promptly to ensure proper assembly and functionality of the toddler bed.

Mattress Selection and Setup

Choose a standard crib mattress that fits snugly in the bed frame. Ensure the mattress is firm and properly sized to prevent gaps, ensuring your child’s safety.

6.1 Choosing the Right Crib Mattress

Selecting the right crib mattress is crucial for your toddler’s comfort and safety. Opt for a firm, standard-sized crib mattress that fits snugly within the toddler bed frame. Ensure it meets current safety standards and has a tight-fitting cover. Avoid soft or bulky mattresses to prevent suffocation risks. The mattress should be specifically designed for cribs to guarantee compatibility and safety for your child.

6.2 Placing the Mattress in the Toddler Bed

Once the toddler bed is assembled, carefully place the crib mattress inside, ensuring it fits snugly without gaps. The mattress should align perfectly with the bed frame to prevent any shifting. Double-check that the mattress is firm and specifically designed for cribs to meet safety standards. Ensure the guardrails are securely in place to avoid entrapment risks, providing a safe and comfortable sleeping environment for your child.

Converting a Crib to a Toddler Bed

Converting a crib to a toddler bed is a straightforward process that ensures your child’s safety during their transition to a big-kid bed. Start by removing the front rail using an Allen key, then attach the toddler rail to create a secure and comfortable sleeping area.

7.1 Steps to Convert a Crib

To convert a crib to a toddler bed, remove the mattress and front rail using an Allen key. Detach the legs from the front rail and reattach the toddler rail. Ensure all bolts are securely tightened. Place the mattress back and attach guardrails for safety. Follow the manufacturer’s instructions to ensure a proper and safe conversion for your child’s transition to a big-kid bed. Always test stability before use.

7.2 Safety Tips for the Transition

Ensure the toddler bed is placed on a firm, flat surface and away from windows or curtains. Always use the provided guardrails to prevent falls. Check that the mattress fits snugly without gaps to avoid entrapment. Follow the recommended age (15 months to 5 years) and weight (up to 50 lbs) limits. Double-check all bolts and screws during assembly for stability and safety. Test the bed’s sturdiness before allowing your child to use it. Supervise your child during the transition to ensure their safety and confidence.

Product Features and Benefits

Durable wood construction ensures long-lasting safety and stability. Features include attached guardrails for added security and a low-to-ground design for easy access. Stylish and timeless aesthetics complement any nursery décor, while the standard crib mattress compatibility simplifies the transition. Its sturdy build and safety-focused design make it a reliable choice for toddlers.

8.1 Sturdy Construction and Durability

The Delta Toddler Bed is crafted from high-quality, durable materials, ensuring stability and longevity. Its solid wood frame provides exceptional strength, supporting the recommended weight limit of up to 50 pounds. The bed’s robust construction minimizes wobbling, offering a secure sleeping environment for toddlers. Designed to withstand regular use, it remains a reliable choice for growing children, blending safety with lasting performance.

8.2 Aesthetic Design Options

The Delta Toddler Bed offers timeless elegance with its classic designs, including sleigh-style and traditional options. Made from high-quality hardwood, it features a sturdy yet stylish frame. Available in various finishes, the bed seamlessly complements any nursery decor. The attached guardrails add both safety and a polished look, ensuring the bed is as visually appealing as it is functional. Its versatile design suits diverse room themes, making it a beautiful addition to your child’s space.

Weight and Age Limits

The Delta Toddler Bed is designed for children aged 15 months to 5 years, with a maximum weight capacity of 50 lbs. Always adhere to these limits for safety.

9.1 Maximum Weight Capacity

The Delta Toddler Bed has a maximum weight capacity of 50 pounds. This ensures the bed’s stability and safety for your child. Always check the weight limit before use to prevent any potential hazards. Exceeding this limit could compromise the bed’s structural integrity. Adhering to this guideline is crucial for your child’s safety and the longevity of the bed.

9.2 Recommended Age Range

The Delta Toddler Bed is designed for children aged 15 months to 5 years. This range ensures the bed is suitable for toddlers transitioning from a crib to a big-kid bed. The bed’s weight capacity of 50 pounds aligns with this age recommendation, providing a safe and sturdy sleeping solution. Always follow the manufacturer’s guidelines to ensure your child’s safety and comfort.

Styling the Room for the Toddler Bed

Design a toddler-friendly room with a sturdy, low-height bed for easy access. Choose themes that match your child’s personality, ensuring safety and style in their space.

10.1 Design Tips for a Toddler-Friendly Room

Design a room that’s both safe and inviting for your toddler. Choose a bed with a low profile for easy access and ensure sturdy construction. Select themes that match your child’s personality, such as playful colors or whimsical patterns. Incorporate soft flooring, rounded furniture, and storage solutions to create a functional space. Ensure lighting is gentle and add calming elements like plush toys or artwork to foster a cozy environment.

Customer Reviews and Feedback

Customers praise the Delta Toddler Bed for its sturdy construction and timeless design. Many find it easy to assemble, while others note mixed experiences. It’s a great value for toddlers transitioning from cribs.

11.1 Positive Aspects Highlighted by Users

Users praise the Delta Toddler Bed for its sturdy construction, ease of assembly, and timeless design. Many appreciate its low profile, making it safe for toddlers to climb in and out. The attached guardrails and standard crib mattress compatibility are also highlighted as key safety features. Parents often commend its durability and aesthetic appeal, noting it fits well with various room decors. The bed is recommended for children aged 15 months to 5 years, with a weight limit of 50 lbs.

11.2 Common Complaints and Concerns

Some users report challenges with assembly, citing unclear instructions and difficulty aligning parts. Others mention that the bed’s hardware can feel flimsy. A few note that the bed may not fit all crib mattresses perfectly, leading to gaps. Additionally, some parents express concerns about the bed’s weight capacity and durability over time, though most agree it serves well for its intended age range of 15 months to 5 years.

Thank you for following the Delta Toddler Bed guide. Remember to always prioritize safety and proper assembly. Delta Children ensures durability and comfort for your child. Happy parenting!

12.1 Final Thoughts on the Delta Toddler Bed

The Delta Toddler Bed offers a perfect blend of safety, durability, and style, making it an excellent choice for transitioning from a crib. Its sturdy construction and classic design ensure long-lasting comfort for your child. With easy assembly and thoughtful features like guardrails, it provides peace of mind for parents. Follow the instructions carefully to ensure optimal safety and enjoy a seamless transition to big-kid bedding.

12.2 Encouragement for Proper Assembly and Usage

Proper assembly and usage of the Delta Toddler Bed are crucial for your child’s safety and comfort. Always follow the instructions carefully to ensure all parts are securely fitted. Regularly check for loose joints and tighten them as needed. Use the provided guardrails and ensure the mattress fits snugly to prevent gaps. By adhering to these guidelines, you’ll create a safe and enjoyable sleeping environment for your toddler, giving you peace of mind.

PDF

the sour grape pdf

Introducing The Sour Grape, a charming story by Jory John and Pete Oswald, part of the beloved Food Group series. This sweet and funny tale teaches forgiveness, compassion, and self-reflection through engaging storytelling and vibrant illustrations, making it a delightful read for children and parents alike.

Overview of the Book and Its Popularity

The Sour Grape by Jory John and Pete Oswald is a heartwarming and humorous picture book that has captivated readers of all ages. As part of the beloved Food Group series, it continues to charm with its lighthearted storytelling and vibrant illustrations. The book’s relatable themes of forgiveness and compassion resonate deeply, making it a favorite among both children and parents. Its popularity has grown significantly, with many praising its ability to blend humor with meaningful lessons. Available in PDF format, The Sour Grape remains a must-read in the series, offering a delightful and educational experience for young readers and educators alike.

Key Themes and Lessons in the Story

The Sour Grape explores themes of forgiveness, compassion, and self-reflection, offering valuable lessons for young readers. The story follows a grape whose sour demeanor hides deeper issues, teaching children the importance of understanding and empathy. Through humor and heartwarming moments, the book emphasizes personal growth and the value of relationships. These themes are central to the narrative, providing a moral framework that resonates with readers of all ages. The story’s ability to balance lightheartedness with meaningful messages makes it a standout in children’s literature, fostering both entertainment and education.

Background and Development of “The Sour Grape”

The Sour Grape is the latest addition to Jory John and Pete Oswald’s popular Food Group series, continuing their tradition of blending humor with heartfelt storytelling. The book’s development reflects the duo’s successful collaboration, building on the series’ established charm and appeal. Its creation further solidifies the series’ reputation for engaging narratives and memorable characters, making it a highly anticipated release in children’s literature.

Jory John and Pete Oswald’s Collaboration

Jory John and Pete Oswald’s partnership shines in The Sour Grape, blending John’s witty storytelling with Oswald’s vibrant illustrations. Their teamwork creates a unique narrative voice, capturing humor and emotion. John’s ability to craft relatable characters complements Oswald’s visual storytelling, making the Food Group series a standout in children’s literature. Fans of their previous collaborations eagerly anticipate each new release, as their synergy continues to charm readers of all ages. This collaboration is a key factor in the series’ enduring popularity and its ability to resonate with both children and adults.

The Food Group Series and Its Success

The Food Group series, including The Sour Grape, has achieved remarkable success due to its unique blend of humor and heartfelt lessons. Each book introduces a new character facing relatable challenges, resonating with young readers and parents alike. The series’ popularity stems from its ability to tackle complex emotions like anger, patience, and forgiveness through simple, engaging stories. With its growing fanbase and critical acclaim, the Food Group series has become a staple in children’s literature, offering both entertainment and valuable life lessons. Its success highlights the power of storytelling in shaping young minds.

Themes and Messages in “The Sour Grape”

The Sour Grape explores themes of forgiveness, compassion, and humor, offering a lighthearted yet meaningful story about overcoming grudges and understanding others, making it both entertaining and educational.

Forgiveness and Compassion

The story of The Sour Grape beautifully highlights the importance of forgiveness and compassion. Grape, once the happiest, becomes bitter after an accident, but learns to let go of grudges. Through its lighthearted narrative, the book shows how understanding others’ feelings and offering kindness can heal relationships. The tale encourages readers to embrace empathy and forgive, fostering a positive and harmonious community. This heartfelt message, combined with humor, makes the story a powerful tool for teaching children and adults alike about the value of compassion and the freedom that comes with forgiveness.

Humor and Lighthearted Storytelling

The Sour Grape captivates readers with its humorous and lighthearted approach to storytelling. Jory John’s witty narrative brings the characters to life, making the story both entertaining and relatable. Pete Oswald’s vibrant illustrations add a playful touch, enhancing the comedic moments. The tale of Grape’s journey from bitterness to understanding is filled with amusing situations and charming dialogue, making it a delightful read for children and parents alike. The blend of humor and heartwarming lessons creates a engaging experience that keeps readers smiling while imparting valuable life lessons.

Personal Growth and Self-Reflection

The Sour Grape beautifully illustrates themes of personal growth and self-reflection. Grape’s journey from bitterness to self-acceptance is a powerful metaphor for overcoming negativity; Through his experiences, Grape learns to recognize the value of relationships and the importance of self-awareness. The story encourages readers to reflect on their own emotions and behaviors, highlighting how understanding oneself can lead to positive change. This heartfelt narrative, supported by Pete Oswald’s expressive illustrations, shows how embracing one’s uniqueness fosters confidence and happiness, making it a valuable lesson for children and a reminder for all ages.

The Authors’ Contributions

Jory John and Pete Oswald’s collaboration brings warmth and humor to The Sour Grape. Their storytelling and vibrant illustrations create engaging, meaningful experiences for readers of all ages, fostering emotional intelligence and joy.

Jory John’s Writing Style

Jory John’s writing in The Sour Grape is both humorous and heartfelt, blending witty dialogue with meaningful lessons on forgiveness and compassion. His storytelling is engaging and relatable, making complex emotions accessible to young readers while entertaining parents. John’s ability to balance lightheartedness with deeper themes creates a narrative that resonates with audiences of all ages, fostering emotional intelligence and joy in a simple yet impactful way.

Pete Oswald’s Illustrations

Pete Oswald’s illustrations in The Sour Grape are vibrant and expressive, bringing the story’s characters to life with warmth and humor. His artistry complements Jory John’s narrative perfectly, creating visually engaging scenes that enhance the emotional depth of the story. Oswald’s use of color and texture adds a playful yet heartfelt dimension, making the book a joy to explore for readers of all ages while beautifully capturing the themes of forgiveness and personal growth.

Target Audience and Educational Value

The Sour Grape is designed for children, offering lessons in emotional intelligence and social skills. Its engaging storytelling and humor make it a valuable educational tool for parents and educators alike, fostering empathy and self-awareness in young readers while providing a enjoyable reading experience.

Appeal to Children and Parents

The Sour Grape captivates children with its relatable protagonist, a grumpy grape, and its lighthearted humor. The story’s simple yet engaging narrative, combined with Pete Oswald’s vibrant illustrations, makes it a delightful read for young audiences. Parents will appreciate the book’s ability to balance humor with meaningful lessons about forgiveness and personal growth. The story’s warmth and accessibility make it a shared reading experience that fosters connection between children and parents. Its universal themes and charming visuals ensure it becomes a family favorite, sparking conversations and encouraging empathy in readers of all ages.

Lessons for Teachers and Educators

The Sour Grape offers valuable lessons for educators, providing a relatable story to teach empathy, conflict resolution, and self-reflection. Teachers can use the book to discuss emotional intelligence and interpersonal relationships, encouraging students to reflect on their own behaviors. The story’s themes of forgiveness and personal growth align with social-emotional learning (SEL) goals, making it a powerful tool for classroom discussions. Additionally, the book’s humor and engaging illustrations can be used to spark creative writing or art projects, fostering a deeper connection to the material and promoting literacy skills in a fun and interactive way.

Cultural and Literary Significance

The Sour Grape stands out in children’s literature for its unique storytelling, blending humor with meaningful lessons. Its impact lies in its universal appeal, fostering emotional intelligence and empathy across cultures, while Pete Oswald’s vivid illustrations enhance its literary charm, making it a standout in the Food Group series and a modern classic in children’s storytelling.

Impact on Children’s Literature

The Sour Grape has made a significant impact on children’s literature by offering a fresh perspective on emotional growth and relationships. Its ability to tackle complex themes like forgiveness and self-reflection through relatable characters and humor has resonated widely. The book’s success contributes to the growing popularity of the Food Group series, showcasing how stories can be both entertaining and educational. With its vibrant illustrations and engaging narrative, The Sour Grape has become a beloved addition to modern children’s literature, inspiring young readers and setting a new standard for storytelling in the genre.

Comparisons to Other Works in the Series

The Sour Grape stands out within the Food Group series for its unique blend of humor and heartfelt lessons. While earlier books like The Bad Seed and The Good Egg focused on self-identity and community, The Sour Grape delves deeper into themes of forgiveness and compassion. Its narrative style and character development mirror the series’ signature wit, yet the story’s emotional depth offers a fresh perspective. This progression highlights the authors’ ability to evolve while maintaining the charm that fans have come to love, making The Sour Grape a memorable addition to the collection.

Downloading and Accessing “The Sour Grape PDF”

Download The Sour Grape PDF for free or purchase from online marketplaces. Access the story through popular platforms or educational websites for easy reading on various devices.

Free and Paid Options for Access

The Sour Grape PDF is available through various platforms, offering both free and paid options. Free downloads can be found on educational websites, blogs, and platforms like pemburujandamarkipat.blogspot.com, allowing easy access for readers. Paid versions are available on major online marketplaces such as Amazon and Google Books, ensuring high-quality formatting and supporting the creators. Additionally, some websites may require account registration for free access, while others offer direct downloads. This flexibility makes the book accessible to a wide audience, catering to different preferences and budgets.

Platforms for Reading and Sharing

The Sour Grape PDF can be easily accessed and shared across various platforms. Popular options include Google Books, Amazon, and educational blogs, where readers can download or read online. Additionally, tools like Flipbook allow users to create interactive versions for mobile devices, enhancing accessibility. Social media platforms also facilitate sharing, enabling educators and parents to distribute the book widely. These platforms ensure that the story reaches a broad audience, making it simple for readers to enjoy and share The Sour Grape in their preferred format, fostering a sense of community and engagement.

The Sour Grape is a heartwarming and humorous tale that teaches valuable lessons. Its engaging storytelling and vibrant illustrations make it a must-read for children and parents alike.

Final Thoughts on the Book’s Importance

The Sour Grape is a standout addition to children’s literature, offering a unique blend of humor and heartfelt lessons. Its ability to address complex emotions like jealousy and forgiveness through relatable characters makes it a valuable tool for teaching empathy. The collaboration between Jory John and Pete Oswald creates a visually and narratively engaging experience. This book not only entertains but also fosters self-reflection and compassion, making it a timeless read for children and adults alike. Its cultural impact lies in its ability to simplify profound truths, ensuring its place as a cherished story in many households.

Encouragement to Read and Explore

Embark on a delightful journey with The Sour Grape, a story that combines humor, vibrant illustrations, and timeless lessons. This charming book, part of the popular Food Group series, is perfect for children and parents seeking a fun yet meaningful read. Its availability in PDF format makes it easily accessible for readers worldwide. With its engaging storytelling and universal themes, The Sour Grape encourages empathy, self-reflection, and forgiveness. Dive into this heartwarming tale and discover why it has become a favorite in many households, fostering a love for reading and learning in both kids and adults alike.

a level biology revision guide

Welcome to your A-Level Biology revision guide! This section introduces key strategies and tips to help you excel in your exams. Understand the syllabus, focus on weak areas, and practice past papers to build confidence. Regular revision and active learning techniques will ensure a strong grasp of biological concepts and their practical applications. Stay motivated and systematic in your approach to achieve success.

1.1 Understanding the Importance of Revision

Revision is essential for A-Level Biology success, as it reinforces understanding and retention of complex concepts. Regular review helps identify weak areas, allowing focused improvement. It also builds exam confidence by familiarizing you with question types and marking schemes. Effective revision strategies, such as active recall and spaced repetition, enhance learning efficiency. Consistent effort ensures a strong foundation, enabling you to tackle challenging topics with clarity and precision.

1.2 Setting Clear Goals for Your Revision

Setting clear goals is crucial for effective revision. Break down the syllabus into manageable topics and prioritize weak areas. Create a realistic timetable, allocating specific time slots for each subject. Define measurable objectives, such as mastering key concepts or completing past papers. Track your progress and adjust your plan as needed. Clear goals help maintain focus, ensure systematic coverage, and build confidence for exam success.

Effective Study Techniques for A-Level Biology

Active recall, spaced repetition, and flashcards enhance retention. Practice past papers, focus on weak areas, and apply concepts to real-world scenarios. Stay organized and motivated.

2.1 Active Recall: Testing Yourself Regularly

Active recall involves testing yourself frequently without notes. This strengthens memory and identifies gaps. Use flashcards or quizzes to simulate exam conditions, ensuring long-term retention of complex biological concepts.

2.2 Spaced Repetition: Distributing Your Study Sessions

Spaced repetition involves reviewing material at increasing intervals to enhance long-term retention. Schedule study sessions with breaks in between to avoid overload. Start with short intervals for new concepts and gradually extend them. This method helps manage large volumes of information effectively, ensuring consistent progress and reducing the need for last-minute cramming. Regular reviews also help identify and reinforce weaker areas.

2.3 Using Flashcards for Key Terms and Concepts

Flashcards are a versatile tool for memorizing key terms and concepts in A-Level Biology. Write the term on one side and the definition or explanation on the other. Regularly testing yourself with flashcards helps reinforce memory and quick recall. Use physical cards or digital apps for convenience. Prioritize complex topics and review them frequently to ensure mastery. Flashcards are ideal for active learning and self-assessment.

Key Topics to Focus On in A-Level Biology

Focus on key topics such as Cell Biology, Genetics, Evolution, Plant and Animal Physiology, Ecology, and Conservation Biology to build a strong foundation for your A-Level Biology exams.

3.1 Cell Biology and Biochemistry

Focus on understanding cell structure, transport, and biological molecules. Master enzyme kinetics, photosynthesis, and respiration. Study lipid, protein, and DNA structures. Review active and passive transport mechanisms. Practice analyzing biochemical processes and their importance in living organisms. Use flashcards for key terms and concepts. Regularly test yourself on past paper questions to reinforce your understanding of these fundamental topics.

3.2 Genetics and Evolution

Focus on Mendelian inheritance, gene expression, and evolutionary mechanisms. Study population genetics, natural selection, and speciation. Understand DNA structure, replication, and genetic engineering techniques. Review phylogenetic trees and biodiversity. Practice analyzing inheritance patterns and evolutionary adaptations. Use past papers to test your understanding of genetic principles and evolutionary concepts. Create concept maps to connect genes, environments, and species changes effectively.

3.3 Plant and Animal Physiology

Focus on transport systems, gas exchange, and digestion in plants and animals. Study nutrient uptake, vascular tissues, and photosynthesis in plants. Understand blood circulation, respiration, and nervous systems in animals. Compare plant and animal responses to stimuli and hormonal control. Practice analyzing processes like transpiration and enzyme activity. Use diagrams to visualize structures like xylem, phloem, and capillaries. Apply concepts to real-world scenarios, such as crop yield optimization and human physiology.

3.4 Ecology and Conservation Biology

Explore ecosystems, energy flows, and nutrient cycles. Study population dynamics, community interactions, and conservation strategies. Understand succession, biodiversity, and human impacts on ecosystems. Focus on practical applications, such as habitat restoration and species management. Analyze case studies of conservation efforts and ecological disasters. Use data to evaluate environmental policies and sustainable practices. Apply ecological principles to real-world challenges, ensuring a deeper understanding of environmental balance and human responsibility.

Utilizing Past Papers and Mark Schemes

Past papers and mark schemes are invaluable for identifying patterns, understanding exam questions, and refining your answers. Practice under timed conditions to improve speed and accuracy, ensuring you meet the marking criteria. Analyze your mistakes to address knowledge gaps and strengthen your understanding of key concepts. This targeted approach enhances exam readiness and confidence.

4.1 How to Analyze Exam Questions and Trends

Analyze past exam papers to identify recurring themes, question types, and content emphasis. Use keyword searches to spot trends in topics like cell biology or genetics. Review mark schemes to understand examiner expectations and common student errors. Focus on high-weight topics and practice structuring answers to meet marking criteria. This systematic approach helps prioritize revision and improves familiarity with exam formats and question styles effectively.

4.2 Practicing Under Timed Conditions

Practicing under timed conditions is crucial for A-Level Biology revision. Use past papers to simulate exam scenarios, ensuring you adhere to time limits. This helps build speed, accuracy, and familiarity with question formats. Set a timer while practicing to improve time management and reduce exam-day anxiety. Focus on prioritizing questions, skimming through sections, and allocating time wisely to cover all topics effectively during practice sessions.

Time Management and Revision Planning

Effective revision requires a structured timetable, balancing study sessions with breaks to maintain focus. Prioritize topics, set realistic goals, and avoid overloading. Regularly review progress to stay on track and adjust plans as needed for optimal productivity and stress reduction.

5.1 Creating a Realistic Revision Timetable

A well-structured revision timetable is essential for covering all topics without overload. Break down the syllabus into manageable chunks, allocating specific time slots for each subject. Prioritize challenging areas and include regular breaks to maintain focus. Set realistic goals, ensuring a balance between study and relaxation. Regularly review and adjust your timetable to track progress and stay motivated. This approach ensures steady, productive learning.

5.2 Balancing Revision with Other Commitments

Balancing revision with school, work, or personal life is crucial for maintaining well-being and productivity. Create a schedule that integrates study time with other responsibilities, ensuring realistic allocations. Use shared calendars to avoid conflicts and set clear boundaries. Prioritize tasks, delegate where possible, and take regular breaks to prevent burnout. Effective time management fosters a healthy work-life balance, enabling you to excel academically while nurturing personal relationships and hobbies.

Common Mistakes to Avoid in Revision

Avoid overloading with too much information and neglecting weak areas. Focus on understanding concepts rather than memorizing. Don’t skip practicing past papers and seek help when needed.

6.1 Overloading with Too Much Information

Overloading with too much information is a common mistake during revision. Focus on understanding key concepts rather than memorizing everything; Use flashcards for key terms and concepts to simplify learning. Prioritize topics based on exam importance and your weaknesses. Avoid cramming by distributing study sessions evenly. Regular breaks and spaced repetition can help retain information effectively without overwhelming your mind.

6.2 Neglecting Weak Areas

Neglecting weak areas during revision can significantly impact exam performance. Identify your weaknesses through practice tests and past papers. Focus on understanding and improving these areas rather than skipping them. Allocate more time to challenging topics and seek additional resources or help when needed. Ignoring weak areas can lead to lower grades and a lack of confidence. Addressing them ensures a well-rounded understanding and better preparation for the exam.

Exam Strategy and Technique

Develop a clear exam strategy to tackle questions effectively. Understand question types, manage time wisely, and prioritize high-scoring answers. Practice past papers to refine your approach.

7.1 Approaching Different Types of Questions

Mastering different question types is crucial for A-Level Biology success. For multiple-choice questions, identify keywords and eliminate incorrect options. Short-answer questions require concise, structured responses. Essay questions demand clear introductions, detailed explanations, and logical conclusions. Practice analyzing mark schemes to understand examiners’ expectations. Time management is key; allocate minutes based on question weight. Regularly review past papers to refine your technique and build confidence.

7.2 Managing Time During the Exam

Effective time management is vital for exam success. Allocate time per question based on marks, ensuring high-weight questions receive adequate attention. Start by skimming the paper to identify straightforward questions and tackle them first. Avoid spending too long on one question—move on and return later if time allows. Keep track of the clock and review your answers briefly if time permits. Stay calm and systematic to maximize your score.

Final Tips for Success

Stay motivated by setting small goals and celebrating progress. Avoid burnout with regular breaks and a balanced routine. Seek help when needed and use effective revision strategies consistently. Stay focused and confident to achieve your best results.

8.1 Staying Motivated and Avoiding Burnout

Maintaining motivation is crucial for successful revision. Break your goals into smaller, achievable tasks to track progress and celebrate milestones. Recognize signs of burnout, such as fatigue or decreased focus, and take regular breaks to recharge. Incorporate mindfulness or physical activity to reduce stress. Surround yourself with supportive peers and stay positive—consistent effort leads to success. Prioritize self-care to maintain mental and physical well-being during intense study periods.

8.2 Seeking Help When Needed

When facing challenges in your A-Level Biology revision, don’t hesitate to seek help. Consult your teachers or join online study groups for clarification on complex topics. Librarians can guide you in finding relevant resources, and advanced search techniques can help you locate past papers and mark schemes. Actively reaching out for support ensures you address weaknesses promptly and maintain a strong understanding of the subject matter.

PDF

genki 1 workbook pdf

The Genki 1 Workbook is a companion to the popular textbook, offering comprehensive exercises for mastering elementary Japanese. Available as a PDF, it enhances language learning through structured practice.

1.1 Overview of the Workbook

The Genki 1 Workbook is a comprehensive companion to the textbook, designed to reinforce learning through practical exercises. It covers grammar, vocabulary, and writing, with listening comprehension to enhance skills. Available as a PDF, it provides structured practice, making it an essential tool for mastering elementary Japanese effectively. Its clear format supports self-study and classroom use.

1.2 Importance in Japanese Language Learning

The Genki 1 Workbook is a vital resource for mastering elementary Japanese, offering structured practice to build grammar, vocabulary, and writing skills. Its exercises complement the textbook, ensuring a well-rounded learning experience. Cultural insights and interactive activities further enhance understanding, making it an essential tool for effective Japanese language acquisition and cultural comprehension.

Key Features of the Genki 1 Workbook

The workbook offers comprehensive grammar exercises, vocabulary building, and writing/reading practice. It also includes listening comprehension, cultural insights, and interactive activities to enhance Japanese language skills effectively.

2.1 Comprehensive Grammar Coverage

The Genki 1 Workbook provides extensive grammar exercises, covering essential sentence structures, verb conjugations, and particle usage. Each lesson aligns with the textbook, reinforcing concepts through practical drills and clear explanations. This ensures learners grasp foundational grammar, enabling effective communication in Japanese. The structured approach helps build confidence and proficiency step-by-step.

2.2 Extensive Vocabulary Building

The Genki 1 Workbook includes extensive vocabulary exercises, covering over 1,. These exercises help learners remember and use vocabulary effectively, with structured drills and contextual practice. The workbook ensures that vocabulary is learned in a practical and applicable way, reinforcing lessons from the textbook and promoting confident communication in Japanese.

2.3 Writing and Reading Practice

The workbook provides dedicated sections for writing and reading practice, focusing on hiragana, katakana, and kanji. Exercises include writing sentences, reading comprehension, and drills to improve accuracy. These activities help learners build foundational skills, ensuring they can read and write Japanese confidently. Structured practice reinforces grammar and vocabulary, making it easier to progress in their studies.

2.4 Listening Comprehension Exercises

The workbook includes listening comprehension exercises in MP3 format, covering dialogues, conversations, and pronunciation practice. These exercises help learners improve their ability to understand spoken Japanese in various contexts, such as greetings, shopping, and daily interactions. The activities are designed to enhance listening skills, making them essential for effective communication. Regular practice ensures progress in comprehension and speaking abilities.

Role of the Workbook with the Textbook

The workbook complements the Genki 1 Textbook, providing exercises that reinforce lessons and enhance learning through structured practice. It is designed to be used alongside each lesson.

3.1 Companion to the Genki 1 Textbook

The Genki 1 Workbook is specifically designed as a companion to the Genki 1 Textbook, offering supplementary exercises that align with each lesson. It reinforces grammar, vocabulary, and reading skills through structured activities. Available in PDF format, it ensures comprehensive practice alongside the textbook for effective learning.

3.2 Supplementary Material for Lessons

The workbook provides supplementary material that complements each lesson in the Genki 1 Textbook. It includes additional exercises for grammar, vocabulary, and reading practice, ensuring a deeper understanding of the material. Available as a PDF, it offers a comprehensive resource for reinforcing learning and cultural insights, making it an essential tool for mastering elementary Japanese effectively.

Content Structure of the Workbook

The workbook is organized to align with each lesson in the Genki 1 Textbook, offering structured exercises for grammar, vocabulary, and reading practice. Available as a PDF, it provides a clear and accessible format to reinforce learning, ensuring comprehensive coverage of elementary Japanese language skills.

4.1 Lesson-by-Lesson Exercises

The workbook provides exercises that correspond directly to each lesson in the Genki 1 Textbook, ensuring a seamless learning experience. Each section includes grammar drills, vocabulary practice, and reading/writing activities tailored to reinforce specific language skills.

Exercises are structured to gradually build proficiency, with clear instructions and ample space for practice. This systematic approach helps learners master foundational concepts effectively, making it an essential tool for elementary Japanese study.

4.2 Review Sections and Tests

The workbook includes periodic review sections and tests to assess understanding of covered material. These sections reinforce grammar, vocabulary, and kanji, helping learners identify areas for improvement. Tests are designed to evaluate progress and ensure readiness for advancing to more complex content, making them an essential part of the learning process.

Cultural Insights and Notes

The workbook provides cultural insights and notes that complement language lessons, offering a deeper understanding of Japanese traditions and daily life.

5.1 Cultural Context in Exercises

The workbook incorporates cultural context through exercises, such as dialogues and scenarios, offering insights into Japanese daily life and traditions. These elements help learners understand cultural nuances while practicing language skills, making the learning experience more immersive and meaningful.

5.2 Insights into Japanese Life

The workbook provides insights into Japanese life through cultural notes and real-life dialogues. Learners explore common expressions, greetings, and mealtime phrases, gaining a deeper understanding of Japanese customs and social interactions. These elements enrich language learning by connecting it to authentic cultural contexts and daily life scenarios in Japan.

Practice Exercises and Activities

The workbook includes a variety of exercises such as fill-in-the-blank, matching, and listening comprehension. Interactive activities like role-play and pair work enhance engagement and practical application of language skills.

6.1 Types of Exercises

The Genki 1 Workbook features diverse exercise types, including fill-in-the-blank, matching, multiple-choice questions, and listening comprehension. These exercises target grammar, vocabulary, and reading/writing skills, ensuring well-rounded practice; Additionally, interactive activities like role-play and pair work are included to reinforce learning through practical application. Each exercise is designed to build confidence and proficiency in elementary Japanese.

6.2 Interactive Activities

The Genki 1 Workbook includes interactive activities like pair work, role-play, and listening exercises. These activities encourage learners to apply language skills in real-life contexts, fostering practical communication. Designed to engage students actively, they complement traditional exercises by making learning dynamic and immersive, while reinforcing grammar and vocabulary through authentic interactions.

Updates in the Third Edition

The third edition of the Genki 1 Workbook offers enhanced grammar explanations, expanded vocabulary lists, and additional listening exercises. It also features an improved layout and more cultural insights.

7.1 New Features

The third edition of the Genki 1 Workbook introduces updated grammar explanations, expanded vocabulary sections, and new listening exercises. The layout has been improved for easier navigation, and cultural notes now offer deeper insights into Japanese life. Additionally, interactive exercises and downloadable resources have been added to enhance the learning experience effectively.

7.2 Improved Content

The improved content in the third edition includes enhanced clarity in grammar explanations, revised vocabulary lists, and expanded reading and writing practice. Listening comprehension exercises have been updated to reflect real-life scenarios, making them more engaging. The workbook now aligns seamlessly with the textbook, ensuring a cohesive and effective learning experience for students of Japanese.

How to Download the PDF Version

The Genki 1 Workbook PDF is available on platforms like Scribd, kupdf.net, and others. Installation is straightforward, ensuring easy access to all exercises and materials.

8.1 Sources for Download

You can download the Genki 1 Workbook PDF from platforms like Scribd, kupdf.net, and other educational resources. These sites offer free access to the workbook, ensuring you can easily find and download the material. Additionally, some forums and language learning communities provide direct links to the PDF version for convenient access.

8.2 Installation and Usage

After downloading the Genki 1 Workbook PDF, ensure compatibility with a PDF reader like Adobe Acrobat. No installation is required; simply open the file. Use the workbook alongside the textbook for structured learning. Follow the exercises lesson-by.lesson. Regular practice enhances retention and proficiency in Japanese language skills effectively.

Integration into Study Routines

Incorporate the Genki 1 Workbook into your daily study routine by using it alongside the textbook. Consistency is key for effective language learning and retention.

9.1 Daily Practice

Daily practice with the Genki 1 Workbook is essential for consistent progress. Allocate time each day to complete exercises, focusing on areas like hiragana, vocabulary, and grammar. Regular review of listening and writing tasks enhances retention. By incorporating the workbook into your routine, you ensure steady improvement in Japanese language skills.

9.2 Effective Study Tips

For optimal learning, set specific goals for each study session and break exercises into manageable parts. Prioritize active engagement by writing answers clearly and reviewing mistakes. Utilize listening and writing exercises to enhance skills. Align your study sessions with the workbook’s structure, ensuring consistent progress. Focus on understanding concepts deeply rather than rushing through content.

Effectiveness of the Workbook

The Genki 1 Workbook is highly effective for mastering Japanese fundamentals, with structured exercises that ensure steady progress. Its popularity and widespread use attest to its value.

10.1 Feedback and Reviews

The Genki 1 Workbook has received widespread acclaim for its effectiveness in Japanese language learning. Learners praise its comprehensive exercises, clear structure, and ability to build a strong foundation. With over 2 million copies sold, it is a testament to its popularity and effectiveness in helping students achieve fluency.

10.2 Success Stories

The Genki 1 Workbook has empowered numerous learners to master elementary Japanese, with over 2 million copies sold worldwide. Many users highlight significant improvements in speaking, writing, and cultural understanding. Its structured approach has enabled learners to progress smoothly to intermediate levels, making it a cornerstone in their Japanese language journey.

Resources for Further Learning

Supplement your studies with online forums, vocabulary lists, and grammar guides. Explore additional textbooks, language apps, and cultural resources to deepen your Japanese proficiency journey.

11.1 Supplementary Materials

Enhance your learning with additional resources like vocabulary lists, grammar guides, and cultural notes. Utilize online forums, language apps, and PDF guides to supplement your Genki 1 workbook studies. Explore interactive tools and extra practice materials available for download to deepen your understanding and mastery of elementary Japanese.

11.2 Online Communities and Forums

Engage with online communities and forums dedicated to Japanese learners. Platforms like Scribd and Kupdf.net host discussions and share resources, including the Genki 1 workbook PDF. These spaces offer valuable advice, tips, and support from fellow learners and instructors, fostering a collaborative environment for mastering elementary Japanese effectively.

final fantasy type 0 trophy guide

Welcome to the comprehensive trophy guide for Final Fantasy Type-0 HD! This guide will help you navigate the game’s 50 trophies, including the elusive Platinum.

Overview of the Game and Trophy System

Final Fantasy Type-0 HD features a diverse trophy system with 50 trophies, including 38 bronze, 9 silver, 2 gold, and 1 platinum. Trophies are awarded for completing specific tasks, defeating enemies, and progressing through the story. Some trophies are tied to optional missions and side quests, while others require defeating challenging bosses or achieving high scores. The system encourages exploration and mastery, making it a rewarding experience for dedicated players aiming for 100% completion.

Importance of Trophies in Final Fantasy Type-0

Trophies in Final Fantasy Type-0 HD serve as achievements marking progress and milestones, enhancing gameplay depth and replayability. They reward skill, exploration, and completion, providing a sense of accomplishment. Earning all trophies unlocks the Platinum, a prestigious badge for dedicated players. The trophy system adds an extra layer of challenge and fun, encouraging players to explore every aspect of the game thoroughly.

Platinum Trophy Requirements

Earning the Platinum Trophy requires obtaining all 50 trophies, including story-related and challenging optional achievements, showcasing mastery of Final Fantasy Type-0 HD.

Steps to Achieve the Platinum Trophy

To secure the Platinum Trophy, complete the main story, side quests, and optional missions. Focus on defeating 300 enemies for the Bloodlust trophy and mastering combat strategies. Collect all l’Cie Crystals and participate in challenging battles like the Ironwood and Malboro fights. Ensure all achievements are unlocked by the post-game phase to avoid missing any. Dedication and thorough exploration are key to success.

Estimated Time to Platinum

Earning the Platinum Trophy in Final Fantasy Type-0 HD requires approximately 70-90 hours, depending on your skill level and familiarity with the game. Completing the main story and side quests efficiently can reduce time, while optional challenges may extend it. Dedicate around 30-40 hours to story missions and 30-50 hours to post-game cleanup and trophy hunting. Consistent progress and strategic planning are essential to achieving the Platinum within this timeframe.

Gold Trophies

Final Fantasy Type-0 HD features two Gold Trophies, each requiring dedication and skill. “Ultimate Guardian” is unlocked by defeating a formidable boss using advanced tactics, while “L’Cie Paragon” demands exceptional mastery of the game’s combat mechanics.

Complete List of Gold Trophies

Final Fantasy Type-0 HD offers two challenging Gold Trophies: Ultimate Guardian and L’Cie Paragon; Ultimate Guardian is awarded for defeating a specific formidable boss, requiring precise strategy and skill. L’Cie Paragon is granted for achieving exceptional combat mastery, showcasing your expertise in the game’s intricate battle system. Both trophies demand dedication and advanced gameplay techniques, making them a true test of your abilities.

Strategies for Earning Gold Trophies

To earn the Gold Trophies in Final Fantasy Type-0 HD, focus on mastering specific challenges. For Ultimate Guardian, defeating the formidable boss requires optimal party setups and strategic ability rotations. Practice timing and exploit enemy weaknesses. For L’Cie Paragon, prioritize leveling up your characters and unlocking their unique combat potentials. Use retries to refine your tactics and minimize errors. Persistence and careful planning are key to unlocking these prestigious achievements.

Silver Trophies

There are 9 Silver Trophies in Final Fantasy Type-0 HD, each representing significant achievements such as completing challenging missions or mastering advanced combat techniques.

Complete List of Silver Trophies

The Silver Trophies in Final Fantasy Type-0 HD include achievements like Enter Class Zero, Roaming the Skies, Instrument of War, and Skilled Fighter. These trophies recognize milestones such as completing key chapters, defeating powerful enemies, and mastering combat mechanics. Each Silver Trophy requires dedication and skill, contributing to the ultimate goal of earning the Platinum Trophy.

Tips for Unlocking Silver Trophies

To unlock Silver Trophies, focus on completing specific missions and defeating challenging enemies. For example, Roaming the Skies requires liberating all territories, while Skilled Fighter demands defeating 300 enemies. Prioritize upgrading your abilities and weapons to tackle tougher foes. Completing side quests and replaying missions on higher difficulty can also help. Stay persistent and strategic to earn these impressive achievements.

Bronze Trophies

There are 38 Bronze Trophies in Final Fantasy Type-0 HD, awarded for completing missions, defeating enemies, and progressing through the story. They are earned through various gameplay elements.

Complete List of Bronze Trophies

The 38 Bronze Trophies in Final Fantasy Type-0 HD cover a wide range of achievements, from completing specific missions to defeating certain enemies. Examples include Kill 300 Enemies and Complete Chapter 1. These trophies are essential for progression and provide a foundation for unlocking higher-tiered achievements. Earning all Bronze Trophies is a crucial step toward the Platinum Trophy.

Efficient Ways to Earn Bronze Trophies

To efficiently earn Bronze Trophies in Final Fantasy Type-0 HD, focus on completing main story missions and side quests. Defeat specific enemies, like 300 foes, to unlock certain trophies. Utilize characters with unique abilities for missions requiring precision. Regularly check progress and repeat challenging sections to maximize achievements; Farming enemies in key areas can also accelerate trophy unlocks, ensuring a smooth path toward 100% completion.

Tips and Strategies for Trophy Hunters

To efficiently earn trophies in Final Fantasy Type-0 HD, focus on completing main story missions and side quests. Utilize character abilities for specific challenges and track progress regularly.

Optimizing Combat for Trophy Progress

To optimize combat for trophy progress in Final Fantasy Type-0 HD, exploit enemy weaknesses using appropriate abilities and weapons. Completing side missions enhances character strength and unlocks essential items. Mastering the Active Time Battle system and summoning the right Eidolons during tough fights ensures victory. Regularly upgrading equipment and focusing on specific trophy-related challenges will streamline your journey to the Platinum Trophy.

Importance of Side Quests and Missions

Side quests and missions in Final Fantasy Type-0 HD are crucial for earning specific trophies and improving character skills. Many missions reward unique items and experience points, which are essential for character development. Completing side content also unlocks certain trophies tied to specific achievements. Dedicate time to explore and finish these missions, as they are vital for progressing toward the Platinum Trophy and maximizing your gameplay experience.

Walkthrough for Trophy Completion

This section provides a detailed walkthrough to help you earn all trophies in Final Fantasy Type-0 HD. Follow the guide to unlock every achievement seamlessly.

Step-by-Step Guide to Main Story Trophies

Complete Chapter 1: The War That Changed Everything to unlock the first story trophy. Progress through the main story, defeating bosses like Qun’mi and Dainsleif. Each chapter completion rewards trophies, with the final one unlocking the Platinum. Ensure all side missions are completed to avoid missing any trophies. Use the in-game logs to track progress and follow the storyline meticulously.

Post-Game Cleanup for Remaining Trophies

After completing the main story, focus on clearing any remaining missions and side quests. Use the Apollo Save Tool to manage saves and track trophy progress. Complete challenging missions like defeating Malboro and Bomb for hidden trophies. Ensure all collectibles, such as Golden Coffer and Lords Dog, are retrieved. This post-game phase is crucial for 100% completion and securing the Platinum Trophy. Estimated time: 10-15 hours.

Missions and Side Quests

Missions and side quests in Final Fantasy Type-0 offer diverse objectives, from defeating enemies like Malboro to retrieving hidden items like the Golden Coffer, aiding in character progression and item collection.

Missions That Reward Trophies

Several missions in Final Fantasy Type-0 directly reward trophies upon completion; Defeating bosses like Malboro and Qunmi/Dainsleif unlocks specific trophies. Additionally, completing story-related missions, such as those in Chapter 1, grants trophies like “Enter Class Zero” and “Three Hours That Changed the World.” These missions are essential for progression and 100% completion. Ensure to complete all main and optional missions to earn every trophy.

Side Quests Essential for 100% Completion

Side quests in Final Fantasy Type-0 are crucial for earning specific trophies and achieving 100% completion. Quests like “Retrieve Golden Coffer” and “Get Lords Dog” provide unique rewards and contribute to trophy progress. Completing these optional tasks ensures you unlock hidden achievements and miss no opportunities for trophy-related content. Prioritize these quests during your playthrough to avoid missing out on essential rewards.

Collectibles and Hidden Items

Final Fantasy Type-0 features various collectibles, including the Golden Coffer and Lords Dog, which are hidden in specific locations throughout the game. These items are essential for unlocking certain trophies and completing side quests. Explore thoroughly and use tools to track down every hidden item efficiently.

Locations of All Collectibles

In Final Fantasy Type-0, collectibles like the Golden Coffer and Lords Dog are hidden in specific areas. The Golden Coffer is found in the Bandit Cave by defeating 100 bandits, while Lords Dog is located in the Pirates Cave’s third area. Explore thoroughly and revisit locations to uncover these hidden items, as they are essential for certain trophies and enhancing your gameplay experience.

Guidance for Finding Hidden Items

To find hidden items in Final Fantasy Type-0, explore areas thoroughly and revisit locations after gaining new abilities. Use the Crystal of the Moogle to reveal hidden paths and secrets. Defeat specific enemies in caves, like the Bandit Cave, to unlock rare rewards. Keep an eye out for subtle clues and hidden chests, as they often contain essential items for trophy progression and enhancing your characters’ abilities.

Resources and Community Help

For trophy hunters, recommended forums like PowerPyx and the Trophies subreddit offer detailed guides and tips. Utilize tools like Trophy Tracker to monitor progress and stay updated with community insights.

Recommended Forums and Guides

For Final Fantasy Type-0 HD trophy hunters, forums like PowerPyx and the Trophies subreddit provide essential resources and detailed walkthroughs. These platforms host active communities sharing strategies and tips. Additionally, guides from MeltyQuest on F95ZONE offer insights into specific trophy requirements. Utilize these resources to streamline your journey toward the Platinum trophy and stay updated with community-driven solutions for overcoming challenges.

Using Trophy Tracker Tools

To efficiently track your progress, consider using tools like the Apollo Save Tool, which allows management of save files and trophies on PlayStation consoles. Trophy tracker tools provide detailed breakdowns of achievements, helping you monitor your journey toward the Platinum trophy; These tools are especially useful for identifying missed trophies and optimizing your gameplay strategy. They ensure you stay on track and efficiently unlock all Final Fantasy Type-0 HD achievements.

Final Fantasy Type-0 HD features 50 trophies, including the prestigious Platinum, providing a comprehensive guide to unlock every achievement and enhance your gaming experience successfully.

Final Thoughts on Trophy Hunting in Final Fantasy Type-0

Trophy hunting in Final Fantasy Type-0 is a rewarding journey that challenges players to explore every aspect of the game. From mastering combat to completing side quests, each trophy brings a sense of accomplishment. Earning the Platinum Trophy is the ultimate goal, requiring dedication and persistence. While the process can be demanding, the satisfaction of completing the list is unparalleled. Trophy hunters, embrace the grind and enjoy the ride!

Motivation for Completing the Trophy List

Completing the trophy list in Final Fantasy Type-0 offers a sense of pride and accomplishment, showcasing your mastery of the game. The journey to unlock every trophy, especially the Platinum, is rewarding and pushes you to explore every aspect of the story, combat, and side quests. Each trophy earned is a testament to your dedication, making the final achievement all the more satisfying. Embrace the challenge and enjoy the thrill of 100% completion!

PDF

modern dental assisting 13th edition pdf

The 13th edition of Modern Dental Assisting is a trusted resource for dental assisting education, offering updated content, technological advancements, and clinical photographs for comprehensive learning.

Overview of the 13th Edition

The 13th edition of Modern Dental Assisting offers a comprehensive update, featuring the latest advancements in dental technology, expanded coverage of emerging topics, and enhanced clinical visuals. Designed for both students and professionals, it provides practical exercises, mock exams, and supplementary materials to enhance learning and skill development in dental assisting.

Significance of the 13th Edition in Dental Education

The 13th edition of Modern Dental Assisting is pivotal in dental education, providing updated, evidence-based content that aligns with current standards. Its comprehensive coverage ensures students gain practical and theoretical knowledge, preparing them for certification and real-world challenges. The inclusion of interactive resources and real-world applications makes it an essential tool for modern dental assisting training and professional development.

New Features in the 13th Edition

The 13th edition introduces updated content, cutting-edge technologies, enhanced clinical photographs, and expanded coverage areas, providing a comprehensive learning experience for dental assisting professionals and students.

Updated Content and Technological Advancements

The 13th edition includes the latest advancements in dental technology, such as digital imaging and CAD/CAM systems, along with updated clinical procedures and evidence-based practices, ensuring students and professionals stay current with modern dentistry.

New Coverage Areas in Dental Assisting

The 13th edition expands on emerging topics such as implantology, sedation dentistry, and orthodontic assisting, providing detailed insights into these growing areas of dental care. This ensures students and professionals gain expertise in both foundational and advanced procedures, preparing them for diverse clinical challenges.

Enhanced Clinical Photographs and Illustrations

The 13th edition features high-quality clinical photographs and detailed illustrations, providing clear visuals of dental procedures and anatomy. These enhancements aid in understanding complex concepts, making learning more engaging and effective for both students and practicing dental assistants. The visuals align with updated content, ensuring a comprehensive and practical educational experience.

Learning Package and Student Resources

The 13th edition includes a comprehensive learning package with student resources on Evolve, such as chapter quizzes, mock exams, procedure videos, and tray setup exercises to enhance understanding and practical skills in dental assisting.

Student Resources on Evolve

Student Resources on Evolve for the 13th edition include interactive tools like chapter quizzes, mock CDA exams, procedure videos with Q&A, and tray setup exercises. These resources provide hands-on practice, reinforcing key concepts and clinical skills. They are designed to enhance learning, retention, and exam preparation, making them indispensable for dental assisting students striving to excel in their field.

Workbook and Supplementary Materials

The workbook for the 13th edition offers practical exercises, application activities, and reinforcement to master dental assisting concepts. Supplementary materials include procedure checklists and tray setup guides, aiding in skill development. These resources complement the textbook, ensuring a well-rounded educational experience for students and professionals seeking to enhance their expertise in dental assisting.

Interactive Features for Effective Learning

The 13th edition of Modern Dental Assisting includes interactive features like procedure videos, chapter quizzes, and a mock CDA exam. These tools, accessible via Evolve, enhance student engagement and understanding. Interactive exercises, such as tray setup questions, provide hands-on practice, ensuring a dynamic and effective learning experience tailored to dental assisting education and professional development.

Target Audience

This edition is designed for dental assisting students, practicing dental assistants, and educators. It serves as a comprehensive resource for both learning and professional development in dental assisting.

Dental Assisting Students

The 13th edition is tailored for dental assisting students, providing updated content, practical exercises, and resources like Evolve. It offers chapter quizzes, mock exams, and procedure videos to enhance learning and skill mastery, ensuring students are well-prepared for clinical practice and certification. The workbook reinforces concepts, making it an essential tool for academic success in dental assisting programs.

Practicing Dental Assistants

The 13th edition supports practicing dental assistants by providing updated clinical procedures, technological advancements, and evidence-based practices. It offers resources like procedure videos and tray setup exercises to refine skills. The content ensures professionals stay current with industry standards, enhancing patient care and operational efficiency in dental practices;

Dental Educators and Instructors

The 13th edition serves as an invaluable tool for dental educators, offering comprehensive lesson plans and supplementary materials. It includes chapter quizzes, mock CDA exams, and procedure videos to enhance classroom instruction. Educators can utilize these resources to create engaging and effective learning experiences, ensuring students are well-prepared for clinical practice and certification.

Features of the 13th Edition

The 13th edition offers comprehensive coverage, practical exercises, and mock CDA exams. It includes updated content, clinical photographs, and interactive features to enhance learning and preparation for certification.

Comprehensive Coverage of Dental Assisting

The 13th edition provides an extensive review of dental assisting, covering foundational concepts, clinical procedures, and emerging technologies. It ensures students gain a thorough understanding of both theoretical and practical aspects of the field, preparing them for real-world challenges and certifications. The content is organized to promote logical learning and retention of key dental assisting skills.

Practical Exercises and Application Activities

The 13th edition includes numerous exercises and activities designed to reinforce learning. Students engage in hands-on tasks, such as procedure simulations and tray setups, to apply theoretical knowledge. These practical exercises help develop critical thinking and technical skills, ensuring readiness for clinical environments and professional certifications like the CDA exam. Real-world scenarios enhance problem-solving abilities, making learning interactive and effective.

Mock CDA Exam and Chapter Quizzes

The 13th edition offers a Mock CDA exam and chapter quizzes to prepare students for certification. These assessments simulate real test conditions, helping students evaluate their readiness. Quizzes reinforce chapter content, while the mock exam provides a comprehensive review of all material, ensuring confidence and competence for the Certified Dental Assistant exam and future professional challenges.

Workbook and Supplementary Materials

The workbook provides practical exercises and application activities to reinforce dental assisting concepts. Supplementary materials include procedure videos, tray setup exercises, and additional resources for comprehensive learning.

Details of the Workbook

The workbook complements the 13th edition with reinforcement exercises and application activities. It includes procedure videos, tray setup exercises, and additional resources to help master dental assisting skills effectively.

Additional Resources for Learning

Beyond the workbook, the 13th edition offers supplementary materials, including Evolve resources like chapter quizzes, mock CDA exams, procedure videos, and Dentrix practice exercises. These tools enhance learning and prepare students for real-world challenges in dental assisting.

Availability and Formats

The 13th edition is available in PDF and ePub formats, with options for hardcover or digital purchase. It is accessible on various devices, ensuring flexibility for learners.

PDF and ePub Formats

The 13th edition is available in PDF and ePub formats, offering flexibility for digital learners. The DRM-free PDF ensures compatibility across devices, while the ePub format provides an adaptive reading experience. Both options deliver high-quality content, including images and text, optimized for tablets, smartphones, and computers, making it easy to access and study on the go.

Hardcover and Digital Options

The 13th edition is available in both hardcover and digital formats, catering to diverse learning preferences. The hardcover provides a traditional, tactile experience, while the digital version offers portability and accessibility. Students can choose between these options, ensuring they have the resource that best suits their study habits and learning environment needs.

Accessibility on Various Devices

The 13th edition is accessible across multiple devices, including smartphones, tablets, and computers. The PDF and ePub formats ensure compatibility, allowing students to study anytime, anywhere. This flexibility enhances learning convenience, making it easier for users to access the material in any setting, whether at home, in the classroom, or on the go.

Authors’ Credentials

Doni L. Bird and Debbie S. Robinson are renowned experts in dental assisting education. Their contributions have shaped modern dental assisting practices, making the 13th edition a trusted resource.

Doni L. Bird and Debbie S. Robinson

Doni L. Bird and Debbie S. Robinson are highly respected professionals in dental education. Their expertise has significantly contributed to the development of Modern Dental Assisting, ensuring it remains a leading resource for both students and practitioners. Their work emphasizes practical applications, updated techniques, and comprehensive coverage of dental assisting, making the 13th edition a cornerstone in dental education.

Their Contributions to Dental Education

Doni L. Bird and Debbie S. Robinson have significantly advanced dental education through their work on Modern Dental Assisting. Their expertise has shaped the 13th edition into a trusted resource, offering updated content, practical applications, and comprehensive coverage. Their contributions have supported both students and professionals, ensuring the book remains a cornerstone in dental assisting education and practice.

How to Access the Book

The Modern Dental Assisting 13th Edition is available in PDF and ePub formats. It can be purchased or downloaded from authorized platforms, with free preview options available.

Purchase and Download Options

The Modern Dental Assisting 13th Edition is available for purchase in hardcover or digital formats. It can be downloaded as a PDF or ePub from authorized retailers like Amazon or Evolve. Students and professionals can also access the book through subscription-based platforms, ensuring flexibility in learning and practice.

Free Resources and Preview

Free resources for Modern Dental Assisting 13th Edition include chapter quizzes, procedure videos, and preview sections on platforms like Evolve. A PDF preview is available for review, allowing users to explore content before purchase. Additional free materials, such as sample chapters and interactive tools, enhance learning and provide a glimpse into the comprehensive coverage of dental assisting topics.

Importance of the Latest Edition

The 13th edition provides updated content, reflecting the latest advancements in dental assisting, ensuring students and professionals stay current with modern practices and technologies for optimal patient care.

Benefits of Updated Information

The 13th edition offers current advancements in dental assisting, including new clinical procedures, technologies, and evidence-based practices. These updates enhance learning, ensuring students and professionals are well-prepared for real-world challenges and improved patient outcomes. The revised content also aligns with modern standards, making it an essential resource for staying competitive in the field of dental assisting.

Drawbacks of Using Previous Editions

Previous editions lack the latest advancements in dental assisting, such as updated clinical procedures and technologies. They may omit new coverage areas, limiting practical skills and knowledge. Reliance on outdated information can hinder adherence to current standards, making it less effective for modern practice and education compared to the 13th edition.

User Reviews and Testimonials

Students and professionals praise the 13th edition for its comprehensive coverage, up-to-date content, and practical applications, making it a trusted resource in dental education.

Feedback from Students and Professionals

The 13th edition has received overwhelmingly positive feedback from both students and professionals. Students highlight its ease of understanding, updated content, and practical exercises, which aid in mastering dental assisting skills. Professionals praise its relevance to modern dentistry and the inclusion of clinical photographs and procedural videos, enhancing both learning and practice. It remains a trusted resource in the field, making it indispensable for education and professional development.

Impact on Learning and Practice

The 13th edition significantly enhances learning and practice by providing updated content, practical exercises, and clinical photographs. It improves understanding of modern techniques and technologies, enabling students to apply knowledge effectively. Professionals benefit from its relevance to current practices, while the mock CDA exam and quizzes prepare students for certification. This resource bridges education and real-world application, fostering competence and confidence in dental assisting.

Future of Dental Assisting

The 13th edition highlights technological advancements and emerging trends, preparing students and professionals for the evolving field. It emphasizes the role of modern dental assisting in adapting to future challenges and innovations.

Emerging Trends and Technologies

The 13th edition highlights the integration of digital tools, such as Dentrix, and advanced technologies like CAD/CAM and 3D printing. It also covers emerging trends in infection control and patient care, ensuring dental assistants are prepared for modern clinical practices. Multimedia resources, including procedure videos, enhance understanding of cutting-edge techniques.

Role of Modern Dental Assisting in the Future

Dental assisting will play a pivotal role in shaping future dental care, emphasizing preventive treatments, technological integration, and patient-centered approaches. The 13th edition prepares professionals to adapt to advancing technologies, such as CAD/CAM and digital imaging, while highlighting the importance of skilled assistants in modern clinical settings to enhance efficiency and patient outcomes.