Archive: October 10, 2023

sha cerlin bed frame instructions pdf

The SHA CERLIN Bed Frame combines style, durability, and functionality, offering a sturdy metal platform design with optional storage drawers. Built from solid wood and stainless steel, it ensures long-lasting support and a sleek appearance. Easy to assemble with clear instructions, this bed frame is perfect for modern bedrooms, providing both comfort and aesthetic appeal.

1.1 Key Features and Benefits

The SHA CERLIN Bed Frame offers a sturdy metal platform design, ensuring excellent support and durability. Its solid wood components and stainless steel legs provide strength and stability, while the optional storage drawers add functionality for organizing belongings. The bed frame features a sleek, modern aesthetic that complements various bedroom styles. Easy-to-follow assembly instructions are included, making setup straightforward. Its compact design maximizes space, and the high-quality materials ensure longevity. This bed frame is ideal for those seeking a reliable, stylish, and practical sleeping solution for their home.

1.2 Importance of Following Assembly Instructions

Following the assembly instructions for the SHA CERLIN Bed Frame is crucial for ensuring safety, stability, and proper functionality. Incorrect assembly can lead to structural issues, instability, or even damage to the frame. The instructions provide a step-by-step guide to help you avoid common mistakes and ensure all components are securely fastened. By adhering to the manual, you can prevent potential hazards and guarantee a durable, long-lasting bed frame. Proper assembly also ensures the warranty remains valid and the product performs as intended.

Preparing for Assembly

Begin by identifying all components, gathering tools, and organizing parts. Ensure a clean, flat workspace to prevent damage and misplacement of hardware during assembly.

2.1 Identifying All Component Parts

Start by carefully unpacking and laying out all components. This includes side rails, slats, headboard, footboard, and hardware like bolts and screws. Match each part with the instructions to ensure nothing is missing. Organize smaller pieces in a designated area to prevent loss. Check for any damage or defects before proceeding. Identifying and categorizing each component beforehand will streamline the assembly process and help avoid confusion later.

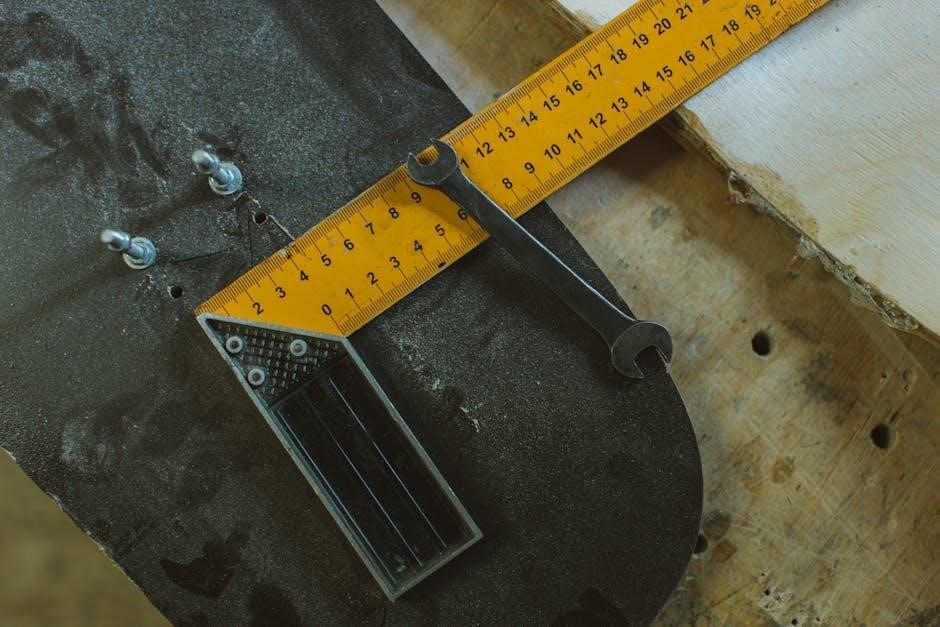
2.2 Tools and Hardware Required

To assemble the SHA CERLIN Bed Frame, you will need basic tools like an Allen wrench, screwdriver, and possibly a rubber mallet. Ensure all hardware, such as bolts, screws, and washers, is included in the package. Refer to the instruction manual for a detailed list of required tools and hardware. Organize these items beforehand to avoid delays during assembly. Double-check that no pieces are missing or damaged to ensure a smooth process.

2.3 Unpacking and Organizing Components

Begin by carefully unpacking all components from the box to avoid damage. Lay out the parts on a soft surface to prevent scratching. Identify and separate the side rails, slats, headboard, footboard, and hardware. Use the inventory list from the manual to ensure all pieces are accounted for. Organize smaller hardware, such as bolts and screws, in labeled containers for easy access. This step ensures a smooth assembly process and helps prevent missing or misplaced parts.

Double-check for any damaged or bent components and report issues to the manufacturer if necessary. Proper organization saves time and reduces frustration during assembly.

Step-by-Step Assembly Process

Begin by assembling the bed frame structure, then attach side rails and slats. Follow the guide to secure the headboard and footboard. Ensure all bolts are tightened properly for stability and safety.

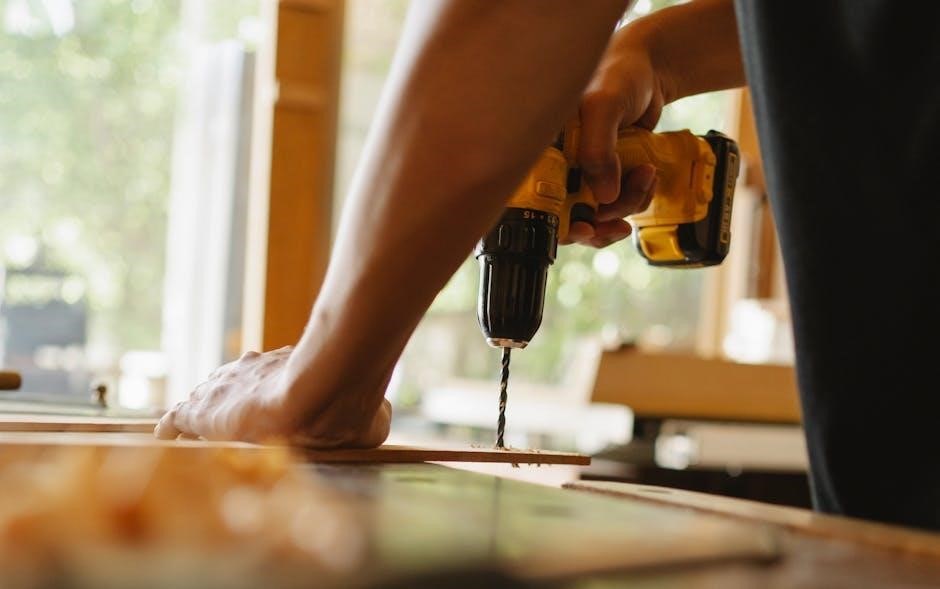
3.1 Assembling the Bed Frame Structure

Start by laying out the main frame components on a soft surface to prevent scratching. Attach the legs to the frame using the provided bolts, ensuring they are securely tightened. Next, align the side rails with the frame and fix them using the screws from the hardware kit. Double-check the alignment to avoid misfitting. Once the frame structure is complete, proceed to attach the slats, ensuring even spacing for proper support. Follow the manual for precise torque settings to maintain stability and durability.

3;2 Attaching Side Rails and Slats

Begin by attaching the side rails to the bed frame structure using the provided screws. Ensure the rails are aligned with the pre-drilled holes for a secure fit. Next, place the slats evenly across the side rails, spacing them as specified in the manual. Use the shorter screws to fasten the slats to the rails, ensuring they are tightly secured. Double-check the alignment and spacing to ensure proper support for the mattress. Tighten all hardware firmly to complete this step.

3.4 Securing the Headboard and Footboard

Align the headboard with the bed frame, ensuring the mounting brackets match the pre-drilled holes. Use the bolts provided to secure it tightly. Repeat the process for the footboard, making sure it is evenly aligned. Tighten all hardware firmly to prevent any movement. Double-check that both the headboard and footboard are stable and level. If necessary, adjust the bolts for a snug fit. Ensure all connections are secure to avoid wobbling or shifting during use. Refer to the manual for specific hardware requirements.

Safety Tips and Precautions

Assemble on a soft surface to prevent scratching. Ensure all connections are secure and avoid over-tightening. Wear protective gloves and verify weight capacity before use.

4.1 Preventing Damage During Assembly

To prevent damage, assemble the bed frame on a soft, even surface to avoid scratching. Handle all components with care, ensuring no excessive force is applied. Use protective gloves and verify hardware compatibility before tightening. Avoid over-tightening bolts, as this may strip threads or warp metal parts. Double-check each step in the manual to ensure proper alignment and installation. If unsure, consult the user manual or contact customer support for clarification. Proper handling and adherence to instructions will safeguard your bed frame during assembly.

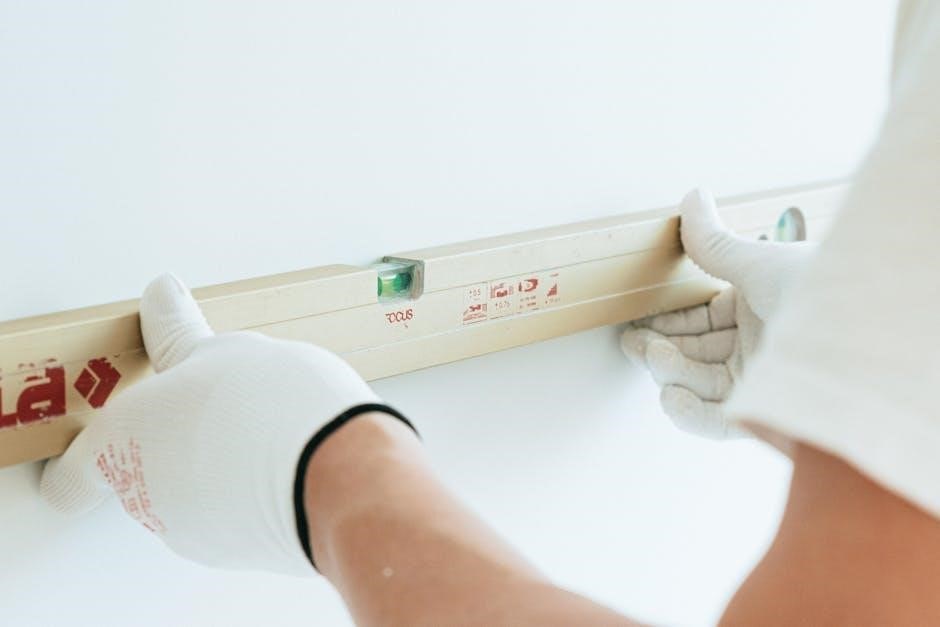
4.2 Ensuring Stability and Leveling

Ensure the bed frame is assembled on a level, even surface to maintain stability. Use a spirit level to verify the frame’s alignment during assembly. Check the floor for any unevenness and adjust the legs accordingly. Tighten all hardware securely, but avoid over-tightening, which could destabilize the structure. If necessary, use felt pads or rubber feet on the legs to prevent movement and ensure even weight distribution. Proper leveling guarantees the bed frame remains stable, preventing wobbling or shifting during use.

Troubleshooting Common Issues

Common issues include hardware misalignment or missing parts. Recheck assembly steps, ensure all bolts are securely tightened, and verify part numbers. Contact support for assistance if problems persist.

5.1 Resolving Hardware Misalignment

Hardware misalignment is a common issue during assembly. To resolve it, re-examine the instructions and ensure all bolts and screws are correctly aligned. Verify that each part matches the diagram provided. If a component seems misplaced, disassemble the affected section and reattach it carefully. Double-check that all connections are secure and tighten any loose bolts. If misalignment persists, contact customer support for assistance. Proper alignment is crucial for stability and safety, so take the time to address it thoroughly before finalizing the assembly.

5.2 Addressing Missing or Damaged Parts

If you discover missing or damaged components, stop assembly immediately. Cross-check all parts against the provided inventory list. If an item is missing or damaged, contact customer support for a replacement. Avoid forcing parts into place, as this may cause further damage. Wait for the correct components before proceeding, as skipping steps can compromise the bed frame’s stability. Handle all parts with care during assembly to prevent accidental damage. Proper replacement and handling ensure a safe and durable final product.

Maintenance and Care

Regularly clean the bed frame with a soft cloth and avoid harsh chemicals. Inspect for loose parts and tighten as needed. Refer to the warranty for support options.

6.1 Cleaning and Preserving the Bed Frame

To maintain the SHA CERLIN Bed Frame, use a soft, dry cloth to wipe down surfaces regularly. Avoid harsh chemicals or abrasive cleaners, as they may damage the finish. For metal parts, a mild soap solution can be used, but ensure thorough drying to prevent rust. Inspect the frame periodically for loose screws or wear and tear, addressing issues promptly. Protect the frame from moisture and direct sunlight to preserve its durability and appearance. Refer to the provided manual for specific care recommendations tailored to the materials used.

6.2 Warranty and Support Information

The SHA CERLIN Bed Frame is backed by a [X]-year warranty covering manufacturing defects. For any issues, contact our customer support team via [contact info] or visit [website]. Our team is ready to assist with warranty claims, repairs, or general inquiries. Keep this manual for future reference, as it contains essential information for warranty claims. The warranty applies only to the original purchaser and cannot be transferred.

data fabric case study pdf

Data fabric is a revolutionary data management approach enabling seamless access and sharing across distributed environments․ It integrates diverse data sources‚ ensuring unified governance and real-time collaboration‚ while addressing compliance and security challenges․

1․1 What is Data Fabric?

A data fabric is an integrated architecture and set of data services that provide consistent capabilities across a choice of endpoints spanning hybrid multi-cloud environments․ It enables seamless data discovery‚ access‚ and sharing by connecting diverse data sources‚ whether on-premises‚ in the cloud‚ or across edge devices․ The fabric acts as a unified layer‚ abstracting the complexity of underlying systems and ensuring data consistency‚ governance‚ and security․ It leverages technologies like data virtualization‚ metadata management‚ and orchestration to deliver real-time or near-real-time data access․ By eliminating data silos and enabling a decentralized approach‚ a data fabric empowers organizations to manage their data landscapes more effectively‚ supporting agility‚ innovation‚ and compliance in a rapidly evolving digital landscape․ It is designed to adapt to changing data needs‚ making it a critical component of modern data management strategies․

1․2 Importance of Data Fabric in Modern Data Management

Data fabric is essential for modern data management as it addresses the growing complexity of distributed and diverse data landscapes․ It enables seamless data accessibility‚ interoperability‚ and governance across organizations‚ breaking down silos and fostering collaboration․ With data fabric‚ businesses can achieve real-time data sharing‚ enhanced decision-making‚ and improved operational efficiency․ Its unified framework supports regulatory compliance‚ security‚ and scalability‚ making it critical for organizations aiming to stay competitive in a data-driven world․ By integrating advanced technologies like AI and metadata management‚ data fabric ensures data accuracy‚ consistency‚ and transparency‚ ultimately driving innovation and agility in today’s fast-paced digital environment․

Architecture of Data Fabric

Data fabric architecture integrates advanced technologies like data virtualization‚ integration tools‚ and metadata management to connect distributed data sources‚ enabling unified access and efficient data orchestration․

2․1 Key Components of Data Fabric Architecture

Data fabric architecture comprises several core components designed to enable seamless data integration and management․ These include data virtualization‚ which connects disparate data sources without physical movement‚ and metadata management‚ ensuring data context and discoverability․ Data governance frameworks are integral‚ providing unified policies for security‚ compliance‚ and access control․ Additionally‚ data orchestration tools automate workflows‚ while integration layers handle transformations and mappings․ These components work synergistically to create a flexible‚ scalable‚ and decentralized architecture‚ addressing modern data challenges and enabling real-time insights across organizations․

2․2 How Data Fabric Differs from Traditional Data Architectures

Data fabric differs from traditional architectures by adopting a decentralized‚ scalable approach․ Unlike monolithic systems like data warehouses or lakes‚ data fabric connects diverse data sources without centralization‚ enabling real-time access and sharing․ It leverages data virtualization to avoid physical data movement‚ reducing latency and enhancing agility․ Traditional architectures often rely on ETL processes‚ while data fabric integrates metadata and orchestration to create a unified‚ flexible layer․ This shift from centralized to decentralized models allows organizations to manage complex‚ distributed data landscapes more effectively‚ addressing modern challenges like multi-cloud environments and hybrid data ecosystems․ By focusing on connectivity and interoperability‚ data fabric provides a more dynamic and adaptable solution compared to rigid‚ legacy systems․

Key Components of Data Fabric

Data fabric’s core components include data integration‚ governance‚ security‚ and orchestration‚ enabling seamless connectivity and management of distributed data sources across enterprises․

3․1 Data Integration and Interoperability

Data integration and interoperability are foundational to data fabric‚ enabling seamless connectivity across diverse data sources and systems․ By leveraging advanced technologies like data virtualization and APIs‚ data fabric ensures that data from various formats and locations can be accessed and combined without physical movement․ This approach eliminates silos‚ allowing organizations to create a unified view of their data assets․ Interoperability is achieved through standardized metadata and common data models‚ ensuring consistency and compatibility․ Tools like data orchestration further enhance the process by automating workflows and ensuring data is delivered to the right place at the right time․ This capability is crucial for real-time analytics‚ cross-department collaboration‚ and meeting strict compliance requirements in today’s data-driven world․

3․2 Data Governance and Security

Data governance and security are critical components of a data fabric‚ ensuring that data is managed‚ accessed‚ and shared securely․ A data fabric provides a unified framework for governance‚ enabling organizations to define policies‚ enforce compliance‚ and maintain data integrity․ Advanced security measures‚ such as access controls‚ encryption‚ and auditing‚ protect sensitive data from unauthorized access and breaches․ AI-driven tools enhance governance by automating policy enforcement and detecting anomalies․ With a data fabric‚ organizations can ensure compliance with regulatory requirements while maintaining transparency and accountability․ This approach not only safeguards data but also builds trust in the organization’s ability to manage data responsibly‚ making it a cornerstone of modern data management strategies․

Use Cases for Data Fabric

Data fabric enables organizations to enhance data accessibility‚ support real-time sharing‚ and foster collaboration across teams․ It empowers enterprises to manage diverse data sources effectively‚ ensuring seamless integration and compliance․

4․1 Enhancing Data Accessibility Across Organizations

Data fabric plays a pivotal role in enhancing data accessibility by providing a unified framework for managing and accessing distributed data sources․ By integrating data virtualization and metadata management‚ it enables organizations to deliver data to users in real-time‚ regardless of its physical location․ This approach eliminates data silos‚ ensuring that teams across departments can access the information they need seamlessly․ Gartner highlighted data fabric as a top trend in 2019‚ emphasizing its ability to simplify data sharing in complex environments․ With AI-driven orchestration‚ data fabric intelligently routes data requests‚ reducing latency and improving efficiency․ This capability is particularly valuable for global organizations‚ where data resides in multiple cloud and on-premises systems․ By fostering a decentralized yet interconnected data ecosystem‚ data fabric empowers organizations to make data-driven decisions faster and more accurately․

4․2 Supporting Real-Time Data Sharing and Collaboration

Data fabric excels in enabling real-time data sharing and collaboration by providing a unified‚ decentralized architecture․ It ensures that data remains in its source systems while being accessible across the organization‚ eliminating the need for physical data movement․ This capability is crucial for organizations requiring instantaneous access to data for decision-making․ By leveraging data virtualization and AI-driven orchestration‚ data fabric streamlines data workflows‚ reducing latency and ensuring data consistency․ Real-time collaboration is further enhanced through secure‚ role-based access controls‚ allowing teams to work simultaneously on shared datasets․ This approach not only improves operational efficiency but also fosters innovation by enabling cross-departmental and cross-organizational data sharing․ With data fabric‚ businesses can respond to market changes swiftly‚ aligning with the demands of modern‚ fast-paced environments․

Implementation Best Practices

Effective Data Fabric implementation involves clear goals‚ iterative deployment‚ and leveraging existing tools․ Ensure robust governance‚ security‚ and scalability․ AI can enhance integration and orchestration seamlessly․

5․1 Planning and Designing a Data Fabric

Planning and designing a Data Fabric requires a clear understanding of business goals and data landscapes․ Start by aligning objectives with organizational needs‚ ensuring scalability and flexibility․ Assess existing data sources‚ platforms‚ and tools to identify integration points․ Define governance frameworks to manage data security‚ compliance‚ and quality․ Leverage technologies like data virtualization and AI to streamline processes․ Design a decentralized architecture to enable real-time access and sharing across systems․ Consider iterative deployment to gradually build capabilities․ Engage stakeholders to ensure adoption and collaboration․ Finally‚ implement monitoring and feedback mechanisms to optimize performance․ This structured approach ensures a robust‚ adaptable Data Fabric that drives innovation and efficiency․

5․2 Overcoming Challenges in Data Fabric Deployment

Deploying a Data Fabric presents challenges‚ including data silos‚ integration complexities‚ and governance gaps․ Organizations must address these by adopting iterative deployment strategies‚ fostering collaboration‚ and leveraging advanced tools․ Data silos can be overcome by implementing unified access layers and metadata management․ Integration challenges require robust APIs and connectors to ensure interoperability across systems․ Governance must be prioritized through centralized policies and AI-driven compliance tools․ Change management is critical to ensure user adoption and align stakeholders․ Additionally‚ scalability and performance must be monitored to handle growing data volumes․ By addressing these challenges proactively‚ organizations can unlock the full potential of their Data Fabric‚ enabling seamless data sharing and driving business innovation․

Role of AI in Data Fabric

AI plays a crucial role in Data Fabric by automating data governance‚ enhancing integration‚ and optimizing orchestration‚ ensuring compliance and improving overall data management efficiency significantly․

6․1 AI-Driven Data Governance and Compliance

AI significantly enhances data governance within Data Fabric by automating compliance monitoring and ensuring regulatory adherence․ It leverages machine learning to classify‚ tag‚ and secure sensitive data‚ reducing manual errors․ AI-driven tools continuously scan data environments to identify risks and enforce policies‚ ensuring data integrity and traceability․ This enables organizations to meet stringent regulatory requirements efficiently․ Additionally‚ AI-powered governance frameworks provide real-time insights‚ fostering transparency and accountability․ By integrating AI‚ Data Fabric ensures that data practices remain compliant‚ scalable‚ and aligned with organizational goals‚ thereby strengthening overall governance frameworks․

6․2 AI Enhancing Data Orchestration and Integration

AI plays a pivotal role in enhancing data orchestration and integration within Data Fabric by automating complex workflows and improving efficiency․ It enables intelligent data discovery‚ mapping‚ and transformation processes‚ ensuring seamless connectivity across disparate sources․ AI-driven orchestration tools optimize data pipelines‚ reducing manual intervention and errors․ Additionally‚ AI enhances metadata management by categorizing and tagging data dynamically‚ improving searchability and accessibility․ This facilitates real-time data sharing and collaboration across distributed systems․ AI also supports data virtualization‚ allowing organizations to integrate data without physical movement‚ thus reducing latency and enhancing scalability․ By leveraging AI‚ Data Fabric ensures robust‚ adaptive‚ and intelligent data integration‚ enabling businesses to respond swiftly to changing demands and deliver actionable insights․ This capability is critical for modern enterprises seeking agility and efficiency in their data strategies․

conservative shopping guide

Understanding Conservative Values in Shopping

Conservative shopping emphasizes frugality, sustainability, and supporting local businesses, reflecting values like financial responsibility and community loyalty. It prioritizes ethical practices and durable, timeless products.

Defining Conservative Shopping Values

Conservative shopping values emphasize frugality, sustainability, and ethical practices, prioritizing quality over quantity. It involves supporting local businesses, reducing waste, and making intentional purchasing decisions that align with personal beliefs. This approach fosters financial responsibility and environmental stewardship, ensuring resources are used wisely. By focusing on timeless products and avoiding trends, conservative shoppers promote long-term value and community well-being.

How Conservative Values Influence Purchasing Decisions

Conservative values guide shoppers to prioritize frugality, ethical practices, and sustainability. They often favor brands aligned with their beliefs, such as those supporting local communities or ethical sourcing. Purchasing decisions are influenced by a preference for durable, timeless products over trendy, disposable items. Avoiding wasteful spending and supporting small businesses are key principles, ensuring resources are used responsibly and contributing to the local economy while promoting long-term value and environmental stewardship.

Budgeting and Financial Planning for Conservative Shoppers

Conservative shoppers prioritize budgets, focusing on needs over wants, and seek cost-effective, sustainable options to align spending with financial goals and values.

Creating a Budget That Aligns with Conservative Principles

Creating a budget that aligns with conservative principles involves assessing your financial situation, prioritizing needs over wants, and allocating money wisely. Start by identifying essential expenses like housing, food, and healthcare, while minimizing discretionary spending. Allocate a portion to savings and debt repayment, reflecting long-term financial stability. Consider investing in durable, high-quality products to reduce long-term costs. Use budgeting tools or spreadsheets to track expenses and ensure alignment with conservative values of frugality and responsibility.

Strategies for Saving Money While Shopping

Strategies for saving money while shopping include using coupons, buying in bulk, and shopping during sales. Prioritize needs over wants and compare prices across brands and stores. Consider second-hand or refurbished items for non-essential purchases. Use cashback apps and loyalty programs to maximize savings. Avoid impulse buys by sticking to a shopping list. Investing in high-quality, durable products can also reduce long-term costs, aligning with conservative values of financial responsibility and sustainability.

Evaluating Brands and Products

Evaluating brands and products involves researching their values, quality, and ethical practices. Prioritize brands that align with conservative principles, ensuring durability and sustainability in their offerings.

Researching Brands That Support Conservative Values

Researching brands that align with conservative values involves using specific keywords and platforms to identify companies that share your principles. Utilize privacy-focused search engines like DuckDuckGo to find brands that promote ethical practices, sustainability, and community support; Look for transparency in their mission statements and sourcing methods. Advanced search tools can help refine results, ensuring you discover brands that resonate with your values. This approach allows you to make informed decisions and support businesses that reflect your beliefs, fostering a stronger connection between your purchases and principles. Avoid brands that contradict conservative values by boycotting those that prioritize profit over ethics or community impact.

Identifying Products That Promote Sustainability and Quality

Conservative shoppers prioritize products that combine sustainability and quality, ensuring long-term value and environmental responsibility. Use specific search terms like “durable,” “timeless,” or “ethically sourced” to refine your search. Opt for brands known for sustainable practices and transparent production methods. Avoid wasteful spending by investing in products built to last, reducing the need for frequent replacements. This approach aligns with conservative values of frugality and stewardship, promoting a mindful and responsible shopping ethos.

Online Shopping Tips for Conservatives

Use privacy-focused search engines like DuckDuckGo to avoid bias and protect your data. Employ specific keywords and advanced search techniques to find conservative-friendly products efficiently online.

Using Privacy-Oriented Search Engines Like DuckDuckGo

Switching to DuckDuckGo ensures your searches remain private and unbiased, aligning with conservative values. This engine doesn’t track your activity, offering a secure way to find products without compromising your data or exposure to targeted ads. By choosing DuckDuckGo, you support a platform committed to user privacy and neutrality, essential for conservative shoppers seeking trust and transparency in their online experiences.

Effective Search Techniques to Find Conservative-Friendly Products

Refine your online searches by using specific keywords and advanced search tools. Utilize privacy-oriented engines like DuckDuckGo to avoid bias and protect your data. Incorporate terms that reflect conservative values, such as “sustainable,” “local,” or “ethically sourced,” to find products that align with your principles. Employ filters and boolean operators to narrow down results, ensuring you discover brands and items that resonate with your conservative shopping ethos and priorities.

Importance of Privacy and Security in Conservative Shopping

Conservative shoppers prioritize privacy and security to protect personal data and ensure secure transactions. They opt for platforms and tools that respect user privacy and minimize data collection.

Protecting Personal Data While Shopping Online

Conservative shoppers prioritize privacy by using encrypted platforms and avoiding data collection. They opt for privacy-oriented tools like DuckDuckGo and secure payment methods to safeguard personal information, ensuring online transactions remain confidential and trustworthy.

Choosing Platforms That Respect User Privacy

Conservative shoppers favor platforms that prioritize privacy, such as DuckDuckGo, to avoid data tracking. They select platforms with strict privacy policies, ensuring their personal information remains secure and free from exploitation. This approach aligns with their values of trust and transparency, promoting a safer online shopping experience.

Supporting Small Businesses and Local Communities

Conservative shoppers often prioritize local businesses, fostering community growth and sustainability. This approach promotes economic stability and preserves unique, high-quality products, aligning with conservative values.

The Role of Small Businesses in Conservative Shopping

Small businesses embody conservative values by promoting self-reliance and community strength. They offer personalized service, local job creation, and unique products, fostering economic sustainability. Conservative shoppers often view these businesses as pillars of their communities, aligning with principles of independence and tradition. By supporting small businesses, conservatives help preserve local character and reduce reliance on large corporations, reinforcing ethical and sustainable practices that benefit both the economy and society.

Benefits of Shopping Locally for the Community

Shopping locally strengthens community bonds by reinvesting dollars within the area, creating jobs, and supporting local entrepreneurs. It preserves the unique character of neighborhoods and fosters a sense of pride. Local businesses often provide personalized service and higher-quality products, enhancing the shopping experience. By keeping money within the community, shoppers help sustain local schools, services, and infrastructure, contributing to long-term economic stability and a vibrant, self-sufficient community.

Avoiding Wasteful Spending

Avoiding wasteful spending is central to conservative shopping, emphasizing intentional purchases and financial discipline. Prioritize needs over wants, use coupons, and avoid impulse buys to save money and reduce clutter.

Practicing Frugality as a Conservative Value

Practicing frugality is a cornerstone of conservative shopping, emphasizing mindful spending and resourcefulness. It involves creating detailed budgets, avoiding impulse purchases, and prioritizing essential items over luxury goods. By focusing on long-term value and durability, frugal shoppers reduce waste and cultivate financial discipline. This approach aligns with conservative principles of responsibility and sustainability, ensuring that every purchase contributes to personal and household well-being while supporting local economies and ethical practices.

Investing in Durable and Timeless Products

Investing in durable and timeless products is a key aspect of conservative shopping, focusing on quality over quantity. This approach reduces waste and long-term costs by prioritizing items built to last. Timeless designs avoid fleeting trends, ensuring versatility and value. By supporting brands that emphasize craftsmanship and sustainability, shoppers align with conservative values of responsibility and ethical consumption, while also contributing to a more mindful and resource-efficient economy.

Ethical Considerations in Shopping

Ethical considerations in shopping involve prioritizing brands with transparent sourcing and fair labor practices. Shoppers often boycott companies that contradict their values, supporting ethical production and accountability.

Understanding Ethical Sourcing and Production Practices

Ethical sourcing and production practices prioritize transparency, fair labor conditions, and environmental sustainability. Conservative shoppers often seek brands that ensure workers are treated fairly and materials are sourced responsibly. This approach aligns with values of integrity and responsibility, promoting accountability across industries. By supporting such practices, consumers help create a more equitable and sustainable global marketplace, encouraging businesses to adopt higher ethical standards and improve working conditions worldwide.

Boycotting Brands That Contradict Conservative Values

Conservative shoppers often choose to boycott brands that align with progressive ideologies or engage in practices contrary to their values, such as censorship or promoting liberal agendas. This strategy encourages businesses to remain neutral or align with conservative principles. By avoiding such brands, consumers send a clear message about their expectations for ethical and unbiased corporate behavior. This practice also fosters a more diverse and free market, allowing for greater consumer choice and representation of values.

Engaging with the Community

Engaging with the community involves joining conservative shopping groups, participating in local markets, and collaborating with like-minded individuals to promote shared values and support local economies effectively.

Joining Conservative Shopping Groups and Forums

Joining conservative shopping groups and forums connects individuals with like-minded communities, fostering shared values and ethical consumption. These platforms enable members to exchange ideas, discover brands, and support causes aligned with their beliefs. By participating, individuals gain access to resources, reviews, and collective bargaining power, enhancing their shopping experiences. Such communities also promote transparency, sustainability, and local economies, empowering consumers to make informed, values-driven purchasing decisions while strengthening social bonds and mutual support.

Participating in Local Markets and Events

Engaging in local markets and events strengthens community ties and supports small businesses, aligning with conservative values of self-reliance and local economy. These gatherings offer unique, often handcrafted goods, promoting sustainability and reducing reliance on large corporations. Shoppers benefit from direct interactions with producers, ensuring transparency and ethical practices. By participating, consumers contribute to the preservation of local traditions and cultural heritage, fostering a sense of belonging and economic resilience within their communities.

Adopting conservative shopping practices fosters financial responsibility, sustainability, and community support. By prioritizing ethical choices and privacy, shoppers contribute to a more mindful and resilient economy.

Summarizing the Key Principles of Conservative Shopping

Conservative shopping revolves around frugality, sustainability, and ethical practices. It emphasizes budgeting, prioritizing quality over quantity, and supporting local businesses. Shoppers focus on privacy, avoiding wasteful spending, and investing in durable products. By aligning purchases with personal values, such as ethical sourcing and community support, conservative shoppers promote a responsible and mindful approach to consumption, fostering long-term economic and environmental benefits.

Encouraging Others to Adopt Conservative Shopping Practices

Leading by example is a powerful way to inspire others to embrace conservative shopping. Share the benefits of budgeting, ethical sourcing, and supporting local businesses. Educate friends and family about the impact of their purchases and how conservative values align with sustainability. Encourage community involvement through local markets and forums. Highlight success stories and the positive effects of mindful consumption. By fostering a sense of responsibility and unity, you can motivate others to adopt practices that benefit both individuals and society.

PDF

math kangaroo level 5 and 6 pdf

Overview of the Math Kangaroo Competition

The Math Kangaroo competition is an international math event held annually, attracting students from over 90 countries. It is organized by the non-profit organization Kangourou sans frontières. The contest aims to make mathematics engaging and accessible, fostering problem-solving skills and logical thinking. The competition consists of 30 multiple-choice questions, and students have 75 minutes to complete it without calculators. It is designed for students of various grade levels, with Levels 5 and 6 catering to grades 5 and 6, respectively. The competition emphasizes creativity and analytical reasoning, making it a popular platform for young mathematicians worldwide.

Importance of Level 5 and 6 for Students

Math Kangaroo Levels 5 and 6 are designed for students in grades 5-6, offering a platform to enhance their mathematical skills and problem-solving abilities. These levels help build a strong foundation in arithmetic, algebra, and geometry, preparing students for advanced math concepts. Participation fosters critical thinking, logical reasoning, and creativity. It also boosts academic confidence and curiosity, encouraging students to explore math beyond the classroom. By engaging with challenging questions, students develop resilience and analytical skills, essential for future academic and professional success. These levels act as a bridge, preparing students for higher-level competitions and complex math challenges.

Structure of the Math Kangaroo Level 5 and 6 Exam

The exam consists of 30 multiple-choice questions with options from A to E. Students have 75 minutes to complete, covering arithmetic, algebra, geometry, and problem-solving, including visual diagrams and number puzzles.

Number of Questions and Time Allocation

The Math Kangaroo Level 5 and 6 exam consists of 30 multiple-choice questions, divided into three parts. Part A includes 8 questions worth 3 points each, Part B has 7 questions worth 4 points each, and Part C contains 15 questions worth 5 points each. Students are allocated 75 minutes to complete the test. Calculators are not allowed, and participants must solve problems using their mathematical knowledge and problem-solving skills. The time allocation ensures a balanced approach to tackle arithmetic, algebra, geometry, and visual puzzles effectively. Accuracy and speed are crucial for success.

Question Types and Difficulty Levels

Math Kangaroo Level 5 and 6 feature diverse question types, including arithmetic, algebra, geometry, word problems, number puzzles, and visual diagrams. The difficulty levels range from basic comprehension to complex problem-solving. Early questions focus on foundational skills, while later ones require advanced techniques and creative thinking. The variety ensures a comprehensive assessment of mathematical knowledge and reasoning abilities. Students must adapt strategies to handle increasing complexity, making the competition both challenging and rewarding for participants.

Key Topics Covered in Level 5 and 6

Math Kangaroo Level 5 and 6 cover arithmetic, algebra, geometry, and problem-solving. These topics are essential for developing fundamental math skills and logical reasoning abilities in students.

Arithmetic and Algebra

Math Kangaroo Level 5 and 6 emphasize arithmetic and algebraic skills, covering operations with integers, decimals, and fractions. Students engage with algebraic expressions, equations, and word problems. These topics require logical reasoning and precision, helping students build a strong foundation in numerical and algebraic manipulation. Practice questions from past papers, available as PDFs, provide ample opportunities to master these concepts and prepare for the competition.

Geometry and Problem Solving

Geometry and problem-solving questions in Math Kangaroo Level 5 and 6 challenge students to apply spatial reasoning and analytical thinking. Topics include properties of shapes, perimeter, area, and volume calculations. Visual diagrams and real-world scenarios are often used to test comprehension. Practice PDFs offer exercises that enhance students’ ability to approach complex problems methodically, fostering creativity and logical reasoning essential for success in these areas of the competition.

Sample Problems from Past Papers

Past papers for Math Kangaroo Level 5 and 6 provide 30 diverse problems, including arithmetic, algebra, and geometry, with word problems, number puzzles, and visual diagrams.

Examples of Word Problems and Number Puzzles

Past Math Kangaroo papers feature engaging word problems and number puzzles. For instance, one problem asks how many apples to move between baskets to equalize them, while another involves a dog and cat walking along a path. These questions test arithmetic, logical thinking, and problem-solving skills. They cover topics like algebra, geometry, and visual reasoning, ensuring a comprehensive assessment of mathematical abilities. Such examples help students familiarize themselves with the exam format and improve their critical thinking.

Visual Diagrams and Their Solutions

Visual diagrams in Math Kangaroo Level 5 and 6 exams are integral to testing spatial reasoning and geometry skills. Problems often include illustrations of shapes, paths, or objects, requiring students to interpret and solve visually. For example, one problem involves determining the number of apples to move between baskets, while another features a dog and cat walking along a path. Solutions are provided in PDFs, allowing students to analyze their approach and improve their problem-solving techniques effectively.

Accessing Math Kangaroo Level 5 and 6 PDFs

Access Math Kangaroo Level 5 and 6 PDFs by downloading past papers from 1998 to 2023. These resources include test papers and detailed solutions for practice.

Downloading Past Papers and Practice Questions

Students can easily access Math Kangaroo Level 5 and 6 PDFs by downloading past papers from the official Math Kangaroo website or third-party educational platforms. These PDFs contain 30 challenging problems from previous years, covering arithmetic, algebra, geometry, and problem-solving. Practice questions are categorized by difficulty and include word problems, number puzzles, and visual diagrams. Solutions are often provided, allowing students to review and understand problem-solving strategies. These resources are essential for effective exam preparation and improving mathematical skills. They also offer insights into question patterns and difficulty levels, helping students build confidence and accuracy.

Resources for Solutions and Analysis

Math Kangaroo Level 5 and 6 PDFs often include detailed solutions and analysis for past papers, enabling students to understand problem-solving strategies. These resources provide step-by-step explanations for word problems, number puzzles, and visual diagrams, helping students identify mistakes and improve their techniques. Comprehensive analysis guides are available online, offering insights into common question patterns and tips for tackling challenging problems. These resources are invaluable for self-study and reinforce learning, ensuring students are well-prepared for the exam and confident in their mathematical abilities.

Preparing for the Math Kangaroo Exam

Preparing for Math Kangaroo Level 5 and 6 involves using past papers and practice questions to build problem-solving skills and mathematical confidence through structured study and analysis.

Strategies for Solving Complex Problems

To tackle complex problems in Math Kangaroo Level 5 and 6, students should employ strategies like working backwards, using visual diagrams, and breaking problems into smaller parts. Practicing with past papers helps identify patterns and builds familiarity with question types. Encouraging logical reasoning and creative thinking is essential, as these skills are often tested in the competition. Regular practice and reviewing solutions can significantly improve problem-solving efficiency and confidence.

Using Past Papers for Effective Practice

Utilizing past papers from Math Kangaroo Level 5 and 6 is an excellent way to familiarize yourself with the exam format and question types. These PDF resources, available online, include word problems, number puzzles, and visual diagrams, mirroring the actual test structure. Practicing with past papers helps improve time management, identifies weak areas, and builds confidence. Reviewing solutions and analyses enhances understanding and reduces mistakes. Regular practice with these materials ensures thorough preparation and mastery of the competition’s unique challenges.

Benefits of Participating in Math Kangaroo

Participating in Math Kangaroo enhances problem-solving skills, boosts mathematical confidence, and fosters logical thinking. It also exposes students to diverse challenges, inspiring a deeper love for mathematics and learning.

Improving Problem-Solving Skills

Math Kangaroo Level 5 and 6 challenges students with diverse problem types, enhancing their ability to approach complex scenarios creatively. The competition includes word problems, number puzzles, and visual diagrams, which require critical thinking and logical reasoning. By engaging with these tasks, students develop strong analytical skills, learn to break down problems into manageable steps, and build confidence in their mathematical abilities. Regular practice with past papers and PDF resources helps refine these skills, preparing students for future academic challenges.

Enhancing Mathematical Knowledge and Confidence

Participating in Math Kangaroo Level 5 and 6 helps students deepen their mathematical knowledge and build confidence in their abilities. The competition exposes them to a wide range of topics, reinforcing concepts in arithmetic, algebra, and geometry. Access to past papers and PDF resources allows students to practice extensively, familiarizing themselves with the exam format and challenging problems. This consistent practice fosters mastery of math concepts and logical reasoning, enabling students to approach problems with increased self-assurance and reduced anxiety.

Math Kangaroo Level 5 and 6 PDFs provide students with essential resources to enhance their math skills and confidence, encouraging participation in this rewarding competition.

Final Tips for Success in Level 5 and 6

Practice consistently with past papers to familiarize yourself with the question format and difficulty. Focus on understanding concepts rather than memorizing formulas. Time management is crucial—allocate equal time to each question. Stay calm and attempt all problems, as partial solutions may earn marks. Review solutions to past papers to learn from mistakes. Encourage critical thinking and creativity when solving problems. Regular practice builds confidence and improves problem-solving skills. Utilize available PDF resources for targeted preparation and success in the competition.

Encouragement to Participate in the Competition

Participating in Math Kangaroo Level 5 and 6 is a stimulating and rewarding experience that fosters a love for mathematics. It challenges students to think creatively and develop problem-solving skills in a fun and competitive environment. The competition provides an opportunity to test abilities against peers worldwide, building confidence and resilience. Students gain access to valuable resources, including past papers and solutions, to enhance their preparation. Encourage students to embrace this experience, as it empowers them to excel academically and beyond.

PDF

george savillo mexican healer book pdf

George Savillo is a renowned expert in traditional Mexican healing, known for his holistic approach to wellness․ His work bridges ancient remedies with modern health practices, offering a unique perspective on herbalism and spiritual healing․ Through his writings, he shares insights into the cultural and historical roots of Mexican healing traditions, providing readers with practical tools for natural health and wellness․

1․1 Who is George Savillo?

George Savillo is a prominent figure in the realm of traditional Mexican healing, recognized for his deep knowledge of herbal remedies and spiritual practices․ As a healer and educator, he has dedicated his life to preserving and sharing the ancient wisdom of Mexican folk medicine․ His work emphasizes the interconnectedness of physical, emotional, and spiritual well-being, drawing from centuries-old traditions․ Savillo’s expertise spans the use of indigenous plants, rituals, and cultural practices, making him a respected authority in the field of holistic health․ His teachings not only provide practical solutions for health issues but also highlight the importance of cultural heritage in healing․ Through his writings and teachings, Savillo aims to empower individuals to take charge of their health naturally․

1․2 The Background of the “Mexican Healer” Book

George Savillo’s Mexican Healer book is a comprehensive guide to traditional Mexican healing practices, rooted in centuries of cultural and herbal wisdom․ The book was born out of Savillo’s deep passion for preserving the knowledge of indigenous remedies and spiritual rituals passed down through generations․ It serves as a bridge between ancient traditions and modern health needs, offering practical insights into natural healing․ The book is designed to educate readers on the holistic approach of Mexican folk medicine, emphasizing the importance of harmony between body, mind, and spirit․ By sharing his expertise, Savillo aims to empower individuals to embrace natural wellness and honor the cultural heritage behind these timeless practices․

Key Themes and Concepts in the Book

The book explores herbal remedies, spiritual healing, and cultural traditions, emphasizing their interconnectedness in Mexican folk medicine, offering a holistic approach to wellness and health․

2․1 Herbal Remedies and Traditional Healing Practices

George Savillo’s work extensively explores the use of herbal remedies in traditional Mexican healing, highlighting their effectiveness for various health conditions․ He discusses the cultural significance of plants like calendula, yerba buena, and chaparral, which are revered for their medicinal properties․ The book provides detailed instructions on preparing infusions, salves, and poultices, emphasizing the importance of natural ingredients over synthetic alternatives․ Savillo also delves into the historical roots of these practices, tracing their origins to indigenous traditions and the blending of cultures․ By sharing these timeless remedies, he offers readers a practical guide to incorporating herbalism into modern life, while preserving the wisdom of Mexico’s healing heritage․

2․2 Spiritual and Cultural Dimensions of Mexican Healing

George Savillo’s work delves deeply into the spiritual and cultural dimensions of Mexican healing, revealing how these practices are deeply rooted in tradition and faith․ He explores the role of rituals, such as limpias (cleansing ceremonies), and the use of sacred objects like copal and sage to restore balance and harmony․ The book highlights the interconnectedness of physical, emotional, and spiritual health, reflecting the holistic nature of Mexican healing․ Savillo also examines the influence of indigenous and Catholic traditions, illustrating how these cultural blendings have shaped unique healing practices․ By preserving these spiritual and cultural elements, Savillo’s work offers a profound understanding of Mexico’s rich healing legacy and its relevance in modern times․

The Significance of the Book in Modern Context

George Savillo’s book offers a timely exploration of traditional healing, resonating with modern interests in holistic wellness and natural remedies, while bridging cultural gaps in health practices globally․

3․1 The Growing Interest in Alternative Medicine

The growing interest in alternative medicine has sparked a resurgence in holistic healing practices, with many seeking natural remedies over conventional treatments․ George Savillo’s work taps into this trend, offering insights into traditional Mexican herbalism and spiritual healing․ His book provides a comprehensive guide to natural health, aligning with modern wellness movements focused on prevention and natural cures․ As people increasingly question pharmaceutical dominance, Savillo’s teachings resonate, emphasizing the body’s innate healing capacity․ This shift reflects a broader cultural desire for sustainable, ethical, and culturally rooted health solutions, making his work a valuable resource for those exploring alternative approaches to wellness․

3․2 The Role of Cultural Heritage in Healing Practices

George Savillo’s work highlights the profound impact of cultural heritage on healing practices, emphasizing the importance of preserving traditional knowledge․ His book, Mexican Healer, delves into the rich cultural roots of Mexican healing traditions, showcasing how rituals, herbal remedies, and spiritual practices are deeply intertwined with the country’s history and identity․ By exploring these customs, Savillo illustrates how cultural heritage provides a sense of continuity and meaning in health and wellness․ This approach not only honors ancestral wisdom but also offers a holistic framework for understanding and addressing physical, emotional, and spiritual well-being․ The book serves as a bridge between past and present, demonstrating how timeless traditions can inform modern healing practices․

Practical Applications of the Book’s Teachings

The book offers practical guides for creating herbal remedies and integrating spiritual practices into daily life, empowering readers to apply traditional Mexican healing methods effectively․

4․1 DIY Herbal Remedies for Common Ailments

George Savillo’s book provides detailed guidance on crafting herbal remedies for everyday health issues․ Readers learn to create natural treatments using plants like calendula for skin care, eucalyptus for respiratory relief, and chamomile for relaxation․ The book emphasizes sustainable sourcing and simple preparation methods, making it accessible for beginners․ Savillo shares traditional Mexican recipes for teas, salves, and infusions, offering holistic solutions for ailments such as colds, digestive discomfort, and inflammation․ By combining modern practicality with age-old wisdom, the book empowers individuals to take charge of their health naturally․ These DIY remedies not only heal the body but also foster a deeper connection to nature and cultural heritage․

4․2 Incorporating Spiritual Practices into Daily Life

George Savillo’s book emphasizes the importance of integrating spiritual practices into daily routines for holistic well-being․ He explores traditional Mexican rituals, such as meditation, prayer, and smudging with herbs like copal and sage, to purify and balance energy․ These practices, rooted in indigenous wisdom, help individuals connect with their inner selves and the natural world․ Savillo suggests starting the day with a gratitude ritual or ending it with a reflective prayer to foster mindfulness․ By incorporating these spiritual elements, readers can cultivate emotional and physical harmony, creating a balanced and meaningful life․ His guidance makes spiritual practices accessible, encouraging readers to embrace a deeper sense of purpose and connection in their daily lives․

George Savillo’s Contribution to the Field of Healing

George Savillo’s work has revolutionized the field of healing by blending traditional Mexican remedies with modern practices, making holistic wellness accessible and culturally relevant for a global audience․

5․1 Bridging Traditional and Modern Healing Methods

George Savillo’s work uniquely bridges the gap between traditional Mexican healing practices and modern holistic health approaches․ By integrating time-tested herbal remedies, spiritual rituals, and contemporary wellness techniques, he creates a comprehensive system that honors cultural heritage while addressing today’s health challenges․ His methods emphasize the importance of reconnecting with nature and understanding the interplay between physical, emotional, and spiritual well-being․ This fusion makes his teachings accessible to a broad audience, from those rooted in traditional practices to those seeking alternative approaches in a fast-paced, modern world․ Savillo’s holistic perspective encourages a deeper understanding of health as a harmonious balance of body, mind, and spirit․

5․2 The Impact of His Work on Contemporary Health Practices

George Savillo’s work has significantly influenced contemporary health practices by reintroducing traditional Mexican healing methods to modern audiences․ His teachings have sparked a renewed interest in herbalism, spiritual healing, and holistic wellness, resonating with those seeking natural alternatives to conventional medicine․ By sharing his knowledge, Savillo has helped bridge the gap between ancient remedies and modern health trends, inspiring a new generation of healers and health enthusiasts․ His emphasis on cultural heritage has also fostered a deeper appreciation for the interconnectedness of health, spirituality, and community, making his work a valuable resource in today’s diverse and evolving health landscape․

karr alarm manual

Welcome to the KARR Alarm Manual, your guide to understanding and utilizing the KARR BT Series. This manual provides comprehensive insights into features, installation, and troubleshooting, ensuring optimal security for your vehicle with user-friendly instructions.

1.1 Overview of the KARR Alarm System

The KARR Alarm System is a cutting-edge vehicle security solution designed to offer convenience, advanced features, and robust protection. It includes remote start, keyless entry, and mobile app integration, ensuring seamless control over your vehicle’s security. With customizable settings and real-time alerts, the system provides peace of mind while safeguarding against theft and unauthorized access.

1.2 Importance of the Manual for Users

This manual is a comprehensive guide for understanding and utilizing the KARR Alarm System. It provides clear instructions for installation, programming, and troubleshooting, ensuring users can maximize the system’s features. Whether customizing settings or resolving issues, this manual is essential for optimal functionality and security, helping users protect their vehicle effectively and efficiently.

Features of the KARR Alarm System

The KARR Alarm System offers advanced features like remote start, keyless entry, robust security, anti-theft protection, and seamless mobile app integration for enhanced vehicle protection and convenience.

2.1 Remote Start and Keyless Entry

The KARR Alarm System offers remote start and keyless entry, providing unparalleled convenience and security. Users can start their vehicle’s engine and lock or unlock doors remotely, eliminating the need for physical keys. This feature enhances ease of use while reducing the risk of unauthorized access, ensuring a seamless and secure driving experience.

2.2 Security and Anti-Theft Features

The KARR Alarm System boasts advanced security and anti-theft features, including door lock automation and vehicle immobilization. Upon triggering, the system activates the horn and alerts the user. Enhanced encryption ensures remote signals are secure, while door lock automation provides an additional layer of protection. These features work seamlessly to safeguard your vehicle from unauthorized access and theft, offering peace of mind.

2.3 Mobile App Integration

The KARR Alarm System seamlessly integrates with the KARR BT App, available on the Apple App Store and Google Play Store. This app allows users to customize settings, receive real-time notifications, and control the system remotely. With features like remote arming, disarming, and monitoring, the app enhances convenience and ensures your vehicle’s security from anywhere, anytime.

Wiring Diagram and Installation

Understand the wiring layout to ensure proper installation. Connect the RED wire to the unlock motor and refer to the diagram for precise connections and steps.

3.1 Understanding the Wiring Layout

Understanding the wiring layout is essential for proper installation. The KARR alarm system uses color-coded wires for specific functions. The RED wire connects to the unlock motor and should only be linked to the driver’s door lock. Avoid connecting it to other doors. Refer to the wiring diagram for precise connections and steps to ensure compatibility and functionality.

3.2 Step-by-Step Installation Guide

Start by mounting the control unit in an accessible location. Refer to the wiring diagram for connections. Attach the RED wire to the unlock motor on the driver’s door lock. Route wires securely, avoiding interference. Connect the alarm to the vehicle’s battery and ignition systems. Test the remote functionality and ensure all features, like door locks and starter disable, operate correctly. Complete the setup by syncing the remote with the system.

System Programming and Settings

Program your KARR alarm system to customize settings like remote start, keyless entry, and security features. Use the app to adjust sensitivity, arming delays, and notifications.

4.1 Customizing Alarm Settings

Customize your KARR alarm settings to tailor security preferences. Adjust sensitivity levels, arming delays, and notification alerts via the mobile app or remote control. Personalize features like door lock automation and immobilization triggers for enhanced protection. Explore advanced options to fine-tune your system, ensuring it aligns with your vehicle’s specific needs and usage patterns for optimal performance and convenience.

4.2 Programming the Remote Control

Programming the remote control for your KARR alarm system is a straightforward process. Follow the manual’s step-by-step guide to sync your remote with the system. Press and hold the “Lock” button until the LED flashes, indicating successful pairing. This ensures your remote can perform keyless entry, remote start, and alarm activation. Refer to the manual for detailed instructions to avoid errors.

Troubleshooting Common Issues

Identify and resolve common issues with your KARR alarm system, such as the alarm light staying on or remote malfunction. Refer to the manual for reset instructions and troubleshooting guides to ensure your system operates smoothly.

5.1 Resolving Common Alarm Malfunctions

Address issues like the alarm light staying on or remote control malfunction by checking wiring connections and ensuring proper system synchronization. Reset the system if necessary, following the manual’s guidelines. For persistent problems, consult the troubleshooting section or contact professional support to restore functionality and ensure your vehicle’s security remains intact.

5.2 Resetting the System

To reset the KARR alarm system, press and hold the remote’s panic button for 3-5 seconds until the siren stops. If issues persist, disconnect the battery for 10 minutes to reset all components. Ensure all doors and trunk are closed before reconnecting power. This process restores default settings and resolves most temporary malfunctions effectively, ensuring system stability and reliability for continued protection of your vehicle.

Upgrading and Maintenance

This section covers upgrading modules and regular maintenance to ensure your KARR alarm performs optimally and stays updated with the latest features.

6.1 Installing Upgrade Modules

Installing upgrade modules enhances your KARR alarm’s functionality. Refer to the manual for compatibility and steps. Ensure the vehicle is in accessory mode and disconnect the battery. Use the KARR BT app to sync new modules post-installation, following the guide for seamless integration and optimal security performance.

6.2 Regular System Maintenance

Regular maintenance ensures your KARR alarm system performs optimally. Check battery connections and clean sensors periodically. Update software via the KARR BT app to maintain functionality. Inspect wiring for damage and secure loose connections. Test remote controls and ensure all features operate correctly. Schedule professional checks every 3-6 months for advanced diagnostics and system longevity.

Mobile App Functionality

The KARR BT app offers remote control, real-time status updates, and customizable settings for enhanced convenience and security. Available on iOS and Android platforms.

7.1 Downloading and Installing the KARR BT App

Download the KARR BT app from the Apple App Store or Google Play Store. Search for “KARR BT,” select the app by Webhouse Software Solutions, and tap to install. Once installed, open the app and follow in-app instructions to pair it with your KARR alarm system. This enables remote monitoring and control of your vehicle’s security features;

7.2 Customizing Settings via the App

Open the KARR BT app to access customizable settings. Navigate to the settings menu to adjust features like alarm sensitivity, notification preferences, and door lock controls. Enable or disable specific alerts, such as motion detection or low battery warnings. Customize arming and disarming delays, and set up geo-fencing for location-based security. These adjustments ensure a personalized and enhanced security experience for your vehicle.

Advanced Security Features

The KARR system offers cutting-edge security features, including vehicle immobilization and automated door locks, ensuring maximum protection against theft and unauthorized access.

8.1 Vehicle Immobilization Technology

The KARR system incorporates advanced vehicle immobilization technology, preventing unauthorized engine start-up and ensuring your vehicle remains secure. This feature integrates seamlessly with the BT Series, offering enhanced theft protection by disabling ignition and fuel systems when triggered. It provides peace of mind with cutting-edge security solutions designed to safeguard your vehicle effectively.

8.2 Door Lock and Unlock Automation

The KARR system offers seamless door lock and unlock automation, enhancing security and convenience. This feature allows for automatic locking upon arming and unlocking upon disarming, ensuring your vehicle remains secure. It integrates with keyless entry and remote start, providing effortless control. Customizable settings via the mobile app enable personalized preferences, ensuring a tailored security experience for all users.

User FAQs and Common Queries

Addressing common questions about the KARR alarm system, this section provides clarity on troubleshooting, installation, and app functionality, ensuring users can resolve issues quickly and efficiently.

9.1 Frequently Asked Questions

Why does my KARR alarm stay active? Check wiring connections and ensure doors are fully closed. How do I reset the system? Use the remote or consult the manual. Can I customize settings? Yes, via the app. Why isn’t the remote working? Reprogram it following the manual’s guide. How do I fix app connectivity issues? Restart your device and ensure Bluetooth is enabled. Why is there a strange noise? Check sensor alignments and wiring. How do I update the system? Download the latest firmware through the app. How do I arm/disarm manually? Use the Active Arm feature as detailed in the manual.

9.2 Addressing User Concerns

Common concerns include the alarm light staying on, remote issues, or app connectivity problems. Check wiring for loose connections, reprogram the remote if necessary, and restart the app. For persistent issues, refer to the manual or contact support. Regular system updates and proper installation ensure optimal performance and address most user concerns effectively.

Regular system updates, proper maintenance, and following guidelines ensure optimal performance. Stay informed about new features and refer to the manual for troubleshooting and customization.

10.1 Maximizing System Efficiency

To maximize your KARR alarm system’s efficiency, ensure regular software updates and maintain proper battery health. Always check sensor alignments and connections for optimal performance. Customize settings via the mobile app for personalized security. Refer to the manual for advanced features and troubleshooting tips to keep your system running smoothly and effectively at all times.

10.2 Staying Updated with System Changes

Regularly check for software updates via the KARR BT App to ensure your system remains current. Enable notifications for firmware upgrades and new features. Refer to the manual for guidance on updating processes. Staying informed about system changes ensures enhanced security and optimal performance, keeping your vehicle protected with the latest advancements in alarm technology.

mrch2 installation manual

Welcome to the MRCH2 Installation Manual, your guide to installing and configuring the MRCH2 controller with Mitsubishi Electric indoor units. This manual is designed for licensed HVAC professionals, ensuring safe and proper installation. It covers essential steps, safety precautions, and best practices for a successful setup.

1.1 Overview of the MRCH2 Controller

The MRCH2 is a cutting-edge remote controller designed for Mitsubishi Electric ducted systems. Part of the MHK2 kit, it includes the MIFH2 receiver and MRC2 cable. This RedLINK device offers advanced features like touchscreen navigation, scheduling, and smart alerts. Ideal for managing heating and cooling systems efficiently, the MRCH2 must be installed by a certified HVAC professional to ensure warranty validity and safety compliance.

1.2 Importance of Proper Installation

Proper installation of the MRCH2 is crucial to ensure optimal performance, safety, and energy efficiency. Incorrect setup can lead to electrical hazards, system malfunctions, or reduced lifespan of components. Always follow manual guidelines and safety precautions to avoid risks. Proper installation also ensures compliance with manufacturer warranties and guarantees reliable operation of your Mitsubishi Electric system for years to come.

System Requirements and Compatibility

The MRCH2 is compatible with Mitsubishi Electric indoor units and requires proper system configuration for optimal performance. Ensure all components meet specified requirements for seamless operation.

2.1 Compatible Mitsubishi Electric Indoor Units

The MRCH2 controller is designed to work seamlessly with specific Mitsubishi Electric indoor units, including ducted and ductless systems. Ensure your unit is listed in the compatibility chart provided in the manual. Proper compatibility ensures optimal performance and functionality. Always verify the model numbers and specifications before proceeding with installation to avoid any operational issues.

2.2 Necessary Tools and Materials

Before starting the installation, ensure you have the following tools and materials: screwdrivers (Phillips and flathead), wire strippers, pliers, voltage tester, mounting screws, and cable ties. Additionally, verify the availability of the MRCH2 controller, MIFH2 receiver, and MRC2 cable. These components are essential for a successful installation. Always use genuine Mitsubishi Electric parts to maintain compatibility and performance. Proper preparation ensures a smooth and efficient setup process.

Pre-Installation Steps

Before installation, ensure the site is prepared and all necessary tools and materials are available. Disconnect power and follow safety guidelines to avoid electrical hazards. Review the manual thoroughly to understand the process.

3.1 Safety Precautions

Always disconnect power before starting installation to prevent electrical shock. Follow FCC guidelines and ensure proper installation to avoid radio frequency interference; Wear protective gear and avoid exposing components to moisture or extreme temperatures. Adhere to all safety warnings in this manual to ensure a secure and efficient setup.

3.2 Site Preparation

Ensure the installation site is clear of debris and obstructions. Disconnect power before starting work. Verify all necessary tools and materials are available. The MRCH2 receiver should be placed in a dry, vibration-free area, away from direct sunlight. Properly label all wires and connections to avoid mix-ups. Ensure the remote controller is accessible for future maintenance. Follow all guidelines to prepare the site for a smooth installation process.

Installation Process

Install the MRCH2 controller and MIFH2 receiver, ensuring correct placement and secure connections. Follow manual guidelines for wiring and power setup. Test the system post-installation.

4.1 Mounting the MRCH2 Remote Controller

Mount the MRCH2 remote controller in a visible and accessible location. Ensure the surface is level and clean. Use the provided screws or adhesive backing for secure installation. Avoid areas exposed to direct sunlight or moisture. Align the controller properly and tighten the screws firmly. For wall mounting, drill holes according to the dimensions provided in the manual. Ensure the cable is neatly routed and secured to prevent damage or tripping hazards. Refer to the manual for specific torque specifications and alignment guidelines.

4.2 Connecting the MIFH2 Receiver

Connect the MIFH2 receiver to the MRCH2 controller, ensuring proper alignment. Mount the receiver near the indoor unit, following the manual’s placement guidelines. Secure the receiver using screws or adhesive. Connect the communication cable to the designated ports on both devices. Ensure all connections are tight and properly seated. Refer to the manual for specific torque specifications and terminal labels. Once connected, test the communication link to confirm successful pairing. Always disconnect power before starting the connection process to avoid electrical shock. Follow the manual’s instructions for correct wiring and alignment to ensure reliable operation.

4.3 Wiring and Power Connections

Disconnect power before starting wiring to avoid electrical shock. Connect the communication cable between the MRCH2 controller and the MIFH2 receiver, ensuring secure and proper alignment. Verify all connections are tight and free from damage. Refer to the manual for specific wiring diagrams and torque specifications. Connect the power supply to the receiver, following the recommended voltage and polarity. Ensure all wires are neatly routed and secured to prevent interference or damage. After completing the connections, reconnect power and test the system to confirm proper operation. Always adhere to local electrical codes and safety standards during installation.

Configuration and Setup

Configure the MRCH2 controller by pairing it with the indoor unit and setting up smart alerts. Use the menu to customize settings and ensure optimal system performance.

5.1 Pairing the Remote Controller with the Indoor Unit

To pair the MRCH2 remote controller with the indoor unit, ensure both devices are powered off. Press and hold the “PAIR” button on the receiver for 3 seconds until the LED flashes. Turn on the indoor unit and press the “PAIR” button on the remote controller. The LED will stop flashing once paired successfully; If pairing fails, restart the process or consult the troubleshooting guide.

5.2 Setting Up Smart Alerts and Reminders

The MRCH2 remote controller features Smart Alerts and Reminders to maintain your system’s efficiency. These alerts notify you of filter cleaning needs, temperature deviations, or system issues. Access the menu to enable and customize alerts based on your preferences. Schedule settings can be adjusted via the controller, but activation requires a certified HVAC technician. Regular updates ensure optimal performance and energy savings, keeping your system running smoothly year-round.

Troubleshooting Common Issues

Identify and resolve common issues with the MRCH2 controller, such as connection problems or power failures. Refer to the manual for detailed diagnostic steps and solutions.

6.1 Connection Problems

Common connection issues with the MRCH2 controller include poor wireless communication or faulty wiring. Ensure the MIFH2 receiver is properly connected and powered. Check for loose or damaged cables, and verify that the remote controller is paired correctly. Reset the system if necessary. Refer to the manual for detailed troubleshooting steps, such as signal strength checks or re-pairing the controller with the indoor unit.

6.2 Power and Electrical Issues

Power issues with the MRCH2 controller often arise from incorrect voltage supply or loose connections. Ensure the system is powered off before installation to prevent electrical shock. Verify that all wires are securely connected and the power source matches the required specifications. If the controller fails to turn on, check for blown fuses or tripped circuit breakers. Consult a licensed electrician if persistent electrical problems occur.

Maintenance and Upkeep

Regularly clean the MRCH2 controller to ensure optimal performance. Check connections and update firmware periodically. Proper upkeep prevents malfunctions and extends the system’s lifespan effectively.

7.1 Cleaning the Remote Controller

Regular cleaning ensures the MRCH2 remote controller operates smoothly. Power off the device before cleaning. Use a soft, dry cloth to wipe the surface, removing dust and fingerprints. Avoid harsh chemicals or liquids to prevent damage. Gently clean the screen and sensors for optimal performance. Ensure all buttons and ports are free from debris for reliable functionality and extended lifespan of the controller.

7.2 Updating Firmware

To ensure optimal performance, regularly update the MRCH2 controller’s firmware. Download the latest version from Mitsubishi Electric’s official website or through the dedicated mobile app. Connect the controller using a USB cable or via wireless connection, depending on the model. Follow the on-screen instructions to complete the update. Updating firmware enhances functionality, adds new features, and resolves potential issues, ensuring your system operates at peak efficiency and security.

Additional Resources

Visit Mitsubishi Electric’s official website to access the full MRCH2 installation manual, ensuring you have the latest guides and support materials for successful installation and operation.

8.1 Accessing the Full Installation Manual

To access the complete MRCH2 installation manual, visit Mitsubishi Electric’s official website. The manual provides detailed instructions and guidelines for installing, configuring, and troubleshooting the MRCH2 controller. It also includes technical specifications, wiring diagrams, and safety precautions to ensure a smooth installation process. For additional support, refer to the resources provided on their HVAC solutions page.

8;2 Contacting Mitsubishi Electric Support

For assistance with the MRCH2 installation, contact Mitsubishi Electric’s customer support team. Visit their official website to find contact details, support numbers, and email options. They provide expert guidance on troubleshooting, technical queries, and installation issues. Additionally, the website offers downloadable resources, FAQs, and user manuals to help resolve common problems efficiently.

hwh leveling system troubleshooting manual

The HWH leveling system ensures stability and safety for RVs through automatic and manual leveling․ Proper functioning is crucial for comfort and safety‚ making troubleshooting essential․ This guide provides step-by-step instructions to diagnose and resolve common issues‚ helping users maintain optimal system performance and extend its lifespan․

1․1 Overview of the HWH Leveling System

The HWH leveling system is a computer-controlled solution designed to stabilize RVs automatically or manually․ It features a touch panel for easy operation and includes components like sensors‚ solenoids‚ and jacks․ The system ensures proper leveling‚ which is critical for safety‚ appliance functionality‚ and overall comfort․ Regular maintenance and troubleshooting are essential to maintain its performance and extend its lifespan․ This guide provides detailed insights into its operation and common issues to help users keep their system running smoothly․

1․2 Importance of Proper Leveling

Proper leveling is crucial for RV stability and safety‚ preventing risks like tipping and uneven weight distribution․ It ensures appliances function correctly and enhances comfort by maintaining a balanced interior․ Additionally‚ improper leveling can damage the system and affect its longevity․ Regular checks and troubleshooting are vital to maintain optimal performance and ensure a secure living environment while on the road․ Proper leveling also improves overall RV handling and reduces the risk of mechanical stress on the chassis and components․

System Operation and Controls

The HWH leveling system operates through automatic and manual modes‚ controlled via a touch panel․ Understanding its functions and buttons is key for efficient system management․

2․1 Automatic vs․ Manual Leveling Modes

The HWH leveling system offers both automatic and manual modes․ Automatic mode simplifies operation by using sensors to level the RV quickly and efficiently․ Manual mode provides precise control‚ ideal for specific leveling needs or when automatic mode fails․ The touch panel allows easy switching between modes‚ with the “DUMP” button enabling manual retraction․ Understanding these modes ensures proper system operation and adaptability to different situations․ Always consult the manual for detailed instructions on mode selection and usage․

2․2 Understanding the Touch Panel and Buttons

The HWH touch panel is the central control interface for the leveling system‚ featuring buttons for automatic and manual operations․ The “DUMP” button enables manual retraction of jacks when the ignition is on and the park brake is set․ The panel includes indicators for system status‚ mode selection‚ and error messages․ Proper use of the touch panel ensures efficient leveling and troubleshooting․ Always refer to the manual for detailed button functions and operational guidelines to maintain system performance and safety․

Basic Troubleshooting Steps

Start by checking power and connections‚ ensuring all components are properly linked․ Restart the system to reset controls and verify functionality․ This foundational approach helps identify common issues quickly and effectively․

3․1 Power and Connection Checks

Begin troubleshooting by verifying power supply to the HWH system․ Check fuses and circuit breakers to ensure they are intact․ Inspect all electrical connections for tightness and corrosion․ Use jumper wires to test connections if necessary․ Ensure the ignition is on and the park brake is engaged when performing manual operations․ Proper power and connections are essential for system functionality․ Addressing these basics can resolve many common issues quickly and effectively;

3․2 Restarting the System

Restarting the HWH leveling system can often resolve minor issues․ Begin by turning the ignition on and ensuring the park brake is set․ Use the touch panel to initiate the system restart․ If issues persist‚ try flipping the white tabs on the solenoids to release pressure․ After restarting‚ check if the system functions properly․ If problems remain‚ consult the HWH manual for further guidance or contact support for assistance․ Restarting is a simple yet effective first step in troubleshooting․

Common Issues and Solutions

Common issues with the HWH leveling system include jacks not retracting fully and fluid leaks․ Solutions often involve checking connections‚ using jumper wires‚ or consulting the manual․

4․1 Leveling Jacks Will Not Retract Completely

If the leveling jacks fail to retract fully‚ check for obstructions or debris․ Ensure the system is in manual mode and the park brake is engaged․ Flip the white tabs on solenoids to release pressure‚ allowing jacks to retract․ If issues persist‚ inspect electrical connections and solenoid operation․ Refer to the HWH manual for detailed steps to address this common problem effectively․

4․2 Fluid Leaks in the System

Fluid leaks in the HWH leveling system can lead to reduced performance and potential damage․ Inspect hoses and connections for visible signs of leakage․ Ensure all fittings are tight and not damaged․ If fluid is leaking back to the reservoir‚ check the control valve for proper function․ Addressing leaks promptly is crucial to maintain system efficiency․ Consult the service manual for detailed repair procedures and guidelines to resolve fluid-related issues effectively․

Manual Retraction Process

The manual retraction process involves flipping the solenoid white tabs to release pressure‚ allowing jacks to retract when automatic functions fail or fuses blow․

5․1 Solenoid Operation for Manual Retraction

The solenoid operation is critical during manual retraction․ By flipping the white tabs‚ you release pressure in the hydraulic system‚ allowing the leveling jacks to retract․ This process bypasses the automatic controls‚ ensuring the RV can be stabilized manually․ Proper alignment and load distribution are essential for safe operation․ Always refer to the manual for step-by-step guidance to avoid system damage․ This method is a reliable backup when the automatic system fails․

5․2 Flipping the White Tabs on Solenoids

Flipping the white tabs on the solenoids is a key step in manual retraction․ Located on each solenoid‚ these tabs control hydraulic pressure․ By rotating them 90 degrees‚ you release the pressure‚ allowing the jacks to retract․ This process is essential when the automatic system fails․ Ensure the RV is on a level surface and the park brake is engaged before performing this operation․ Always consult the manual for detailed instructions to avoid system damage or malfunction․ This method ensures safe and effective manual control․

Tools and Equipment Needed

Essential tools include jumper wires‚ a pressure gauge‚ and a multimeter for diagnosing electrical issues․ A torque wrench is also necessary for maintaining system hardware integrity․

6․1 Jumper Wires and Pressure Gauges

Jumper wires are essential for bypassing faulty switches or solenoids during troubleshooting․ A pressure gauge (3500 PSI minimum) is critical for diagnosing hydraulic system issues‚ such as fluid leaks or blockages․ These tools help identify electrical and hydraulic malfunctions‚ ensuring accurate repairs․ Always use jumper wires rated for the system’s current capacity and follow safety protocols to avoid damage or injury․ Proper usage of these tools is detailed in the HWH service manual for effective troubleshooting․

6․2 Essential Tools for Troubleshooting

Essential tools for troubleshooting include a multimeter for diagnosing electrical issues‚ a torque wrench for securing connections‚ and a service manual for reference․ A multimeter helps verify power supply and detect short circuits‚ while a torque wrench ensures proper tightening of hydraulic lines and fittings․ The service manual provides detailed diagrams and step-by-step repair instructions‚ making it indispensable for resolving complex problems․ These tools collectively enable users to efficiently identify and fix issues within the HWH leveling system․

Maintenance and Service Tips

Regular maintenance ensures optimal performance of the HWH leveling system․ Check hydraulic fluid levels‚ inspect hoses for leaks‚ and clean sensors to prevent malfunctions․

7․1 Regular Maintenance Schedule

A well-planned maintenance routine is essential for the longevity and efficiency of the HWH leveling system․ Start by checking the hydraulic fluid levels monthly and topping them off as needed․ Inspect hoses and connections for signs of wear or leaks․ Clean the sensors and solenoids regularly to ensure accurate system operation․ Additionally‚ grease all moving parts every 30 days or before storing the RV․ Always refer to the service manual for specific intervals and procedures tailored to your system․ Regular checks prevent unexpected issues and ensure smooth functionality․

7․2 Checking Batteries and Connections

Maintaining reliable power supply and secure connections is critical for the HWH leveling system․ Begin by inspecting the battery terminals for corrosion and ensuring they are tightly connected․ Check the voltage with a multimeter to confirm it meets the system’s requirements․ Next‚ examine all electrical connections‚ including solenoids and sensors‚ for looseness or damage․ Clean or replace any corroded parts and tighten all fittings․ This routine helps prevent power-related issues and ensures consistent system performance․ Regular checks can avoid unexpected malfunctions․

Advanced Troubleshooting Techniques

Diagnosing complex issues involves analyzing electrical circuits‚ sensor calibration‚ and hydraulic performance․ Use tools like multimeters and pressure gauges to identify faults in the system․

8․1 Identifying Electrical Issues

To identify electrical issues in the HWH leveling system‚ start by checking the power supply and connections․ Use a multimeter to test voltage at the control panel and solenoids․ Blown fuses or tripped breakers can disrupt system operation․ Inspect wiring for damage or corrosion‚ and ensure all connectors are secure; If a solenoid fails to activate‚ verify its electrical supply․ Grounding issues can also cause malfunctions․ Refer to the system’s wiring diagram in the manual for detailed troubleshooting guidance․

8․2 Adjusting Sensors and Valves

Adjusting sensors and valves in the HWH leveling system ensures accurate leveling and proper function․ Start by calibrating the system sensors to confirm they are correctly detecting the RV’s pitch and roll․ Clean or replace sensors if they are faulty․ For valves‚ inspect for blockages and ensure they are opening and closing properly․ Use the manual override feature to test valve operation․ Refer to the troubleshooting manual for specific calibration steps and valve adjustment procedures to maintain system efficiency․

After troubleshooting‚ perform final checks to ensure the HWH leveling system operates smoothly․ Verify all functions‚ including automatic and manual leveling‚ are stable and secure․

9․1 Ensuring System Stability

System stability is crucial for optimal performance․ After troubleshooting‚ verify all components‚ including sensors and valves‚ are functioning correctly․ Ensure the RV is level and secure․ Check for any residual issues like fluid leaks or jack alignment․ Test the system in both automatic and manual modes to confirm reliability․ Refer to the HWH manual for final checks and maintenance tips to maintain stability and prevent future issues․ Stability ensures safety and comfort during travel and camping․

9․2 Post-Troubleshooting Verification

After resolving issues‚ it’s essential to verify the system’s functionality․ Test the leveling process in both automatic and manual modes to ensure proper operation․ Check all jacks for complete retraction and extension․ Verify that sensors and valves are responding accurately․ Consult the HWH manual for specific verification steps․ Ensure no leaks or electrical faults persist․ Once confirmed‚ the system should function reliably‚ providing a stable and safe environment for your RV․ This final check ensures all repairs are effective and the system is ready for use․

Additional Resources

For further assistance‚ refer to official HWH service manuals and guides․ Contacting HWH support directly can provide personalized solutions and expert advice․

10․1 HWH Service Manuals and Guides

The official HWH service manuals are comprehensive resources for troubleshooting and maintaining your leveling system․ These guides provide detailed diagrams‚ step-by-step repair instructions‚ and essential maintenance schedules․ They cover various HWH series‚ including 625S and 725 models‚ offering specific solutions for automatic and manual leveling systems․ By referencing these manuals‚ users can identify and resolve issues efficiently‚ ensuring optimal performance and longevity of their HWH leveling system․ Regular updates and revisions are available online for the latest information․

10․2 Contacting HWH Support

For issues beyond manual troubleshooting‚ contacting HWH Support is recommended․ Their experienced team provides personalized assistance‚ ensuring problems are resolved efficiently․ Visit the official HWH website for contact details‚ including phone numbers and email․ Technical support is available to address complex concerns‚ offering expert guidance and solutions tailored to specific HWH leveling systems․ Reaching out directly ensures accurate diagnoses and professional advice‚ helping users maintain their system’s performance and reliability․ Prompt response times and comprehensive support make HWH a trusted partner for RV owners․

costco stuffed chicken breast cooking instructions

Cooking Costco Stuffed Chicken Breast offers a convenient and flavorful meal solution. Pre-seasoned and pre-stuffed, it simplifies meal prep while delivering a delicious, home-cooked experience effortlessly.

Overview of the Product

Costco Stuffed Chicken Breast is a pre-seasoned, pre-stuffed chicken product designed for convenience and flavor. Typically filled with ingredients like broccoli, cheese, or spinach, it offers a balanced and satisfying meal. Made with high-quality chicken, the product is known for its tender texture and consistent taste. With minimal prep required, it caters to busy households seeking delicious, home-cooked meals without the hassle. The chicken is often frozen to maintain freshness and can be cooked straight from the freezer, making it a practical choice for meal planning and quick dinners.

Popularity and Convenience

Costco Stuffed Chicken Breast has gained immense popularity due to its ease of preparation and flavorful profile. Perfect for busy households, it offers a convenient meal solution with minimal effort required. The pre-seasoned and pre-stuffed design eliminates the need for extensive meal prep, making it a time-saving option for home cooks. Its availability in bulk at Costco stores adds to its appeal, providing a cost-effective solution for families and individuals alike. Additionally, the product’s versatility in cooking methods ensures it suits various preferences, further enhancing its widespread popularity and convenience.

Ingredients and Nutritional Information

Costco Stuffed Chicken Breast contains high-quality chicken, flavorful stuffing, and essential spices, offering a balanced mix of protein, vitamins, and minerals for a nutritious meal option.

Key Components of Costco Stuffed Chicken Breast

Cooking Costco Stuffed Chicken Breast involves high-quality chicken breast meat paired with a savory stuffing, typically featuring ingredients like broccoli, cheese, and spices. The chicken is carefully seasoned with salt, pepper, garlic powder, and paprika for enhanced flavor. The stuffing adds creamy and aromatic notes, creating a balanced taste. This pre-assembled dish is designed for convenience, ensuring a flavorful meal without the hassle of preparation; Each component is selected to deliver a moist and juicy texture, making it a satisfying option for home cooks seeking a delicious meal with minimal effort.

Nutritional Facts and Dietary Benefits

Cooking Costco Stuffed Chicken Breast provides a protein-rich meal with lean chicken breast as the main component. Each serving offers essential nutrients, including chicken’s natural protein for muscle repair and satisfaction. The stuffing, often featuring broccoli and cheese, adds fiber, vitamins, and calcium. This dish is relatively low in calories compared to richer meals, making it a balanced choice for health-conscious individuals. The combination of lean meat and vegetables supports a nutritious diet, while the seasonings enhance flavor without excessive sodium or fat, ensuring a guilt-free and satisfying meal option.

Preparation Steps

Thaw Costco stuffed chicken breast overnight in the fridge. Pat dry, season with garlic powder and paprika, ensuring even coverage for enhanced flavor. Lightly brush with oil for a crispy exterior.

Thawing and Safety Guidelines

Always thaw Costco stuffed chicken breast safely to prevent bacterial growth. Refrigerator thawing is recommended, placing the chicken on a leak-proof tray. For quicker thawing, submerge in cold water, changing water every 30 minutes. Never thaw at room temperature. Ensure the chicken is fully thawed before cooking to avoid uneven cooking. Pat dry with paper towels to remove excess moisture, promoting even browning. Always handle raw poultry safely, washing hands and utensils thoroughly. Proper thawing ensures food safety and optimal cooking results. Avoid refreezing once thawed to maintain quality and texture.

Seasoning Tips for Enhanced Flavor

Enhance the flavor of Costco stuffed chicken breast by seasoning thoughtfully; Drizzle with olive oil, then sprinkle with salt, pepper, garlic powder, and paprika. Add herbs like thyme or rosemary for aromatic depth. For a spicy kick, lightly dust with cayenne pepper. Marinate in your favorite seasonings for 30 minutes to an hour before cooking for added flavor. Avoid over-seasoning, as the stuffing already adds rich flavor. Let the chicken rest after seasoning to allow flavors to meld. These simple steps elevate the dish, ensuring a deliciously seasoned and moist result every time.

Cooking Methods

Cooking Costco stuffed chicken breasts can be done using various methods, including oven baking, air frying, or pan-searing. Each method ensures a juicy and flavorful result.

Oven Cooking Instructions

Preheat your oven to 350-400°F (175-200°C). Remove the Costco stuffed chicken breast from its packaging and place it in an oven-safe dish. Bake for 35-45 minutes, or until a meat thermometer inserted into the thickest part reaches 165°F (74°C). For even cooking, ensure the chicken is not crowded in the dish. If frozen, thaw overnight in the refrigerator for best results. Let the chicken rest for 5 minutes before serving to retain juices. For crispier skin, bake at 400°F (200°C) for the last 10 minutes. This method ensures a juicy, flavorful outcome every time.

Air Fryer and Pan-Seared Alternatives

For a quicker cooking method, preheat your air fryer to 390°F (200°C). Place the Costco stuffed chicken breast in a single layer, ensuring space between each piece. Cook for 15-20 minutes, flipping halfway, until the internal temperature reaches 165°F (74°C). Alternatively, pan-sear the chicken in a skillet over medium heat with a little oil. Sear for 5-7 minutes per side, then reduce heat and cover, simmering until fully cooked. Both methods yield a crispy exterior and juicy interior, offering a delicious alternative to oven baking with reduced cooking time.

Internal Temperature and Resting

Ensure the chicken reaches an internal temperature of 165°F (74°C) for food safety. Let it rest for 5-10 minutes after cooking to retain juices and achieve tender results.

Importance of Reaching 165°F

Reaching an internal temperature of 165°F (74°C) is crucial for food safety when cooking Costco Stuffed Chicken Breast. This ensures that harmful bacteria, such as Salmonella and Campylobacter, are eliminated. Undercooked chicken can pose serious health risks, especially for vulnerable individuals like the elderly, young children, and those with weakened immune systems. Additionally, cooking to this temperature guarantees that the chicken is fully cooked and safe to eat. Always use a meat thermometer to check the thickest part of the breast, avoiding the stuffing. This step is non-negotiable for a safe and enjoyable dining experience.

Resting Period for Juicy Results

A resting period is essential for achieving juicy and tender Costco Stuffed Chicken Breast. Once cooked, remove the chicken from the oven and let it rest for 5-10 minutes. This allows the juices to redistribute, ensuring the meat remains moist and flavorful. During this time, the stuffing will also retain its texture. Covering the chicken with foil during resting helps retain heat and moisture. Cutting into the chicken too soon can release valuable juices, leading to dryness. Patience here guarantees a more satisfying and enjoyable dining experience with every bite.

Serving Suggestions

Cooked Costco Stuffed Chicken Breast pairs perfectly with roasted vegetables, mashed potatoes, or a fresh salad. For a balanced meal, add garlic asparagus or sautéed spinach for a nutritious touch.

Side Dish Recommendations

Costco Stuffed Chicken Breast pairs well with a variety of sides for a balanced meal. Roasted vegetables like asparagus or Brussels sprouts add a healthy contrast to the rich chicken. Mashed potatoes provide a comforting complement, while a fresh green salad offers a lighter option. For additional flavor, sautéed spinach with garlic or roasted sweet potatoes can enhance the dining experience. These options ensure a well-rounded and satisfying meal that complements the savory flavors of the stuffed chicken breast.

Garnishing Ideas for Presentation

Elevate the visual appeal of your Costco Stuffed Chicken Breast with fresh herbs like parsley or thyme for a pop of color. A lemon wedge on the side adds brightness and freshness. Drizzle with balsamic glaze or a light sauce for a polished look. For a rustic touch, sprinkle coarse black pepper or paprika over the chicken. Garnishing with edible flowers or microgreens can add elegance, while a side of roasted vegetables arranged artfully around the plate completes the presentation. These simple touches enhance the dish’s appeal, making it perfect for both everyday meals and special occasions.

Tips for Avoiding Common Mistakes

Prevent dryness by not overcooking and using a meat thermometer to ensure internal temperatures reach 165°F. Secure stuffing with toothpicks or twine to keep it intact during cooking.

Preventing Dry Chicken

To prevent dryness, ensure chicken is not overcooked. Use a meat thermometer to confirm an internal temperature of 165°F. Baste with olive oil or butter before baking to retain moisture. Covering the chicken with foil during cooking can help trap steam and keep it juicy. Avoid overcrowding the baking dish, as this can disrupt airflow and lead to uneven cooking. Patting the chicken dry before seasoning also helps create a crispy exterior while keeping the interior moist. These simple steps ensure a tender and flavorful result every time.

Ensuring Stuffing Stays Intact

To keep the stuffing intact, secure the chicken breast with toothpicks or kitchen twine before cooking. This prevents the filling from spilling out during baking. Gently handle the chicken to avoid dislodging the stuffing. If using twine, tie it loosely to allow even cooking without squeezing out the filling. For added security, tuck the edges of the breast over the stuffing before securing. Proper sealing ensures the stuffing stays inside, resulting in a neat, evenly cooked dish with all flavors contained. This method also helps prevent messy cleanup and ensures a polished presentation.

Cooking Costco Stuffed Chicken Breast is a breeze, offering a flavorful and satisfying meal. With proper techniques, it delivers juicy results and a delighted dining experience every time.

Final Thoughts on Cooking Success

Cooking Costco Stuffed Chicken Breast is a straightforward process that ensures a delicious and satisfying meal. By following proper thawing, seasoning, and cooking techniques, you can achieve juicy, flavorful results. Always use a meat thermometer to confirm the internal temperature reaches 165°F for food safety. Allowing the chicken to rest before serving helps retain moisture and flavor. Experiment with seasonings and sides to elevate your dish. With these tips, you’ll consistently deliver a mouthwatering meal that impresses both family and guests. Happy cooking!

PDF

love dare 40 day challenge pdf

The Love Dare is a 40-day challenge designed to strengthen marriages through daily acts of unconditional love. Originating from the movie Fireproof, it provides practical steps to demonstrate commitment and affection, fostering deeper connections and understanding in relationships. Each day focuses on a specific aspect of love, encouraging participants to prioritize their partner’s needs and cultivate a stronger bond. This transformative journey helps couples build a foundation of trust, patience, and forgiveness, leading to lasting change and renewal in their relationship.

What is the Love Dare?

The Love Dare is a 40-day challenge designed to help couples strengthen their marriage through intentional, unconditional love. Based on the book by Stephen Kendrick and Alex Kendrick, it provides a daily guide for husbands and wives to demonstrate love and commitment. Each day focuses on a specific principle, such as patience, kindness, and forgiveness, encouraging participants to take actionable steps toward improving their relationship. The challenge is not just for struggling marriages but also for those seeking to deepen their connection. Available as a downloadable PDF, the Love Dare offers a practical, faith-based approach to transforming relationships through consistent effort and dedication. Its transformative power has made it a popular resource for couples worldwide.

Origin and Background

The Love Dare originated from the 2008 movie Fireproof, a faith-based film that highlights the transformative power of unconditional love in marriage. Created by Stephen Kendrick and Alex Kendrick, the challenge is rooted in biblical principles and aims to help couples rebuild and strengthen their relationships. The 40-day program was designed to coincide with the movie’s message, offering practical steps for husbands and wives to demonstrate love and commitment. Since its release, the Love Dare has gained widespread popularity, becoming a trusted resource for couples seeking to reignite their connection and deepen their understanding of what it means to truly love one another.

Purpose of the Challenge

The primary purpose of the Love Dare is to help couples fortify their marriages by practicing unconditional love and fostering meaningful communication. Each day presents a specific challenge designed to break down barriers and rebuild trust, intimacy, and connection. The challenge encourages participants to focus on their partner’s needs, demonstrating love through actions rather than words alone. By committing to the 40-day journey, couples are equipped with tools to overcome common marital struggles, such as conflict and misunderstanding. The ultimate goal is to create a stronger, healthier relationship rooted in mutual respect, patience, and forgiveness, leading to a more fulfilling and enduring marriage.

Overview of the 40 Day Challenge

The Love Dare is a structured 40-day program with daily challenges to strengthen marriages through unconditional love, fostering patience, forgiveness, and deeper connections, inspired by the movie Fireproof.

Structure of the Challenge

The Love Dare is divided into 40 daily challenges, each focusing on a specific aspect of love and relationship-building. Each day includes a dare, a Bible verse, and reflective questions. Participants are encouraged to apply the dare practically, fostering patience, kindness, and forgiveness. The structure is simple: read the dare, apply it, and reflect on the experience. This consistent approach helps couples build habits of unconditional love, strengthening their bond over time. The PDF guide provides a clear, day-by-day plan, making it easy to follow and commit to the challenge. By dedicating time each day, couples can experience transformative growth in their relationship. The structured format ensures accountability and progress, making the journey both meaningful and impactful.

Key Themes and Principles

The Love Dare revolves around unconditional love, patience, and selflessness. It emphasizes that love is a choice, not merely a feeling, and requires consistent effort. Each dare focuses on actions rather than words, teaching couples to demonstrate love through kindness, forgiveness, and understanding. The challenge underscores the importance of prioritizing your partner’s needs and cultivating a servant-like attitude. Key principles include trust, intimacy, and commitment, guiding couples to build a stronger, more joyful marriage. By focusing on these themes, participants learn to nurture their relationship through intentional, Christ-centered actions, fostering a deeper emotional and spiritual connection.

Day-by-Day Breakdown of the Challenge

The Love Dare is structured as a 40-day journey, with each day focusing on a specific aspect of love and relationships. Starting with patience, the challenge progresses through themes like kindness, forgiveness, and trust. Each dare includes practical actions to demonstrate love, such as writing heartfelt notes or performing thoughtful gestures. The daily tasks are designed to build upon one another, fostering a deeper connection and understanding between partners. By committing to the challenge, couples can experience gradual transformation in their relationship, leading to a stronger, more meaningful bond. The structure ensures consistency and gradual growth.

Day 1: Love is Patient

Day 1 of the Love Dare focuses on the foundational principle that love is patient. The challenge encourages participants to demonstrate patience by refraining from saying anything negative to their spouse for the entire day. This dare emphasizes the importance of self-control and kindness, even in difficult moments. By choosing to remain silent rather than speak hurtful words, individuals can begin to cultivate a deeper understanding of unconditional love. This first step sets the tone for the journey, reminding couples that patience is a cornerstone of a healthy and lasting relationship. The dare is simple yet profound, encouraging couples to prioritize empathy and compassion in their interactions.

Day 25: Love Forgives

Day 25 of the Love Dare focuses on the powerful principle that love forgives. This dare is often considered one of the most challenging, as it requires letting go of past hurts and resentments. Participants are encouraged to reflect on areas where they may be holding onto unforgiveness and to release those burdens. The dare emphasizes that forgiveness is not for the other person’s benefit but for the participant’s own freedom and the health of the relationship. By choosing to forgive, couples can break free from the weight of bitterness and create a foundation for healing and reconciliation. This step is a crucial part of the journey toward unconditional love and a stronger marriage.

Benefits of the Love Dare Challenge

The Love Dare fosters deeper connections, strengthens communication, and builds lasting intimacy, empowering couples to nurture a resilient and fulfilling marriage through unconditional love and commitment.

Strengthening Communication

The Love Dare Challenge emphasizes the importance of effective communication in building a resilient marriage. By focusing on daily acts of unconditional love, couples learn to express their feelings more openly and honestly; The challenge encourages participants to avoid negative words and instead use affirming language, fostering a positive and supportive environment. Each dare is designed to help partners understand each other’s needs and desires, promoting deeper emotional connections. Through consistent effort, couples develop healthier communication habits, which are essential for resolving conflicts and strengthening their relationship. This renewed focus on verbal and non-verbal communication helps create a stronger, more loving bond, enabling partners to navigate life’s challenges together with greater unity and understanding.

Building Intimacy and Trust

The Love Dare Challenge plays a significant role in fostering intimacy and trust within relationships. By committing to daily acts of unconditional love, couples create a foundation of emotional and spiritual connection. The challenge encourages partners to prioritize their spouse’s needs, demonstrating affection through selfless actions and heartfelt gestures. Forgiveness, a key theme in the challenge, helps heal past wounds, fostering a deeper sense of trust and vulnerability. As couples consistently work through the dares, they build a stronger emotional bond, allowing intimacy to flourish. This focus on intentional, loving actions creates a safe and nurturing environment, where both partners feel valued and secure, leading to a more resilient and meaningful relationship.

Success Stories and Testimonials

Couples who completed the Love Dare Challenge shared remarkable transformations, citing improved communication, renewed commitment, and strengthened relationships. Many reported reduced conflicts and deeper emotional connections, crediting the challenge for reigniting their love and fostering lasting change.

Real-Life Examples of Transformation

Many couples have experienced profound changes through the Love Dare Challenge. One couple, on the brink of divorce, found renewed hope and connection by committing to the daily dares. Another couple noted that the challenge helped them break cycles of negativity, fostering a culture of patience and understanding. A wife shared how her husband’s consistent efforts during the challenge reignited her trust and affection. These testimonials highlight how the Love Dare’s practical steps can lead to deep emotional healing and a stronger marital bond, proving that intentional acts of love can transform even the most challenging relationships.

Tips for Completing the Challenge Successfully

Commit to the challenge day by day, focusing on consistent efforts rather than perfection. Embrace each dare as an opportunity to demonstrate unconditional love and strengthen your relationship through practical actions.

Consistency and Commitment

Consistency is key to successfully completing the Love Dare 40 Day Challenge. Each day builds on the previous one, fostering growth and deeper connection. Commitment to the daily dares, even when challenging, ensures progress. It’s not about perfection but steady effort. Missing a day shouldn’t discourage you—instead, learn from it and move forward. Reflection and prayer are crucial for staying focused. By prioritizing your relationship and dedicating time each day, you’ll experience transformation. Remember, unconditional love requires perseverance. Stay committed, and let the journey shape your heart and marriage.

Common Challenges and Solutions

Participants often face challenges like impatience or negativity. Solutions include prayer, self-reflection, and open communication. Staying committed and focusing on unconditional love helps overcome obstacles effectively.

Overcoming Obstacles

Participants in the Love Dare 40 Day Challenge often encounter obstacles such as impatience, negative communication, or resistance to change. These challenges can hinder progress and discourage consistency. However, the key to overcoming them lies in self-reflection, prayer, and a willingness to grow. For instance, when faced with impatience, individuals are encouraged to pause and reflect on their actions before reacting. Open communication with your partner can also help address misunderstandings and unmet expectations. Additionally, focusing on unconditional love and committing to the process, even when it’s difficult, fosters resilience and long-term transformation; By staying dedicated and embracing the journey, couples can overcome obstacles and strengthen their relationship.

The Love Dare 40 Day Challenge offers a transformative journey, fostering unconditional love and perseverance. By completing the dare, couples can achieve lasting change, strengthening their marriage and deepening their connection. The challenge’s focus on patience, forgiveness, and trust creates a foundation for a healthier, more loving relationship. Embrace the journey and experience the profound impact of unconditional love.

Long-Term Impact

Completing the Love Dare 40 Day Challenge fosters enduring changes in relationships. By prioritizing unconditional love and consistent effort, couples establish a stronger foundation of trust and understanding. Over time, the daily practices of patience, forgiveness, and affection become ingrained, leading to a more resilient and loving marriage. The challenge not only addresses immediate issues but also equips couples with tools to navigate future challenges with grace and unity. Many participants report sustained improvement in communication and intimacy, highlighting the challenge’s lasting benefits. The journey’s impact extends beyond the 40 days, creating a lifelong commitment to nurturing and growing in love together.