Archive: April 27, 2025

noco genius charger manual

Welcome to the NOCO Genius Charger Manual, your guide to understanding and optimizing the use of this advanced battery charger and maintainer. Designed for versatility, the NOCO Genius Charger supports various battery types, including AGM, ensuring proper maintenance and extending battery life. This manual provides key insights, installation tips, and troubleshooting solutions to help you get the most out of your charger. Whether you’re a novice or an expert, this guide will help you navigate the features and capabilities of the NOCO Genius Charger with ease.

Overview of the NOCO Genius Charger

The NOCO Genius Charger is a versatile and advanced battery charger designed for maintaining and charging various types of batteries, including AGM, flooded, and lithium. Known for its smart charging technology, it automatically detects battery type and adjusts settings for optimal performance. Users praise its compatibility with deep-cycle batteries and its ability to recover deeply discharged cells. While it is highly rated for its features, some users have reported reliability issues, particularly in the first year of use. Despite this, it remains a popular choice for those seeking a reliable and efficient charging solution for automotive, marine, and recreational applications.

Key Features of the NOCO Genius Charger Manual

The NOCO Genius Charger Manual highlights several key features that make this charger a standout choice for battery maintenance. It supports multiple battery types, including AGM, flooded, and lithium, ensuring versatility for various applications. The charger is equipped with advanced charging algorithms that automatically detect and adjust to the battery’s needs, preventing overcharging and extending battery life. Additionally, it features a compact and durable design, making it easy to use in different environments. The manual also emphasizes safety, with built-in protections against short circuits, overloads, and overheating. These features, combined with its user-friendly interface, make the NOCO Genius Charger a reliable and efficient solution for maintaining batteries effectively.

Installation and Setup Guide

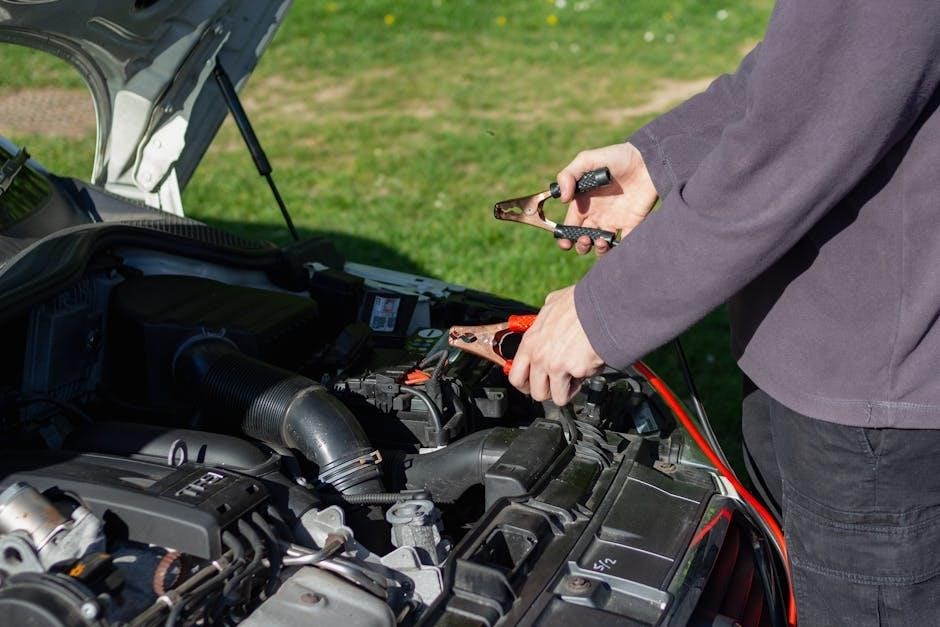
Preparation for First-Time Use

Ensure the charger is placed on a stable surface, away from flammable materials. Connect the battery terminals securely, following the manual’s wiring diagram for correct polarity.

Step-by-Step Installation Process

Mount the charger near the battery, ensuring good ventilation. Connect the positive and negative leads to the battery posts, then plug in the charger and select the appropriate mode.

To ensure safe and effective use, proper preparation is essential before using the NOCO Genius Charger for the first time. Begin by carefully reading the manual to understand its features and safety guidelines. Inspect the charger and cables for any visible damage or wear. Ensure the battery is compatible with the charger, especially for AGM batteries, which require specific settings. Clean the battery terminals to ensure a secure connection and prevent charging issues. Select the correct charging mode based on your battery type and needs. Finally, place the charger in a well-ventilated area, away from flammable materials, and plug it in only when ready to charge. Proper preparation ensures a safe and efficient charging experience.

Installing the NOCO Genius Charger is straightforward and requires minimal tools. Begin by unboxing the charger and ensuring all components are included. Locate a suitable installation site, ensuring good ventilation and protection from extreme temperatures. Mount the charger securely using the provided brackets or place it on a flat surface. Connect the positive (red) clamp to the battery’s positive terminal and the negative (black) clamp to a metal ground or the battery’s negative terminal. Plug in the charger and select the appropriate mode for your battery type using the intuitive interface. Allow the charger to initialize and monitor the charging process. Once fully charged, the charger will automatically switch to maintenance mode. Always refer to the manual for specific wiring diagrams and safety precautions.

Maintenance and Troubleshooting

Regularly inspect connections and update firmware to ensure optimal performance. Address common issues like faulty displays or charging errors by resetting the device or replacing defective parts.

Common Issues and Solutions

Users of the NOCO Genius Charger have reported several common issues. One major problem is a high failure rate within the first year of use, with some units stopping work entirely. Another issue involves improper charging with AGM batteries, leading to overcharging or undercharging. Additionally, some users have experienced connectivity problems, where the charger fails to detect the battery. To address these, ensure proper installation, avoid overloading, and regularly update the charger’s firmware. For AGM batteries, use the specific AGM mode to prevent damage. If connectivity issues arise, check cable connections and battery terminals for cleanliness. Refer to the manual for troubleshooting steps to resolve these common problems effectively.

How to Maintain the Charger for Optimal Performance

Regularly clean the charger’s vents and connectors to prevent dust buildup, which can cause overheating. Inspect the cords and connections for damage or corrosion and replace them if necessary. Store the charger in a cool, dry place when not in use to avoid exposure to extreme temperatures. Update the firmware periodically to ensure the latest features and improvements are installed. Avoid using the charger in humid environments or near flammable materials. Always unplug the charger when not in use to prevent electrical issues. Follow these maintenance tips to extend the lifespan and ensure reliable performance of your NOCO Genius Charger.

Compatibility and Usage

The NOCO Genius Charger is compatible with AGM, lead-acid, and other battery types, ensuring safe and efficient charging across various applications, from automotive to marine use cases.

Using the NOCO Genius Charger with AGM Batteries

The NOCO Genius Charger is fully compatible with AGM batteries, offering advanced charging and maintenance capabilities. For optimal performance, ensure the charger is set to the AGM mode before connecting it to your battery. This mode adjusts the charging parameters to suit the specific needs of AGM batteries, preventing overcharging and extending lifespan. Always follow the manual’s guidelines for voltage settings and connection procedures. Continuous use is safe as long as the charger is configured correctly. Monitoring the battery’s condition and adjusting settings as needed will help maintain peak performance. Refer to the manual for detailed instructions on AGM battery charging to ensure reliable and safe operation.

Compatibility with Other Battery Types

The NOCO Genius Charger is renowned for its versatility, supporting a wide range of battery types beyond AGM, including flooded, gel, and lithium batteries. This universal compatibility makes it a preferred choice for users with diverse power needs. The charger automatically adjusts its charging parameters to suit the specific battery type, ensuring optimal performance and longevity. However, some users have reported mixed experiences with certain battery types, highlighting the importance of proper configuration. Despite its adaptability, it’s crucial to refer to the manual for specific settings to avoid potential issues. Overall, the NOCO Genius Charger remains a reliable option for maintaining various battery technologies, though careful setup is essential for consistent results.

Safety Guidelines and Precautions

Always avoid overcharging, ensure proper ventilation, and keep the charger away from flammable materials. Never touch electrical components with wet hands or while standing in water.

Important Safety Tips for Operation

Safety is paramount when using the NOCO Genius Charger. Always ensure the charging area is well-ventilated to prevent hydrogen gas buildup. Avoid overcharging, as it can damage the battery and pose a fire risk. Keep flammable materials away from the charger and battery. Never connect the charger to a battery while it is still connected to the vehicle’s electrical system. Ensure the charger is properly grounded to prevent electrical hazards. Always follow the manual’s guidelines for voltage and charge settings. If you notice any malfunction, such as overheating or unusual noises, disconnect the charger immediately. Proper handling and adherence to these tips will ensure safe and effective operation of the NOCO Genius Charger.

Handling and Storage Best Practices

Proper handling and storage of the NOCO Genius Charger are crucial for maintaining its performance and longevity. Always handle the charger with clean, dry hands to prevent moisture or dirt from affecting its internal components. Store the charger in a cool, dry place, away from direct sunlight and extreme temperatures. Avoid exposing it to humidity or corrosive environments, as this can damage the electronics. When not in use, disconnect the charger from both the power source and the battery to prevent accidental charging or discharging. Clean the charger periodically with a soft cloth to remove dust or debris. For long-term storage, ensure the charger is fully charged and placed in its original packaging or a protective case to avoid scratches or damage. Following these best practices will ensure your NOCO Genius Charger remains in optimal condition for years to come.

Customer Reviews and Feedback

Users praise the NOCO Genius Charger for its reliability and compact design, while some report issues with durability and higher-than-expected failure rates in the first year of use.

Positive Experiences with the NOCO Genius Charger

Many users have praised the NOCO Genius Charger for its reliability and performance. Its compatibility with AGM batteries has been particularly highlighted, as it ensures proper maintenance and extends battery life. The charger’s ease of use and robust design have made it a favorite among car enthusiasts and professionals alike. Several customers have noted its ability to revive deeply discharged batteries, showcasing its versatility. The compact size and silent operation are also appreciated, making it ideal for long-term use. Overall, the NOCO Genius Charger has earned a reputation for delivering consistent results and providing excellent value for its price.

Negative Reviews and Common Complaints

Some users have reported issues with the NOCO Genius Charger, particularly regarding reliability and durability. A high failure rate within the first year of use has been noted, with several units requiring replacement. Additionally, certain users have expressed frustration with the charger’s performance on AGM batteries, citing inconsistent charging behavior. On platforms like Reddit, threads have emerged discussing overpriced features and subpar performance compared to competitors. While the charger is praised for its design and functionality, these negative experiences highlight areas where improvements could be made to enhance user satisfaction and overall product reliability.

The NOCO Genius Charger offers reliable performance for AGM and other battery types, with mixed user reviews highlighting both its efficiency and occasional reliability concerns.

Pros and Cons of the NOCO Genius Charger

The NOCO Genius Charger is a highly versatile and efficient battery maintenance solution, offering compatibility with various battery types, including AGM. Its compact design and user-friendly interface make it a popular choice for both professionals and hobbyists. The charger excels in maintaining battery health over long periods and features advanced charging modes. However, some users have reported a high failure rate within the first year of use. Additionally, the higher price point compared to competitors can be a drawback for some. Despite these concerns, the NOCO Genius Charger remains a reliable option for those seeking a high-quality, durable battery maintainer.

Is the NOCO Genius Charger Worth the Investment?

The NOCO Genius Charger has garnered mixed reviews, making its value a topic of debate. While some users appreciate its compatibility with AGM batteries and reliable long-term performance, others have reported issues such as a high failure rate within the first year and inconsistent quality. Positive feedback often highlights its user-friendly design and versatility across various battery types. However, negative experiences, including early malfunctions and perceived overpricing, raise concerns about its overall worth. Potential buyers should weigh these factors against their specific needs and budget to decide if the NOCO Genius Charger aligns with their expectations and offers the desired value.

club car charger manual

Safety Precautions

Always follow safety guidelines to prevent accidents. Ensure the charger is used in a well-ventilated area‚ away from water and flammable materials. Keep out of children’s reach.

1.1. General Safety Guidelines

Always follow safety guidelines to ensure safe operation. Keep the charger away from water‚ flammable materials‚ and children. Use the charger only in well-ventilated areas to prevent gas buildup. Avoid overloading electrical circuits and ensure all connections are secure. Never modify the charger or batteries‚ as this can cause malfunctions or fire hazards. Read the manual thoroughly before use and follow all warnings and instructions carefully to prevent accidents.

1.2. Battery Handling and Charging Safety

Handle batteries with care to avoid acid spills or electrical shorts. Wear protective gloves and eyewear when working with batteries. Ensure the charger is compatible with your battery type and voltage. Never charge batteries near open flames or sparks. Keep the area well-ventilated to prevent hydrogen gas buildup. Avoid overcharging‚ as it can damage the battery and pose a fire risk. Always follow the recommended charging procedures outlined in the manual.

Charger Models and Compatibility

This section covers various Club Car charger models‚ including PowerDrive 2‚ PowerDrive 3‚ and Ultra-Power II‚ ensuring compatibility with specific Club Car vehicles.

2.1. PowerDrive 2 Battery Charger

The PowerDrive 2 Battery Charger is an automatic charger designed for Club Car IQ System‚ PowerDrive‚ and PowerDrive Plus electric vehicles. It is compatible with 36-volt systems and works with lead-acid batteries. The charger features intelligent charging technology to optimize battery performance and extend lifespan. It is suitable for models like PowerDrive 19710‚ 17790-10‚ and others. Always refer to the manual for specific compatibility and usage instructions.

2.2. PowerDrive 3 Battery Charger

The PowerDrive 3 Battery Charger is an advanced‚ automatic charger designed for Club Car vehicles. It supports 36-volt systems and is compatible with IQ System‚ PowerDrive‚ and PowerDrive Plus models. This charger features enhanced charging algorithms for efficient battery maintenance and prolonged lifespan. It ensures optimal performance and safety‚ making it a reliable choice for Club Car owners. Always use as per the manual’s guidelines for best results.

2.3. Ultra-Power II and Accu-Power Chargers

The Ultra-Power II and Accu-Power chargers are high-performance options for Club Car vehicles‚ supporting 36-volt systems. They are compatible with IQ System‚ PowerDrive‚ and PowerDrive Plus models. These chargers feature intelligent charging technology‚ ensuring efficient battery maintenance and extended lifespan. They also include safety mechanisms like overheating protection and automatic shut-off. Designed for reliability‚ they provide fast and efficient charging‚ making them ideal for Club Car owners seeking advanced charging solutions. Always refer to the manual for optimal use.

Installation Instructions

Mount the charger securely on a flat surface‚ ensuring proper ventilation. Connect the electrical components as per the manual’s guidelines to ensure safe and proper functionality. Always verify compatibility and follow installation steps carefully to avoid malfunctions.

3.1. Mounting the Charger

Mount the charger on a stable‚ level surface to ensure proper operation; Use the provided mounting hardware to secure the unit firmly. Avoid locations exposed to direct sunlight‚ moisture‚ or extreme temperatures. Ensure the charger is installed in a well-ventilated area to prevent overheating. Follow the manual’s specific mounting instructions to guarantee safety and efficiency. Proper installation is crucial for optimal performance and longevity.

3;2. Electrical Connections

Connect the charger according to the wiring diagram in the manual. Use the correct gauge wires to ensure safe and efficient charging. Secure all connections tightly to prevent loose contacts. Avoid overloading circuits‚ and ensure the electrical supply matches the charger’s requirements. Double-check polarity to prevent damage or short circuits. If unsure‚ consult a qualified electrician or contact Club Car support for assistance; Proper connections are essential for safe and reliable operation.

Operating the Charger

Turn on the charger and monitor the charge level. Ensure all indicators function properly. Keep the charger away from extreme temperatures and moisture during operation.

4.1. Charging Procedures

Connect the charger to the battery‚ ensuring correct polarity. Turn on the charger and check LED indicators for charging status. Avoid extreme temperatures and moisture. Monitor charging progress and ensure the charger is placed on a stable‚ flat surface. Keep the area clear of flammable materials. Charging should only be done in well-ventilated spaces. Once charging is complete‚ disconnect the charger to prevent overcharging; Always follow the manufacturer’s guidelines for optimal performance.

4.2. Monitoring the Charging Process

Regularly monitor the charging process to ensure safe and efficient operation. Check the charger’s LED indicators for status updates and error codes. Verify that the charger is placed on a stable‚ flat surface. Ensure the charging area is well-ventilated and free from flammable materials. Monitor temperature levels to prevent overheating. Keep an eye on the battery terminals for secure connections. Follow the manufacturer’s guidelines for optimal charging performance and safety.

Maintenance and Cleaning

Regularly clean the charger unit with a soft cloth to prevent dust buildup. Avoid using liquids or abrasive materials that could damage the components. Check cables for wear and ensure all connections are secure. Perform routine maintenance checks to maintain optimal performance and safety.

5.1. Cleaning the Charger Unit

Regular cleaning is essential for maintaining the charger’s efficiency and safety. Use a soft‚ dry cloth to wipe down the exterior‚ removing dust and debris. Avoid using liquids or abrasive materials‚ as they may damage the finish or internal components. Ensure the area around the charger is clean and well-ventilated. Check for any blockages in ventilation openings to prevent overheating. Cleaning should be done with the charger unplugged to ensure safety.

5.2. Routine Maintenance Checks

Perform routine inspections to ensure optimal performance and longevity. Check the charger unit for any visible damage or wear. Inspect cables for fraying or corrosion and ensure all connections are secure. Verify that all settings and configurations are correct for your specific battery type. Regularly review the manufacturer’s maintenance schedule and follow recommended procedures. Use only approved accessories to maintain compatibility and prevent potential issues.

Troubleshooting Common Issues

Identify and resolve common issues promptly. Refer to the manual for error codes and solutions. Contact authorized dealers for complex problems or unclear symptoms. Ensure safety always.

6.1. Charging Errors and Solutions

Common charging errors include overheating‚ incorrect battery type detection‚ or poor connections. Solutions involve ensuring proper ventilation‚ using compatible batteries‚ and checking connections. Restart the charger after addressing issues. If problems persist‚ consult the manual or contact an authorized Club Car dealer for assistance. Regular maintenance and correct usage practices can help prevent recurring issues. Always refer to the troubleshooting guide for detailed solutions.

6.2. Battery Charging Problems

Common battery charging issues include overcharging‚ undercharging‚ or slow charging. Check water levels regularly‚ ensuring they are within the recommended range. Avoid using tap water‚ as impurities can damage batteries. Clean terminals to maintain proper connections. If issues persist‚ inspect the battery for worn-out cells or internal damage. For severe problems‚ consult an authorized Club Car technician. Proper maintenance and adherence to charging guidelines can prevent most battery-related issues.

Warranty Information

Club Car chargers are covered under a limited four-year warranty. This warranty applies to manufacturing defects and ensures repairs or replacements during the specified period.

7.1. Limited Four-Year Warranty Details

Club Car chargers are covered by a limited four-year warranty‚ ensuring protection against manufacturing defects; This warranty applies to properly registered units and requires compliance with usage guidelines. It does not cover damage from misuse‚ unauthorized modifications‚ or normal wear and tear. For warranty claims‚ contact an authorized Club Car dealer or distributor with proof of purchase and detailed issue description.

Environmental and Disposal Guidelines

Recycle batteries and chargers responsibly. Follow local regulations for hazardous waste disposal. Properly disconnect battery terminals before disposal to ensure safety and environmental compliance.

8.1. Proper Disposal of Batteries

Disconnect battery terminals before disposal. Use protective gear and ensure terminals are neutralized with baking soda and water. Do not dispose of batteries in regular trash. Contact local recycling centers for proper handling. Lead-acid batteries must be fully charged and sealed. Follow environmental regulations to prevent contamination. Recycling is recommended to conserve resources and reduce landfill waste. Always adhere to local hazardous waste disposal guidelines.

8.2. Recycling Recommendations

Recycle batteries and chargers at authorized facilities. Use Club Car-approved centers for safe processing. Remove terminal caps and tape terminals to prevent short circuits. Check local regulations for specific guidelines. Many communities offer collection events or drop-off locations. Recycling helps recover valuable materials and protects the environment. Participating in such programs ensures responsible disposal and sustainability. Always confirm recycling procedures with local authorities. Proper recycling supports environmental conservation efforts.

Accessories and Replacement Parts

Consult your local authorized Club Car dealer for approved accessories and replacement parts. Ensure compatibility with your charger model for optimal performance and safety.

9.1. Approved Accessories for Club Car Chargers

Use only Club Car-approved accessories to ensure compatibility and safety. These include power cables‚ mounting kits‚ and connectors designed specifically for your charger model. Approved accessories maintain optimal performance and prevent potential damage. Always consult your authorized Club Car dealer or the manual for a list of recommended parts. Using genuine Club Car accessories ensures compliance with safety standards and warranty terms.

Best Practices for Charger Usage

Optimize charger performance by following recommended charging schedules and ensuring a stable power supply. Regularly inspect cables and connections for wear or damage. Always charge in a well-ventilated area‚ away from flammable materials‚ to enhance safety and efficiency.

10.1. Charging in Different Environments

Charging performance may vary based on environmental conditions. In hot climates‚ ensure the charger is placed in a shaded‚ well-ventilated area to prevent overheating. In cold environments‚ maintain a consistent charge level and consider using a heated space if possible. For humid or dusty areas‚ regularly clean the charger to prevent moisture or debris buildup. Always follow the manufacturer’s guidelines for optimal performance in any setting.

Dealer and Distributor Information

For authorized Club Car dealers‚ visit www.clubcardealer.com or call 1-800-CLUBCAR (258-2227) for assistance with chargers‚ parts‚ and service.

11.1. Finding an Authorized Club Car Dealer

Visit www.clubcardealer.com or call 1-800-CLUBCAR (258-2227) to locate an authorized Club Car dealer. These dealers provide genuine parts‚ expert service‚ and warranty support for your charger and vehicle. Ensure your Club Car products are serviced by professionals to maintain performance and safety. Authorized dealers offer reliable solutions and genuine Club Car accessories‚ ensuring optimal functionality and longevity of your equipment.

Additional Resources

Visit the official Club Car website for comprehensive manuals‚ troubleshooting guides‚ and FAQs. Download the full manual from the support section for detailed instructions and specifications.

12.1. Downloading the Full Manual

To access the complete Club Car charger manual‚ visit the official Club Car website. Navigate to the “Support” section and search for your specific charger model. Select the appropriate manual from the results and download it in PDF format. Ensure you review the entire document for detailed instructions‚ safety guidelines‚ and troubleshooting tips. Additional resources‚ such as troubleshooting guides and FAQs‚ are also available for reference.

tales of a tethered bird guide

Tales of a Tethered Bird is a challenging game mode in Honkai: Star Rail’s Pure Fiction series, offering unique mechanics, strategic depth, and rewarding progression opportunities.

1.1 Overview of the Game Mode

Tales of a Tethered Bird is a dynamic and challenging game mode within Honkai: Star Rail’s Pure Fiction series. Designed to test players’ strategic skills, it features multiple nodes, each with unique enemy weaknesses and mechanics. Players must navigate through stages, leveraging team composition and adaptive strategies to overcome obstacles. The mode introduces distinctive elements like DoT mechanics and buff effects, such as Libel and Rumor, which enhance gameplay depth. With a focus on progression and rewards, Tales of a Tethered Bird offers a thrilling experience that requires careful planning and execution to succeed.

1.2 Key Features and Objectives

Tales of a Tethered Bird features a unique progression system, with 12 rewards available upon completion. Key objectives include clearing multiple stages, each with specific node challenges and enemy weaknesses. Players must strategically utilize team compositions and buff effects like Libel and Rumor to overcome adversaries. The mode emphasizes adaptability, requiring players to exploit elemental weaknesses and manage DoT mechanics effectively. A strong focus is placed on team synergy and tactical decision-making, with the ultimate goal of reaching the final stage, which demands high-level characters and optimized gear. The game mode rewards meticulous planning and mastery of its core mechanics.

Challenges and Nodes in Tales of a Tethered Bird

Tales of a Tethered Bird introduces two primary nodes: Node 1 focuses on Wind and Fire weaknesses, while Node 2 emphasizes Lightning and Physical vulnerabilities, requiring strategic exploitation.

2.1 Node 1: Wind and Fire Weaknesses

Node 1 in Tales of a Tethered Bird focuses on enemies with Wind and Fire elemental weaknesses, requiring players to strategically utilize elemental damage to exploit these vulnerabilities effectively. Teams should prioritize characters with strong Wind and Fire attacks to maximize damage output. Additionally, leveragingbuff effects like Libel and Rumor can enhance elemental damage, making battles more manageable. Players must adapt their compositions to ensure high elemental mastery, as this node’s challenges hinge on efficiently targeting these specific weaknesses to progress smoothly through the stages.

2.2 Node 2: Lightning and Physical Weaknesses

Node 2 introduces enemies primarily vulnerable to Lightning and Physical attacks, shifting the strategic focus to exploiting these elemental and damage type weaknesses. Players should deploy characters specializing in Lightning or Physical damage to optimize their team’s effectiveness. Additionally, Area of Effect (AoE) abilities become crucial due to the node’s enemy formations. While DoT mechanics are less emphasized here, Wind Shear can still be applied to control crowds. Balancing damage output with survivability is key, as enemies may possess high defense or retaliation mechanics. Utilizing buffs like Libel or Rumor can further enhance team performance in overcoming this challenging node.

Rewards and Progression

Tales of a Tethered Bird offers 12 diverse rewards, with the final stage requiring level , high-level Traces, and strong Relics for progression.

3.1 All 12 Rewards in Tales of a Tethered Bird

Tales of a Tethered Bird offers 12 exclusive rewards, including valuable Relics, high-tier Traces, and rare resources. These rewards are unlocked as players progress through stages, with each stage granting specific items. The rewards are tailored to enhance character strength and support team composition. Players can expect to earn essential materials for upgrading equipment and enhancing abilities, making these rewards crucial for both F2P and investment teams. The variety ensures that all players benefit, regardless of their progression level or strategy.

3.2 Final Stage Requirements

To conquer the final stage of Tales of a Tethered Bird, players must assemble a team of level equipped with high-level Traces and Relics. Enemies in this stage possess increased resistance and deal significant damage, requiring precise strategy and synergy. Teams must effectively utilize DoT mechanics and buff effects to overcome the intense challenge. A well-rounded composition, balancing damage output and survivability, is essential for success. Meeting these requirements ensures players can tackle the demanding final stage and claim the mode’s ultimate rewards.

Team Composition and Strategy

Effective team composition focuses on balancing damage dealers, supports, and tanks, leveraging buff effects like Libel and Rumor to maximize efficiency against elemental weaknesses.

4.1 F2P Team Setup

For a free-to-play team, Serval, Dan Heng, Yukong, and Lynx are excellent choices. Serval provides consistent damage and crowd control, while Dan Heng offers healing and support. Yukong excels at inflicting status effects like Wind Shear, and Lynx brings versatility with her abilities. This team composition balances damage output, survivability, and utility, making it ideal for progressing through the challenges without heavy investment. Focus on leveling these characters and equipping them with suitable relics to enhance their performance in combat.

4.2 Investment Team Setup

An investment team setup for Tales of a Tethered Bird focuses on top-tier, high-investment units like E6S, optimized for maximum damage and utility. Key characters include Serval for her devastating attacks, Dan Heng for versatile support, and Yukong to inflict critical status effects. Lynx adds mobility and crowd control, making her invaluable. High-level Traces and advanced relics are essential to enhance their abilities. This team excels in later stages, particularly against nodes requiring specific weaknesses, ensuring a smooth progression through the mode’s challenging content. Proper synergy and strategy are crucial to maximize effectiveness in high-difficulty encounters.

Buff Effects and Mechanics

Tales of a Tethered Bird features unique buff effects like Libel and Rumor, enhancing gameplay. These mechanics, including DoT effects, play a crucial role in strategy and progression.

5.1 Libel, Rumor, and Other Buff Effects

Libel, Rumor, and other buff effects in Tales of a Tethered Bird provide unique enhancements, boosting team performance. Libel increases damage output, while Rumor enhances survivability. These effects, along with additional buffs, create strategic depth, allowing players to tailor their approach to specific challenges. Proper utilization of these buffs is key to overcoming difficult nodes and enemies, making them a cornerstone of successful gameplay in this mode.

5.2 DoT Mechanics and Wind Shear

DoT mechanics in Tales of a Tethered Bird play a pivotal role, with effects like Wind Shear dealing continuous damage over time. While teams without innate DoT abilities can still apply Wind Shear, having characters with DoT capabilities significantly enhances damage output. This mechanic is particularly effective against enemies with specific weaknesses, making it a strategic asset for clearing challenging nodes. Properly leveraging DoT effects ensures sustained pressure on enemies, maximizing overall efficiency in combat.

Walkthrough and Guides

This section provides detailed strategies for clearing stages, optimal team setups, and effective buff utilization, ensuring players can navigate the game mode efficiently and successfully.

6.1 Stage 3 and 4 Clearing Guide

Clearing Stages 3 and 4 in Tales of a Tethered Bird requires a well-rounded team and strategic planning. Focus on using AOE attacks to manage wave enemies effectively. Utilize Wind Shear to inflict consistent damage, especially against fire-weak foes in Stage 3. For Stage 4, prioritize crowd control and survivability due to increased enemy aggression. Ensure your team includes high-stamina characters and leverage buff effects like Libel or Rumor to enhance damage output. Properly timing ultimate abilities and managing resources will be crucial for success in these challenging stages.

6.2 Best Buff Effect to Use

The best buff effect in Tales of a Tethered Bird depends on the stage and enemy weaknesses. Libel excels against Wind and Fire enemies, amplifying damage significantly. Rumor, however, offers consistent damage across all types, making it versatile for mixed encounters. For earlier stages, Libel is ideal due to its high effectiveness against common elemental weaknesses. In later stages, especially the final phase, Rumor’s balanced damage output proves invaluable. Choose Libel for Node 1 and Rumor for Node 2 and beyond to maximize efficiency and adapt to varying enemy compositions throughout the challenge.

craftsman table saw instruction manual

The Craftsman table saw is a versatile and powerful tool designed for precise woodworking. With its robust 2.5 HP motor and 10-inch blade‚ it delivers smooth cuts at 5000 RPM. Ideal for both professionals and DIYers‚ it offers a durable design‚ portability‚ and essential safety features. This manual provides comprehensive guidance on safe operation‚ maintenance‚ and troubleshooting to ensure optimal performance.

Purpose and Scope of the Manual

This manual is designed to provide users with a comprehensive guide for the safe and effective operation of the Craftsman table saw. It covers essential safety precautions‚ product specifications‚ and detailed instructions for assembly‚ operation‚ and maintenance. The purpose of this manual is to ensure that users understand how to properly use and care for their table saw to achieve optimal performance and longevity. By following the guidelines outlined in this manual‚ users can minimize risks and maximize the efficiency of their woodworking projects.

The manual is organized into clear sections‚ addressing topics such as pre-operation checks‚ safety rules‚ product features‚ and troubleshooting. It also includes a parts list and warranty information to assist users in case of repairs or replacements. Whether you are a seasoned professional or a DIY enthusiast‚ this manual serves as a vital resource for understanding your Craftsman table saw. Always refer to this manual before operating the saw to ensure compliance with safety standards and proper usage techniques. By adhering to the instructions provided‚ you can enjoy a safe and productive woodworking experience. This manual is your go-to guide for everything related to your Craftsman table saw‚ from initial setup to ongoing maintenance.

Safety Instructions

Always wear safety glasses and a dust mask when operating the saw. Keep loose clothing and jewelry away from moving parts. Ensure the blade guard and anti-kickback pawls are in place during use. Never reach over the blade or insert materials by hand. Keep children and bystanders at a safe distance. Follow all safety rules to minimize injury risks. Read the manual thoroughly before operation.

Pre-Operation Checks and Safety Rules

Before operating the Craftsman table saw‚ perform a thorough pre-operation check to ensure safety and optimal performance. Inspect the blade guard‚ anti-kickback pawls‚ and splitter to confirm they are properly installed and functioning. Check the saw blade for sharpness and damage; a dull or damaged blade can cause kickback. Ensure the rip fence is aligned and securely locked to prevent movement during operation.

Clear the table surface of debris‚ dust‚ and loose materials to avoid interference. Verify that the power cord is undamaged and securely connected. Always wear safety glasses‚ a dust mask‚ and avoid loose clothing or jewelry that could get caught in moving parts. Keep bystanders‚ especially children‚ at a safe distance from the workspace.

Never operate the saw when fatigued or under the influence of medication. Ensure proper lighting in the work area to maintain visibility. Familiarize yourself with the saw’s controls‚ such as the on/off switch and blade height adjustment. Always use a push stick or other safety devices when cutting narrow or small pieces to maintain control and avoid hand contact with the blade.

Read and follow all safety rules outlined in the manual. Failure to adhere to these guidelines increases the risk of injury or equipment damage. Regularly maintain the saw‚ lubricate moving parts‚ and replace worn components to ensure reliable operation. By following these pre-operation checks and safety rules‚ you can minimize risks and achieve precise‚ professional-quality cuts.

Product Specifications and Features

The Craftsman table saw is designed for precision and durability‚ offering a range of features to meet the needs of both professionals and hobbyists. With a powerful 2.5 HP motor‚ it delivers a maximum blade speed of 5000 RPM‚ ensuring smooth cuts through various materials. The saw features a 10-inch blade‚ capable of handling a wide range of woodworking tasks‚ from ripping lumber to making precise crosscuts.

One of the standout features is the robust cast iron table‚ which provides stability and reduces vibration for accurate cuts. The table also includes extendable cast iron wings‚ offering additional workspace when needed. The quick-release rip fence allows for easy adjustments‚ while the integrated miter gauge ensures precise angled cuts. Safety is a priority‚ with a blade guard‚ anti-kickback pawls‚ and a splitter to protect the user during operation.

Portability is enhanced with the optional leg set‚ making it easy to transport the saw to different work sites. The saw also features a 4-inch dust collection port‚ which connects to a vacuum or dust collection system‚ keeping the workspace clean and reducing airborne debris. Additional features include a convenient on/off switch and a blade height adjustment mechanism for fine-tuning cuts. With its combination of power‚ precision‚ and versatility‚ the Craftsman table saw is an essential tool for any woodworking project.

Assembly and Installation

Begin by unboxing and inventorying all parts‚ ensuring nothing is damaged or missing. Attach the leg set to the table saw for stability. Align and secure the rip fence and miter gauge according to the manual. Connect the dust collection port and ensure all safety guards are properly installed. Refer to the manual for detailed assembly steps.

Unboxing and Inventory of Parts

Upon receiving your Craftsman table saw‚ carefully unpack all components from the box. Verify the integrity of each part to ensure no damage occurred during shipping. The package should include the table saw unit‚ leg set‚ rip fence‚ miter gauge‚ blade guard‚ splitter‚ anti-kickback pawls‚ and mounting hardware. Additionally‚ check for the operator’s manual and any warranty information. If any items are missing or damaged‚ contact Sears Parts Direct immediately for assistance. Organize the parts according to the manual’s instructions to streamline the assembly process. Familiarize yourself with each component’s purpose before proceeding with installation. This step ensures that the assembly process is efficient and reduces the risk of errors. Once all parts are accounted for and inspected‚ you can proceed to the next phase of assembling and installing your table saw.

Operating the Table Saw

Before starting‚ ensure the saw is properly assembled and all safety features are in place. Plug in the saw and turn it on‚ allowing it to reach full speed before making cuts. Use the rip fence or miter gauge for precise cuts‚ and always maintain control of the workpiece. Keep loose clothing tied back and avoid distractions while operating. The 2.5 HP motor delivers consistent power for smooth cutting. Always use the blade guard and splitter to prevent kickback. For crosscuts‚ align the miter gauge with the blade‚ and for rip cuts‚ set the rip fence to the desired width. Maintain a steady feed rate and never reach over the blade. Turn off the saw and allow the blade to stop completely before leaving it unattended. Regularly inspect the blade and accessories for wear and replace them as needed to ensure optimal performance and safety.

Starting the Saw and Basic Operations

To start the Craftsman table saw‚ ensure the area is clear and all safety guards are in place. Plug in the saw and allow it to reach full speed before making any cuts. For basic operations‚ align the material with the blade using the rip fence or miter gauge. Always maintain firm control of the workpiece and avoid wearing loose clothing that could get caught in the blade.

For rip cuts‚ set the rip fence to the desired width and gently push the material through the blade. For crosscuts‚ use the miter gauge to guide the material at the correct angle. Never reach over the blade or make cuts without proper support. Keep your hands away from the blade at all times and use a push stick or other safety accessory if necessary.

After completing a cut‚ turn off the saw and allow the blade to stop completely before leaving it unattended. Regularly inspect the blade for dullness or damage and replace it as needed. Always follow the manufacturer’s recommendations for blade types and sizes to ensure optimal performance. By adhering to these basic operating procedures‚ you can achieve precise and safe results with your Craftsman table saw.

step by step cross stitch symbols guide

Cross stitch symbols are essential for guiding stitchers through patterns. They appear on charts‚ representing specific stitches and colors‚ ensuring precise fabric and thread placement.

1;1 Importance of Symbols in Cross Stitch

Cross stitch symbols are the cornerstone of pattern interpretation. They serve as a visual language‚ guiding stitchers through complex designs. Each symbol represents a specific stitch or color‚ ensuring precision and accuracy. By following these symbols‚ crafters can bring designs to life‚ maintaining the intended aesthetic. They eliminate guesswork‚ making the craft accessible to both beginners and experienced stitchers. Their standardized use ensures consistency across patterns‚ fostering creativity and enjoyment in the stitching process.

1.2 Brief Overview of Common Symbols

In cross stitch‚ symbols are standardized for clarity. The most common include the full cross stitch‚ represented by an “X‚” and the half stitch‚ shown as a diagonal line. Backstitches are depicted as straight or curved lines‚ while specialty stitches like French knots are indicated by small circles. These symbols are universally recognized‚ ensuring consistency and ease of use for stitchers of all skill levels‚ from beginners to experts.

Understanding the Chart

A cross stitch chart is a visual grid representing your design. Symbols and colors guide stitch placement‚ ensuring accuracy. The chart maps directly to fabric‚ helping you align stitches precisely for a flawless finish.

2.1 How to Read a Cross Stitch Chart

A cross stitch chart is a grid-based design where each symbol corresponds to a specific stitch or color. The chart mirrors the fabric layout‚ with each square representing a stitch. Symbols are decoded using the color key‚ which matches them to thread colors. Start by locating the center mark on the chart and align it with the fabric’s center. Follow the grid row by row‚ translating symbols into stitches to replicate the design accurately.

2.2 Comparing the Chart to the Fabric

Each square on the chart corresponds to a stitch on the fabric. Use the center mark on the chart to align with the fabric’s midpoint. The symbols guide thread color selection‚ while the grid ensures accurate placement. For Aida fabric‚ each weave represents a stitch‚ simplifying the process. Regularly compare your stitching to the chart to maintain consistency and accuracy in your design.

The Colour Key

The colour key is a crucial reference on the chart‚ matching symbols to specific thread colors and brands like DMC or Anchor‚ ensuring accurate stitching.

3.1 Matching Symbols to Thread Colors

The colour key provides a clear guide to match symbols with specific thread colors. Each symbol corresponds to a particular shade‚ ensuring accurate stitching. This section explains how to identify and pair symbols with their respective threads‚ making the stitching process seamless and error-free. Proper matching ensures the final design looks as intended‚ maintaining consistency and visual appeal throughout the project.

3.2 Understanding Thread Brands (DMC‚ Anchor)

DMC and Anchor are leading thread brands in cross stitching. Each brand offers unique color palettes and coding systems. The colour key specifies which brand to use‚ ensuring consistency. DMC codes are numerical‚ while Anchor uses letters. Using the same brand throughout your project guarantees accurate color representation‚ as shades may vary between brands. This consistency is vital for achieving the desired visual effect in your stitching.

Fabric and Thread Basics

Fabric choices like Aida‚ Evenweave‚ and Linen vary in texture and stitch count. Threads come in diverse colors and materials‚ with organization key for efficient stitching.

4.1 Choosing the Right Fabric (Aida‚ Evenweave‚ Linen)

Selecting the appropriate fabric is crucial for cross stitch. Aida cloth is ideal for beginners due to its stiff‚ even weave‚ making it easy to handle and count stitches. Evenweave fabric offers a softer texture and is suitable for more experienced stitchers. Linen‚ with its natural‚ textured appearance‚ is perfect for traditional designs. Each fabric type affects the final look and stitching experience‚ so choosing the right one ensures a successful project.

4.2 Thread Preparation and Organization

Proper thread preparation ensures a smooth stitching process. Begin by sorting and organizing threads by color‚ using bobbins or cards. Label each thread to avoid confusion. Cut threads into manageable lengths to prevent tangles. Store threads in a designated container or on a thread holder. Keeping threads organized saves time and reduces frustration‚ allowing you to focus on stitching efficiently and enjoying the creative process.

Basic Cross Stitch Symbols

Basic cross stitch symbols include the full cross‚ half stitch‚ and backstitch. These foundational symbols guide stitchers in creating essential patterns and designs on fabric.

5.1 The Full Cross Stitch

The full cross stitch is the most common symbol‚ represented by an “X” on charts. It is stitched by creating two diagonal lines that intersect in the center of the fabric. This stitch is fundamental to cross stitching and forms the basis of most designs. To stitch it properly‚ start from the center of your project and work outward‚ ensuring even tension. Using a hoop or frame can help maintain stability and consistency in your stitches. This stitch is essential for beginners to master‚ as it is widely used in patterns and designs.

5.2 The Half Stitch

The half stitch is a diagonal stitch‚ represented by a single line on the chart. It is stitched from one corner of the fabric square to the opposite corner. This stitch is commonly used for outlining designs or adding detail. To create a half stitch‚ insert the needle diagonally and pull the thread gently. It is less bulky than the full cross stitch‚ making it ideal for intricate patterns. Stitchers often use it to add texture and depth to their work without overwhelming the design. Proper tension ensures the stitch lies flat and even on the fabric.

5.3 The Backstitch

The backstitch is a straight line used for outlining designs or creating text. It is represented by a straight line on the chart. To stitch‚ bring the needle up at the starting point‚ insert it one fabric square away‚ and pull the thread. This stitch is often used for delicate details and borders. Unlike the cross stitch‚ it does not form an “X” shape; The backstitch is ideal for creating sharp‚ clean lines in your design. It is commonly used in combination with other stitches for added definition and clarity in patterns. Proper tension ensures the stitch lies flat and even on the fabric‚ enhancing the overall appearance of the design.

Specialty Stitches and Symbols

Specialty stitches like French knots and satin stitches add unique details. French knots create small‚ textured dots‚ while satin stitches form smooth‚ shiny areas. Both enhance designs.

6.1 French Knots

French knots are small‚ textured stitches used to add detail. They are created by wrapping thread around the needle and inserting it into the fabric. On charts‚ they’re often represented by a small dot or unique symbol. This stitch is ideal for eyes‚ centers of flowers‚ or any area needing a subtle accent. Proper tension is key to ensure the knot sits neatly on the fabric surface‚ enhancing the design without puckering the material. Mastery of French knots adds depth and dimension to cross stitch projects‚ making them visually appealing and professional-looking. Practice is essential to achieve consistent results.

6.2 Satin Stitch

The satin stitch is a smooth‚ shiny stitch used to cover large areas evenly. It is created by making straight‚ parallel stitches in the same direction. On charts‚ it is often represented by a series of diagonal lines or a unique symbol. This stitch is ideal for creating bold‚ solid blocks of color and is commonly used in backgrounds or large design elements. Proper tension is crucial to maintain the fabric’s stability and ensure a professional finish. The satin stitch adds a sleek‚ polished look to cross stitch projects‚ making it a versatile choice for various designs. However‚ it can be challenging to keep the stitches even‚ so patience and practice are necessary to master this technique effectively.

Reading Chart Symbols

Understanding and interpreting cross stitch symbols is crucial for accurate stitching. Each symbol corresponds to specific stitches and colors‚ guiding the stitcher through the pattern systematically.

7.1 Identifying Symbols on the Chart

Each cross stitch chart uses unique symbols to represent stitches and colors. These symbols‚ often small shapes or letters‚ are arranged in a grid to mirror the fabric. The color key helps match symbols to specific thread colors‚ ensuring accuracy. Common symbols include the full cross stitch (X)‚ half stitch (½X)‚ and backstitch (straight line). Recognizing these symbols is the first step in translating the chart into stitches on fabric.

7.2 Translating Symbols into Stitches

Translating symbols into stitches involves mapping each symbol to its corresponding stitch type and color. Start by locating the center of the chart and work outward. Use the color key to match symbols to thread colors‚ ensuring accuracy. Each full cross stitch symbol (X) translates to a full X-shaped stitch on fabric. Half stitches (½X) are partial Xs‚ while backstitches are straight lines. Count threads carefully to align symbols with fabric grid lines‚ maintaining even tension for precise results. Patience and practice refine this skill.

Step-by-Step Stitching Process

Begin by finding the center of the chart and aligning it with the fabric. Start your first stitch‚ then follow the chart progressively‚ row by row.

8.1 Starting Your First Stitch

To begin‚ locate the center of the chart and align it with the fabric’s center. Thread your needle and tie a waste knot. Bring the needle up through the fabric at the starting point indicated on the chart. Gently pull the thread to secure it‚ leaving a small loop at the back for easy removal later. This marks the beginning of your stitching journey.

8.2 Following the Chart Progressively

Once the first stitch is complete‚ follow the chart systematically. Work in small sections‚ using the color key to match symbols with threads. Maintain consistent fabric tension and count stitches carefully. Use a hoop or magnifier for clarity. Mark completed areas on the chart to track progress. Organize threads by color to avoid tangles and ensure a smooth stitching experience as you bring your design to life.

Common Mistakes and Troubleshooting

Common errors include miscounting stitches‚ misaligning patterns‚ and using incorrect thread colors. Troubleshoot by referencing the chart‚ using magnifiers‚ and carefully frogging stitches to correct mistakes.

9.1 Mistakes in Reading Symbols

Common mistakes include miscounting stitches‚ misaligning patterns‚ and using incorrect thread colors. Overlooking small symbols like half-stitches or backstitches can distort the design. Misinterpreting symbols leads to misplaced stitches‚ affecting the final result. To avoid errors‚ use a magnifier for clarity and mark completed symbols with a marker. Double-checking each symbol against the color key ensures accuracy and prevents frustrations during stitching. Attention to detail is key to achieving the desired outcome.

9.2 Fixing Errors in Your Stitching

Fixing errors early prevents larger issues. Gently remove mistaken stitches with scissors or a tapestry needle. Use a magnifier to spot errors and recount symbols. Re-stitch carefully‚ ensuring alignment with the chart. Regularly checking your work helps catch mistakes. Maintain fabric tension to avoid distortion. Patience is key; fixing errors is part of the stitching process. Learn from mistakes to improve future stitching accuracy and enjoyment of your project.

Cross stitch is a rewarding craft requiring patience and practice. Mastering symbols ensures precise stitching‚ leading to beautiful creations and a sense of accomplishment with each project.

10.1 Final Tips for Mastering Cross Stitch Symbols

Consistently practice reading charts and stitching to build confidence. Keep your work clean to avoid confusion. Use good lighting to see symbols clearly. Refer to the colour key often for accuracy. Take breaks to prevent eye strain and maintain focus. Celebrate small progress to stay motivated. Join stitching communities for support and tips. Happy stitching!

PDF

letrs training manual pdf

The LETRS Training Manual PDF is a comprehensive guide for educators, focusing on Structured Literacy and evidence-based practices to teach reading and spelling effectively.

Overview of LETRS

LETRS (Language Essentials for Teachers of Reading and Spelling) is a professional development program designed for educators. It focuses on structured literacy, providing evidence-based strategies for teaching phonics, word study, and reading comprehension. The program is tailored for teachers of pre-K through fifth-grade students, emphasizing practical application in the classroom. It includes a detailed scope and sequence, ensuring a comprehensive approach to literacy instruction.

Importance of the Training Manual

The LETRS Training Manual is a vital resource for educators, offering practical tools and evidence-based strategies to enhance reading instruction. It supports teachers in developing expertise, ensuring alignment with Structured Literacy principles. The manual bridges theory and practice, providing actionable steps to improve student literacy outcomes effectively.

The LETRS Training Manual is divided into volumes, with Volume 1 focusing on phonology and Volume 2 on comprehension. It includes PLC support, bridge-to-practice activities, and structured guidance for educators.

PLC Support for K-5 LETRS Training

PLC Support for K-5 LETRS Training provides structured guidance for coaches and administrators to lead professional learning communities. Each session includes an overview of learning, bridge-to-practice reviews, and application and coaching for all teachers, ensuring effective implementation of LETRS content.

Volume 1 and Volume 2 Details

Volume 1 focuses on phonological awareness and word recognition, while Volume 2 covers comprehension and vocabulary. Each volume is divided into units, with Volume 1 requiring 15.5 hours and Volume 2 requiring 12.5 hours of structured professional development.

LETRS emphasizes phonological awareness as the foundation for reading, distinguishing it from phonics, which applies sound awareness to decode words, both crucial for structured literacy instruction.

Key Concepts

Phonological awareness and phonics are foundational skills in LETRS, with phonological awareness focusing on sound recognition and phonics on applying these sounds to decode words, both essential for structured literacy instruction and effective reading development in students.

Time Commitment

LETRS training requires a structured time investment, with Year 1 (Units 1-4) focusing on phonology for 15.5 hours and Year 2 (Units 5-8) covering comprehension for 12.5 hours, ensuring a comprehensive understanding of literacy instruction.

Bridge-to-Practice Activities provide opportunities for educators to apply evidence-based practices, enhancing their ability to deliver effective literacy instruction through structured exercises and real-world case studies.

Description

Bridge-to-Practice Activities are designed to help educators apply evidence-based content and best practices in real classroom scenarios. These activities include practical tasks and case studies, enabling teachers to connect theoretical knowledge with hands-on instructional strategies effectively.

Case Studies and Applications

Case studies within the LETRS Training Manual provide real classroom examples, enabling educators to bridge theory and practice. These practical scenarios cover diverse educational settings, offering insights into effective instruction and reinforcing the application of evidence-based strategies for teaching reading and spelling.

Maximize the LETRS manual by engaging in active learning, applying evidence-based strategies, and reflecting on teaching practices to enhance reading instruction and student outcomes effectively.

Active Learning Strategies

Engage with interactive activities, group discussions, and hands-on tasks to apply LETRS concepts. Practice teaching strategies, reflect on outcomes, and adapt methods to meet student needs effectively in real classroom settings.

Collaboration with Educators

Collaboration with educators is a key component of LETRS training, fostering professional growth through shared knowledge and strategies. Engage in discussions, share best practices, and solve challenges together to enhance teaching skills and student outcomes effectively.

Digital Access to LETRS Resources

The LETRS Training Manual and resources are available digitally, including eBooks and downloadable PDFs, accessible through the LETRS learning platform for convenient access and offline use.

Availability of eBooks

LETRS resources, including the training manual, are available as eBooks through the LETRS learning platform. Educators can access downloadable PDFs, ensuring convenient offline use and supporting professional development in structured literacy training.

Downloadable PDFs

LETRS training resources are available as downloadable PDFs, allowing educators to access materials offline. These PDFs include manuals, worksheets, and appendices, such as Appendix B, which outlines the scope and sequence for word study, reading, and spelling.

LETRS Scope and Sequence

LETRS Scope and Sequence outlines the progression of literacy skills, from phonological awareness to advanced reading and spelling, ensuring a comprehensive approach to structured literacy instruction.

Word Study, Reading, and Spelling

The LETRS manual integrates word study, reading, and spelling through structured literacy, emphasizing phonics and phonological awareness. Practical activities and real-world applications help educators teach these skills effectively, aligning with research-based methods by Louisa C. Moats and Carol A. Tolman.

Authors and Contributors

Louisa C. Moats and Carol A. Tolman are key authors, bringing expertise in literacy and Structured Literacy. Contributors include educators and researchers, ensuring evidence-based content tailored for teachers of pre-K through third-grade students, aligning with the LETRS Suite’s goals.

Application of LETRS in the Classroom

LETRS equips teachers to deliver phonics through small-group activities, ensuring personalized instruction. It integrates reading and literacy areas, transforming classroom practices for effective student learning outcomes.

Implementing Structured Literacy

LETRS provides educators with tools to implement Structured Literacy, emphasizing phonological awareness and systematic phonics. It offers evidence-based methods to teach reading and spelling, ensuring aligned instruction and improved student outcomes through explicit skills progression and targeted practice activities.

Tailored Instruction

LETRS enables teachers to deliver tailored instruction by addressing individual student needs through small-group activities and differentiated strategies. This approach ensures personalized learning, aligning with the structured literacy framework to support diverse learners across various grade levels effectively.

The LETRS Training Manual PDF equips educators with evidence-based strategies and structured literacy techniques, empowering them to enhance reading instruction and foster student success effectively.

The LETRS Training Manual PDF provides a detailed roadmap for teaching reading and spelling, emphasizing phonological awareness, phonics, and structured literacy. It offers practical strategies, case studies, and digital resources, supporting educators in delivering effective, evidence-based instruction tailored to diverse student needs.

Final Thoughts on Professional Development

The LETRS Training Manual PDF is a transformative tool for professional development, equipping educators with evidence-based strategies to enhance literacy instruction. By engaging in active learning and collaboration, teachers can refine their skills, ultimately improving student reading and spelling outcomes effectively.

The LETRS Training Manual PDF is a comprehensive guide for educators, focusing on Structured Literacy and evidence-based practices to enhance reading and spelling instruction effectively.

1.1 Overview of LETRS

LETRS (Language Essentials for Teachers of Reading and Spelling) is a professional development program designed to equip educators with the knowledge and skills to effectively teach reading, spelling, and literacy. It focuses on Structured Literacy and evidence-based practices to support student learning across all grade levels.

1.2 Importance of the Training Manual

The LETRS Training Manual serves as a dynamic tool for educators, offering evidence-based strategies and practical applications to enhance reading instruction. It supports active learning, collaboration, and tailored approaches, ensuring teachers are well-equipped to meet diverse student needs effectively.

Structure of the LETRS Training Manual

The LETRS Training Manual is divided into two volumes, providing structured guidance for K-5 educators. Volume 1 focuses on foundational skills, while Volume 2 addresses advanced literacy strategies.

2.1 PLC Support for K-5 LETRS Training

PLC Support for K-5 LETRS Training provides structured guidance for coaches and administrators, covering each Unit and Session in Volume 1. It includes Overview of Learning, Bridge to Practice Review, and Application and Coaching for All, ensuring comprehensive professional development.

2.2 Volume 1 and Volume 2 Details

Volume 1 focuses on phonology and word study, requiring 15.5 hours of training, while Volume 2 covers comprehension and vocabulary, needing 12.5 hours. Both volumes provide structured lessons and practical activities to enhance teaching skills and student outcomes in literacy.

Phonics and Phonological Awareness in LETRS

LETRS emphasizes phonological awareness as understanding sounds in words and phonics as applying that knowledge to decode text, forming the foundation of literacy instruction.

3.1 Key Concepts

Phonological awareness and phonics are foundational skills in LETRS, focusing on sound manipulation, letter-sound relationships, and decoding. Key concepts include letter naming, sound segmentation, and blending, providing teachers with practical strategies to enhance literacy instruction and student reading proficiency effectively in the classroom setting.

3.2 Time Commitment

LETRS training requires a structured time investment, with Year 1 (Units 1-4 on Phonology) needing 15.5 hours and Year 2 (Units 5-8 on Comprehension) requiring 12.5 hours. This includes bridge-to-practice activities, ensuring practical application of evidence-based strategies in daily instruction, enhancing teacher preparedness and student outcomes effectively.

Bridge-to-Practice Activities

Bridge-to-Practice activities allow teachers to apply evidence-based content and best practices to daily instruction, ensuring practical implementation of LETRS training in real classroom scenarios effectively.

4.1 Description

Bridge-to-Practice activities provide practical opportunities for teachers to apply LETRS training content directly in the classroom, ensuring alignment with evidence-based instruction and fostering effective student learning through real-world application and reflection.

4.2 Case Studies and Applications

Case studies within the LETRS manual provide real-life teaching scenarios, enabling educators to analyze and discuss effective instruction. These applications help teachers connect theoretical concepts to practical classroom strategies, ensuring they can adapt methods to meet diverse student learning needs effectively.

Utilizing LETRS Manuals Effectively

The LETRS manual is designed for active learning, offering practical strategies and activities. Engaging with the content enhances teaching skills and fosters collaboration among educators.

5.1 Active Learning Strategies

Active learning strategies in the LETRS manual include practical activities and reflection. Teachers engage in hands-on exercises, apply evidence-based practices, and collaborate to enhance their instructional skills and student outcomes effectively.

5.2 Collaboration with Educators

Collaboration with educators is a key component of LETRS training, fostering teamwork and shared expertise. Educators work together, sharing insights and strategies, to align their teaching methods and enhance professional development, ultimately improving instructional practices and student outcomes.

e46 m3 smg manual conversion

The E46 M3 SMG manual conversion involves swapping the automated SMG transmission for a traditional manual setup‚ offering enhanced driver control and reliability compared to the stock system.

Overview of the E46 M3 SMG System

The E46 M3 SMG (Sequential Manual Gearbox) system is an automated manual transmission designed for quick shifting and ease of use. It uses electrohydraulic actuators to automate clutch engagement and gear shifts‚ providing a unique driving experience. While it offers smooth operation in traffic and quick shifts during spirited driving‚ its complexity and reliance on hydraulic systems can lead to higher maintenance costs and potential reliability issues over time‚ prompting some owners to consider manual transmission conversions.

Why Consider a Manual Conversion?

Many E46 M3 owners opt for a manual conversion to address the SMG’s limitations‚ such as high maintenance costs‚ potential hydraulic failures‚ and lack of driver engagement. A manual transmission offers improved reliability‚ lower repair expenses‚ and a more immersive driving experience. It also eliminates the complexity of the SMG system‚ making the car more straightforward and enjoyable to drive. Additionally‚ a manual setup can enhance performance and control‚ appealing to enthusiasts who prefer a more hands-on connection with their vehicle.

Understanding the SMG System

The SMG (Sequential Manual Gearbox) in the E46 M3 is an automated manual transmission‚ using hydraulics and electronics to shift gears without a clutch pedal‚ offering quick shifts but requiring specialized maintenance and prone to mechanical issues over time.

How the SMG Transmission Works

The SMG transmission operates as an automated manual system‚ utilizing hydraulics and electronic controls to execute gear shifts. A hydraulic pump powers actuators that engage and disengage the clutch and gearshift. The system relies on sensors monitoring throttle position‚ RPM‚ and gear selection to determine optimal shift points. While offering quick‚ precise shifts‚ the SMG’s complexity leads to higher maintenance needs and potential reliability issues compared to traditional manual transmissions‚ prompting some owners to opt for a manual conversion to simplify and enhance driving performance.

Common Issues with the SMG System

The SMG system is prone to issues such as hydraulic system failures‚ electronic control unit malfunctions‚ and worn clutch packs. These problems often lead to erratic shifting‚ slipping gears‚ and reduced performance. High maintenance costs and the complexity of repairs further exacerbate these challenges. Owners frequently report difficulties in diagnosing and resolving these issues‚ which can result in costly replacements. These reliability concerns have driven many enthusiasts to consider converting to a manual transmission for greater simplicity and long-term dependability.

Preparing for the Conversion

Preparation involves gathering tools‚ parts‚ and expertise. Ensure you have a manual transmission‚ clutch‚ flywheel‚ and necessary adapters. Consult specialists and plan for ECU adaptation and hydraulic system removal.

Tools and Parts Required

The conversion requires specialized tools like a transmission jack and flywheel puller. Essential parts include the manual gearbox‚ clutch kit‚ flywheel‚ and adapter plate. Hydraulic components must be replaced with manual equivalents‚ such as a clutch pedal assembly and master cylinder. Electrical connectors for the ECU and gear position sensor are also necessary. Ensure all components are compatible with the E46 M3 to avoid fitment issues. Proper planning is crucial for a smooth process.

Choosing the Right Manual Transmission

Selecting the correct manual transmission is critical for the E46 M3 SMG conversion. The most popular option is the T-56 or 6-speed manual from the E46 330i‚ known for its durability and compatibility. Ensure the transmission is inspected and serviced before installation. Some enthusiasts opt for lightweight or performance-enhanced units‚ but compatibility with the M3’s differential and chassis must be verified. Proper alignment and fitment are essential to maintain the car’s performance and handling characteristics.

The Conversion Process

The E46 M3 SMG manual conversion involves removing the SMG transmission‚ installing a manual gearbox‚ and replacing the clutch and flywheel for proper functionality and reliability.

Removing the SMG Transmission

Begin by disconnecting the battery and draining the transmission fluid. Remove the driveshaft‚ heat shields‚ and crossmember for access. Disconnect electrical connectors and hydraulic lines connected to the SMG. Detach the gear selector and remove the transmission mounting brackets. Remove the bolts securing the SMG to the engine and carefully lower the transmission using a jack or lift. Finally‚ remove the transmission mount and slide the SMG out of the chassis‚ taking care to avoid damaging surrounding components during extraction.

Installing the Manual Transmission

Position the manual transmission under the chassis‚ aligning it with the engine’s bellhousing. Secure the transmission using the factory bolts‚ ensuring proper torque specifications. Reattach the driveshaft‚ crossmember‚ and transmission mount for stability. Reconnect the gear selector and electrical connectors. Refill the manual transmission fluid‚ then connect the hydraulic lines if applicable; Tighten all components securely‚ ensuring no leaks or misalignments. Finally‚ test the manual shifter for smooth operation and verify all connections are properly engaged before starting the engine.

Replacing the Clutch and Flywheel

Remove the SMG transmission to access the clutch and flywheel. Inspect the existing components for wear or damage. Install a high-performance clutch kit designed for manual operation. Secure the new flywheel‚ ensuring it is properly aligned and bolted. Replace the pressure plate and clutch disc‚ adjusting the release bearing and fork. Reinstall the transmission‚ ensuring the clutch engages smoothly. Bleed the hydraulic system to eliminate air bubbles‚ then test the pedal feel and engagement point before finalizing the conversion.

Hydraulic to Manual Conversion

Converting from hydraulic to manual involves replacing hydraulic components with mechanical ones‚ ensuring precise control and reliability. This process eliminates the SMG’s complexity‚ enhancing driver engagement;

Understanding Hydraulic vs. Manual Systems

The E46 M3’s SMG system relies on a complex hydraulic setup to automate gear shifts‚ while a manual transmission uses a mechanical clutch and gearlever. Hydraulic systems‚ though convenient‚ are prone to failure and require specialized maintenance. Manual systems offer simplicity‚ reliability‚ and direct driver control‚ making them a popular choice for enthusiasts. The conversion process involves replacing hydraulic components with mechanical ones‚ eliminating electronic dependencies and enhancing overall performance and durability.

Replacing Hydraulic Components with Manual Ones

Replacing hydraulic components with manual parts involves removing the SMG’s actuators‚ pumps‚ and sensors. These are substituted with a manual gearbox‚ clutch master cylinder‚ and pedal assembly. The process requires precise alignment and bleeding of the new hydraulic system to ensure proper clutch engagement. Specialized tools may be needed to adapt the chassis and wiring for manual operation‚ ensuring a seamless integration of the new components with the existing E46 M3 platform and electronics.

Wiring and Electronics

The conversion necessitates modifying the E46’s wiring and electronics to accommodate manual transmission. This includes reprogramming the ECU to disable SMG-specific controls and integrate manual gearbox signals. Additional adjustments may involve installing new sensors and rewiring the clutch pedal for proper function‚ ensuring the car’s computer recognizes the manual setup without conflicts. Proper coding and testing are crucial to avoid errors and maintain optimal vehicle performance.

Adapting the ECU for Manual Transmission

Adapting the ECU for a manual transmission involves reprogramming the engine control unit to recognize the new gearbox. This process ensures the ECU disables SMG-specific functions and integrates manual transmission protocols. Specialized tools like INPA or ISTA/D are often used to modify the ECU’s software. Additionally‚ the transmission control unit (TCU) may need recalibration to work seamlessly with the manual setup. Proper ECU adaptation is critical to avoid issues like incorrect gear recognition or throttle response problems. A custom tune is typically required for optimal performance. Consult a specialist to ensure compatibility and reliability.

Installing a Manual Gearbox Control Unit

Installing a manual gearbox control unit requires replacing the SMG’s hydraulic actuators with a mechanical linkage system. The new unit ensures precise gear shifts without relying on hydraulic pressure. Key steps include disconnecting the SMG solenoids‚ fitting the manual shift mechanism‚ and recalibrating the ECU to recognize the change. Proper alignment and adjustment of the shift linkage are crucial for smooth operation. This step eliminates common SMG failure points‚ improving both reliability and driving experience. Professional expertise is recommended for a seamless integration.

Testing the Conversion

After installation‚ perform an initial start-up to check clutch engagement and gear shifts. Conduct a test drive on smooth and rough roads to ensure proper operation.

Initial Start-Up and Basic Function Tests

After completing the conversion‚ start the engine and check for any unusual noises or leaks. Engage the clutch and shift through all gears to ensure smooth operation. Test the clutch pedal feel and gear engagement. Monitor the dashboard for error lights. Perform a slow drive to verify proper acceleration and shifting; Ensure the ECU adapts to the manual transmission by driving in various conditions. This step confirms the conversion’s success and identifies any issues needing adjustment.

Road Testing and Fine-Tuning

Once initial tests pass‚ take the car on a thorough road test. Drive on varied roads to assess acceleration‚ shifting smoothness‚ and clutch operation. Pay attention to any hesitation or unusual behavior. Fine-tune the clutch engagement point and gear linkage for optimal feel. Check for consistent RPM drops during shifts and ensure the ECU adapts seamlessly. Adjustments may be needed to the throttle cable or sensors. This step ensures the car performs reliably and responsively‚ meeting the driver’s expectations for a manual transmission.

Maintenance and Upkeep

Regular maintenance is crucial to ensure longevity. Check fluids‚ inspect the clutch‚ and monitor gear engagement. Addressing issues promptly prevents costly repairs and maintains performance.

Post-Conversion Maintenance Tips

After converting to a manual transmission‚ regular maintenance is essential. Check transmission fluid levels monthly and replace the fluid every 30‚000 to 60‚000 miles. Inspect the clutch for wear and ensure proper alignment of the shift linkage. Lubricate the gearshift and clutch pedal periodically. Monitor for any unusual noises or vibrations‚ addressing them promptly to prevent major repairs; Additionally‚ ensure the clutch pedal adjustment is correct to maintain smooth engagement and disengagement. Following these tips will help maintain optimal performance and extend the life of your manual transmission system.

Common Issues After Conversion

Post-conversion issues may include improper clutch engagement‚ misaligned shift linkages‚ or ECU adaptation problems. Some owners report difficulty in finding compatible manual transmission components. Additionally‚ without proper installation‚ drivers may experience grinding gears or hesitant shifts. Ensuring all components are correctly fitted and tested is crucial. Regular inspections and adjustments can mitigate these issues‚ preventing costly repairs and ensuring smooth operation. Proper preparation and skilled installation are key to minimizing post-conversion complications and maintaining optimal performance.

Community and Support

Active online forums and local enthusiast groups provide valuable resources and guidance for E46 M3 SMG manual conversions. Experts and experienced owners share tips‚ solutions‚ and support.

Online Forums and Resources

Online forums like Reddit’s r/BMW and r/E46‚ along with specialized platforms such as Bimmerforums and M3 enthusiast communities‚ are invaluable for E46 M3 SMG manual conversion projects. These platforms host detailed threads‚ DIY guides‚ and troubleshooting tips shared by experienced owners and mechanics. Many users post real-life experiences‚ highlighting common challenges and solutions. Additionally‚ some forums offer access to rare parts and expert advice‚ making them essential for anyone undertaking this complex modification. Engaging with these communities can significantly simplify the conversion process.

Local Communities and Specialists

Engaging with local BMW enthusiast communities and specialists is crucial for a successful E46 M3 SMG manual conversion. Many cities have active car clubs or meetups where experienced owners and mechanics share insights and tips. Local specialists‚ particularly those with a history of handling E46 M3 conversions‚ can provide hands-on guidance and access to rare or hard-to-find parts. These networks often host workshops or events‚ offering practical advice and real-world examples of successful conversions. Building relationships within these communities can significantly enhance the conversion process and ensure long-term support.

The E46 M3 SMG manual conversion is a rewarding endeavor‚ offering improved performance and driver engagement. Proper planning‚ expert guidance‚ and community support are key to success.

Final Thoughts on the E46 M3 SMG Manual Conversion

The E46 M3 SMG manual conversion is a complex but rewarding process that transforms the driving experience. It eliminates the reliability concerns of the SMG system while enhancing driver engagement. Proper planning‚ expert guidance‚ and meticulous execution are essential for success. The conversion not only preserves the car’s heritage but also breathes new life into its performance. For enthusiasts seeking a more connected and reliable driving experience‚ this conversion is a worthwhile investment of time and resources.

season of discovery druid leveling guide

Druid leveling in the Season of Discovery emphasizes versatility and adaptability, leveraging shapeshifting and strategic ability rotations for efficient progression. Mastering quest routes, consumables, and form-switching enhances the journey, ensuring a smooth path to reaching level 60 with optimal builds and gear choices tailored for both Feral and Balance specializations.

1.1 Overview of Druid Class in Season of Discovery

The Druid class in the Season of Discovery is renowned for its versatility, offering exceptional mobility and adaptability through shapeshifting. With access to multiple forms—such as Bear, Cat, and Moonkin—Druids can seamlessly transition between roles like tanking, dealing damage, or providing utility. Their ability to heal and sustain themselves or allies adds to their unique appeal. This flexibility makes Druids a popular choice for both solo leveling and group play, allowing them to thrive in various scenarios during their journey to level 60.

Whether focusing on Feral’s melee prowess or Balance’s spellcasting, Druids are well-rounded, making them a dynamic and powerful class in Season of Discovery. Their adaptability ensures they remain effective in any playstyle, from dungeon runs to open-world questing. This versatility, combined with strategic talent builds and gear choices, solidifies the Druid’s position as a formidable and enjoyable class to level.

1.2 Importance of Leveling Efficiency for Druids

Leveling efficiency is crucial for Druids to maximize their progression in the Season of Discovery. With their versatile shapeshifting abilities, Druids can adapt to various challenges, but optimizing talent builds, rotations, and gear ensures minimal downtime and faster leveling. Efficient questing routes, strategic use of consumables like Swiftness Potions, and mastering form-switching for mobility and survivability are key. By minimizing time spent on unnecessary fights or corpse runs, Druids can focus on quest completion and XP gain, making their leveling journey smoother and more rewarding. This focus on efficiency allows Druids to reach level 60 quickly and effectively, whether solo or in groups.

Best Talent Builds for Druid Leveling

Optimal Druid talent builds focus on enhancing damage output, survivability, and mobility. Feral and Balance Druids benefit from talents like Starsurge, Wild Growth, and Fury of Elune, ensuring efficient leveling and adaptability in various scenarios.

2.1 Feral Druid Talent Build for Leveling

The Feral Druid talent build prioritizes aggressive damage output and mobility. Key talents include Shred, Rip, and Leader of the Pack, enhancing melee attacks and group healing. Additional points in Ferocity and Sharpened Claws improve critical strike chance and attack power. This build maximizes DPS while maintaining survivability through Survival Instincts and Thick Hide. Gear focus should be on Hit Rating, Strength, and Attack Power to ensure consistent damage output and smooth leveling progression.

2.2 Balance Druid Talent Build for Leveling

The Balance Druid talent build focuses on maximizing spell damage and mana efficiency. Key talents include Starfire, Wrath, and Moonfire, enhancing elemental damage output. The Fury of Stormrage rune is particularly effective, making Wrath free and enabling instant-cast Healing Touch. Prioritize Spell Power, Intellect, and Stamina for sustained mana and survivability. This build excels at ranged DPS, making it ideal for solo leveling or group play, while also offering flexibility for occasional healing in 5-man dungeons or group quests.

2.3 Key Talent Differences Between Feral and Balance

Feral Druids emphasize melee damage and survivability, with talents like Savage Roar and Blood Frenzy boosting attack power and healing. Balance Druids focus on spellcasting, prioritizing Starfire, Wrath, and Moonfire for elemental damage. While Feral relies on stamina and agility, Balance emphasizes intellect and spell power for mana efficiency. The Fury of Stormrage rune is unique to Balance, enabling free Wrath casts and instant healing. These differences shape playstyles, with Feral excelling in close combat and Balance dominating at range, each optimized for distinct leveling strategies.

Ability Rotations for Druid Leveling

Ability rotations for Druid leveling focus on Feral’s melee attacks and Balance’s spellcasting, leveraging form switching to maximize efficiency and enhance overall DPS output effectively.

3.1 Feral Druid Rotation for Efficient Leveling

Feral Druid rotation focuses on maintaining consistent DPS while leveraging shapeshifting for mobility and survivability. Begin with Rake to apply a damage-over-time effect, followed by Shred as your primary attack. Use Savage Roar to boost damage output and maintain Blood Fury for increased attack power. Apply Moonfire or Rejuvenation as needed for utility or healing. Finish with Ferocious Bite to consume combo points. Shapeshift to Cat Form for melee attacks and Bear Form for tanking. Optimize your rotation by opening with powerful cooldowns and maintaining buffs for seamless leveling efficiency.

3.2 Balance Druid Rotation for Efficient Leveling

Balance Druid rotation focuses on maximizing spell damage through a priority system. Start with Wrath to generate initial damage and combo points. Follow up with Moonfire to apply a damage-over-time effect. Use Starsurge to spend combo points and trigger Astral Power. Maintain Starfall for area-of-effect damage and Eclipse to amplify your spells. Utilize Healing Touch for survivability and Rejuvenation for sustained health. Leverage Form Switching to adapt to combat situations, ensuring optimal DPS output while managing mana efficiently. This rotation emphasizes spell priority and cooldown management for seamless leveling progression.

3.3 Using Form Switching to Optimize DPS

Form switching is a cornerstone of Druid efficiency, enabling seamless adaptation to combat scenarios. Use Cat Form for melee damage, excelling in single-target DPS. Switch to Moonkin Form for caster damage, leveraging spells like Wrath and Moonfire. Bear Form provides survivability, allowing you to tank elites or avoid unnecessary deaths. Caster Form is ideal for healing or supporting group members. By strategically switching forms, you optimize DPS, manage cooldowns, and maintain mana efficiency, ensuring a smoother leveling experience. This versatility is key to mastering Druid leveling in the Season of Discovery.

Gear and Equipment for Druid Leveling

Optimizing gear is crucial for Druid leveling; Prioritize Intellect and Spell Power for Balance, while Feral focuses on Agility and Strength. Use consumables like Swiftness Potions for mobility and Healing Potions for survivability. Equip gear with beneficial stats and runes to enhance your abilities, ensuring a balanced setup for both DPS and survivability during your journey to level 60.

4.1 Best Gear for Leveling as a Feral Druid

For Feral Druids, prioritize gear with Agility and Strength to maximize attack power and survivability. Focus on weapons with high Agility or Strength, as these enhance your melee capabilities. Armor pieces should emphasize Agility and Stamina for sustained damage and survivability. Gloves and boots benefit from Strength or Agility boosts, while belts and necklaces should provide Stamina for longevity. Avoid Intellect-focused gear, as it offers little benefit for Feral. Use consumables like Swiftness Potions for mobility and Healing Potions to maintain health during intense combat scenarios.

4.2 Best Gear for Leveling as a Balance Druid

For Balance Druids, prioritize gear with high Intellect to enhance mana capacity and Spell Power for increased damage output. Legs with Starsurge or Wild Growth runes are ideal for boosting spell efficacy. Gloves with Wild Growth offer flexibility, allowing seamless transitions to healing in group settings. Chest pieces with Intellect and Spell Power are also crucial. While Spirit or MP5 can aid mana regeneration, focus primarily on Intellect and Spell Power for optimal performance. Avoid Strength or Agility-focused gear, as they provide minimal benefits for Balance Druids.

4.3 Importance of intellect and Spell Power for Balance Druids

4.3 Importance of Intellect and Spell Power for Balance Druids

Intellect and Spell Power are paramount for Balance Druids, as they directly enhance magical damage output and mana efficiency. Higher Intellect increases mana pool and spell critical strike chance, while Spell Power boosts the effectiveness of abilities like Moonfire and Starsurge. Prioritizing these stats ensures sustained damage during prolonged fights and reduces downtime between spells. Balancing these stats optimizes overall performance, making them essential for efficient leveling and raid preparation in the Season of Discovery.

Leveling Strategies and Questing

Efficient questing routes and strategic grouping for elite quests are key. Use shapeshifting for mobility, Swiftness Potions for speed, and Healing Potions. Organize quests by level to maximize experience.

5.1 Efficient Questing Routes for Druids

Druids benefit from optimized questing routes that minimize travel time. Focus on quests within your level range, completing clusters near each other. Use teleport spells or mounts to reduce downtime. Prioritize hubs with multiple quests to avoid frequent zone changes. Always keep Swiftness Potions on hand for faster movement between areas. Efficient route planning ensures steady XP gain and reduces the need for backtracking, keeping your leveling process smooth and consistent. Proper planning is key to maintaining momentum.

5.2 Grouping for Elite Quests and Dungeon Runs

Grouping with others enhances efficiency for elite quests and dungeon runs. Coordinate with classes offering healing or tanking to tackle challenging content. Use consumables like Swiftness Potions for mobility and Healing Potions for survivability. Form switching allows Druids to adapt roles, ensuring flexibility in groups. Shared XP and loot distribution make grouping advantageous. Focus on maintaining a balanced group composition to streamline progress. This approach minimizes downtime and maximizes XP gain, especially in dungeons with multiple elite mobs. Efficient communication and planning are key to success in group-based leveling activities.

5.3 Utilizing Druid’s Shapeshifting for Mobility

Shapeshifting is a cornerstone of Druid mobility, enabling rapid traversal of vast zones. Cat Form grants a 30% speed boost, ideal for quickly moving between quests. Travel Form allows swift movement in open areas, while Aquatic Form enhances swimming efficiency. Insta-cast Healing Touch from Balance or Rejuvenation in Restoration ensures sustained mobility without downtime. Proper form switching minimizes travel time, allowing more focus on questing and combat. This versatility makes Druids highly efficient in navigating the expansive world during the leveling process. Effective use of shapeshifting significantly accelerates overall leveling speed and convenience.

Druid-Specific Leveling Tips and Tricks

Maximize Druid efficiency by utilizing Rejuvenation for self-healing and leveraging procs like Fury of Stormrage for instant-cast spells. Manage mana wisely to sustain long sessions, ensuring optimal DPS through strategic form switching and ability rotations. Prioritize intellect and spell power for Balance, while Feral focuses on agility and strength, enabling seamless transitions between combat and mobility. These tips enhance survivability and performance, making Druids versatile and formidable levelers in the Season of Discovery.

6.1 Using Rejuvenation and Healing Touch for Survivability

Rejuvenation and Healing Touch are essential for maintaining survivability while leveling. Rejuvenation provides a steady heal over time, reducing downtime between fights, while Healing Touch offers a strong burst heal for emergencies. Use Rejuvenation proactively before engaging in combat or when taking sustained damage. Healing Touch is best reserved for critical moments or when multiple enemies are attacking. Together, these spells enhance your durability, allowing you to focus on dealing damage or completing quests without frequent breaks to recover health.

6.2 Leveraging Procs and Rune Effects for Optimal DPS

Leveraging procs and rune effects is crucial for maximizing DPS while leveling. Balance Druids benefit from Wrath, which becomes free and instant-cast with the Fury of Stormrage rune, enhancing burst damage. Feral Druids should monitor Rip and Ferocious Bite procs to maintain optimal damage flow. Pairing these procs with cooldowns like Berserk amplifies output. Tracking and utilizing these effects ensures consistent, high damage output, minimizing downtime and accelerating leveling progress.

6.3 Managing Mana and Stamina for Long-Leveling Sessions

Efficiently managing mana and stamina is vital for prolonged leveling sessions. Druids should use consumables like Swiftness Potions for mobility and Healing Potions for survivability. Balance Druids rely on intellect for mana sustainability, while Feral Druids focus on stamina for endurance. Prioritizing gear with intellect or stamina ensures longer combat uptime. Additionally, ability rotations should balance damage output with resource conservation, preventing unnecessary downtime. Proper management allows Druids to maintain consistent progress without frequent breaks, optimizing their leveling efficiency in the Season of Discovery.

Class-Specific Quests and Abilities

Druid class quests unlock unique abilities, enhancing versatility and shapeshifting mastery. These quests provide essential tools for efficient leveling, ensuring a strong foundation for both Balance and Feral playstyles.

7.1 Druid Class Quests and Their Importance

Druid class quests are pivotal in Season of Discovery, providing essential abilities and enhancing shapeshifting. These quests unlock key forms like Bear and Aquatic, granting mobility and survivability. Completion often rewards vital spells, such as Rejuvenation, which boosts healing. Additionally, class-specific quests offer unique gear, like the gloves with Wild Growth, aiding in group quests. These quests ensure Druids are well-equipped for both solo leveling and group content, making them indispensable for a smooth progression to level 60.

7.2 Using Form Abilities to Enhance Leveling

Druid form abilities are cornerstone to efficient leveling, offering versatility in combat and mobility. Cat Form boosts movement speed for quicker questing, while Bear Form provides survivability in tough encounters. Aquatic Form enhances swimming speed, reducing downtime. Moonkin Form amplifies spellcasting for Balance builds, and Stag Form allows carrying group members, aiding in dungeon runs. Mastering these abilities ensures adaptability, enhances leveling speed, and optimizes performance in various scenarios, making Druids highly efficient in both solo and group play during the Season of Discovery.

7.3 Mastery of Shapeshifting for Versatility

Mastery of shapeshifting is crucial for Druids, enabling seamless adaptation to any situation. Cat Form enhances movement speed and DPS, ideal for leveling, while Bear Form provides sturdy survivability against tough enemies. Moonkin Form boosts spellcasting efficiency, and Aquatic Form accelerates swimming. Travel Form allows rapid traversal of vast areas, saving time during questing. By mastering these forms, Druids gain unmatched versatility, optimizing mobility, survivability, and damage output. This adaptability makes Druids highly efficient in both solo and group leveling scenarios, ensuring a smooth journey to level 60.

entente de principe fae pdf

The Entente de Principe FAE PDF outlines a preliminary agreement between the FAE and the government‚ addressing key issues like salary increases‚ inflation adjustments‚ and retroactive payments. It is presented to members through general assemblies‚ ensuring transparency and democratic voting processes‚ with the aim of reaching a consensus on the proposed terms.

1.1 Definition and Purpose

The Entente de Principe FAE PDF is a preliminary agreement outlining the framework for negotiations between the FAE and the government. It defines the terms and objectives for salary adjustments‚ retroactive payments‚ and inflation indexation. The document serves as a foundation for further discussions‚ ensuring transparency and fairness for educators while addressing their financial and professional concerns through structured negotiations.

1.2 Historical Context

The Entente de Principe FAE PDF emerges from a history of negotiations between the FAE and the government‚ addressing educators’ concerns. Past agreements‚ such as those in 2020 and 2023‚ laid the groundwork for current discussions. These negotiations have historically focused on salary adjustments‚ inflation indexation‚ and retroactive payments‚ reflecting the evolving needs of educators and the economic climate‚ shaping the foundation for the current agreement.

Key Provisions of the Entente de Principe

The Entente de Principe FAE PDF includes salary increases‚ retroactive payments‚ and inflation adjustments‚ ensuring fair compensation for educators while addressing economic pressures and workload challenges.

2.1 Salary Increases and Retroactive Payments

The Entente de Principe FAE PDF includes significant salary increases‚ with a 6% rise retroactive to April 1‚ 2023‚ and an additional 2.8% adjustment by April 1‚ 2024. This results in an 8.8% total increase‚ ensuring educators receive fair compensation for past and future work. Retroactive payments aim to address prior salary gaps‚ reflecting the FAE’s commitment to equitable pay and recognition of teachers’ contributions.

2.2 Indexation and Inflation Adjustments

The Entente de Principe FAE PDF incorporates annual indexation rates to offset inflation‚ ensuring salaries remain competitive. For instance‚ a 1.75% increase was applied in 2020 and 2021‚ followed by 1.50% in 2022. These adjustments aim to maintain purchasing power and reflect economic realities‚ demonstrating the FAE’s commitment to fair compensation and financial stability for educators amid rising costs.

Negotiation Process

The negotiation process involved detailed discussions between the FAE and the government‚ focusing on salary increases‚ inflation adjustments‚ and retroactive payments to address educators’ needs effectively.

3.1 Role of the FAE and Government

The FAE represented teachers’ interests during negotiations‚ while the government aimed to balance educational sector needs with fiscal responsibilities. The FAE ensured member concerns were addressed‚ proposing solutions like salary adjustments and inflation indexing. The government focused on maintaining service quality while managing budget constraints‚ fostering a collaborative environment to reach a mutually beneficial agreement.

3.2 Timeline of Negotiations

Negotiations began in October 2023‚ with the government inviting the FAE to discuss terms. By December 2023‚ a preliminary agreement was reached‚ focusing on salary increases and inflation adjustments. The FAE presented the proposal to its members in early 2024‚ with voting scheduled through general assemblies. The timeline reflects a structured approach to ensure all parties were aligned before finalizing the agreement.

Presentation to Members

The FAE presented the agreement through general assemblies‚ ensuring transparency and a democratic process for member voting‚ reflecting the organization’s commitment to inclusive decision-making.

4.1 General Assemblies and Voting Process

The Entente de Principe FAE PDF is presented to members during general assemblies‚ where discussions and debates are held. Members vote on the agreement‚ ensuring a fair and transparent process. This democratic approach allows all voices to be heard‚ guaranteeing that the final decision reflects the collective will of the FAE membership. The assemblies are crucial for ratifying the proposed terms.

4.2 Transparency in Communication

Transparency is a cornerstone of the Entente de Principe FAE PDF process. The FAE ensures that all members are well-informed about the agreement’s details through clear and accessible communication. Documents are distributed in advance‚ and meetings are conducted openly to foster understanding and trust. This structured approach ensures that members can make informed decisions‚ reflecting the FAE’s commitment to accountability and openness.

Implications for the Education Sector

The Entente de Principe FAE PDF impacts teachers and staff through salary adjustments and retroactive payments‚ while schools adapt to operational changes‚ ensuring resource allocation aligns with new financial terms.

5.1 Impact on Teachers and Staff

The Entente de Principe FAE PDF introduces significant changes for teachers and staff‚ including salary increases and retroactive payments to address inflation. These adjustments aim to improve working conditions and compensate for rising living costs. The agreement also outlines measures to stabilize the education workforce‚ ensuring teachers can focus on providing quality education without financial pressures. This directly impacts morale‚ retention‚ and overall job satisfaction within the sector.

5.2 Effects on School Operations

The Entente de Principe FAE PDF ensures salary indexation and retroactive payments‚ stabilizing school budgets and operations. It addresses staff workload and resource allocation‚ fostering a more predictable environment for educational planning. By aligning financial adjustments with inflation‚ the agreement supports schools in maintaining quality services and infrastructure‚ ensuring uninterrupted learning experiences for students while optimizing administrative efficiency.

Public Reception and Debate

The Entente de Principe FAE PDF sparked significant debate‚ with mixed reactions from educators and the public. While some praised its financial adjustments‚ others raised concerns about broader educational implications.

6.1 Support and Criticism

The Entente de Principe FAE PDF has received mixed reactions. Supporters highlight the salary increases and inflation adjustments as crucial steps for educators’ financial relief. Critics‚ however‚ argue that the agreement lacks comprehensive measures for workload reduction and educational resource allocation‚ sparking debates about its long-term impact on the education system.

6.2 Media Coverage and Public Reaction

Media coverage of the Entente de Principe FAE PDF reflected a divided public opinion. While some outlets highlighted the salary increases and inflation adjustments as positive steps‚ others criticized the lack of broader educational reforms. Public reaction varied‚ with debates on social media and news platforms. Some teachers and unions expressed dissatisfaction‚ leading to ongoing discussions about the agreement’s implications.

Legal and Structural Framework

The Entente de Principe FAE PDF ensures compliance with labor laws and integrates seamlessly into existing contracts‚ providing a structured framework for implementation and adherence to legal standards.

7.1 Compliance with Labor Laws

The Entente de Principe FAE PDF adheres to labor laws‚ ensuring fairness and consistency in its provisions. The agreement is designed to meet legal standards‚ protecting the rights of educators while aligning with governmental regulations. The FAE collaborates with legal experts to ensure all terms comply with existing labor legislation‚ avoiding conflicts and fostering a legally sound framework for implementation.

7.2 Integration into Existing Contracts

The Entente de Principe FAE PDF is designed to integrate seamlessly into existing contracts‚ ensuring continuity and alignment with current collective agreements. The agreement outlines how its provisions will be incorporated without disrupting established terms. Legal and contractual experts review the document to ensure smooth integration‚ maintaining the integrity of prior agreements while introducing new terms. This ensures a cohesive and legally sound contractual framework for educators.

Future Outlook

The Entente de Principe FAE PDF is expected to shape the future of education sector negotiations‚ with potential amendments and long-term benefits for educators‚ ensuring sustainable progress.

8.1 Potential Amendments

The Entente de Principe FAE PDF may undergo future revisions to address evolving educator needs‚ such as salary adjustments‚ inflation indexing‚ and retroactive payment structures. These amendments aim to ensure fair compensation and adapt to economic changes‚ with the FAE prioritizing member input and transparency in the negotiation process to maintain trust and support for long-term educational sector stability.

8.2 Long-term Effects

The Entente de Principe FAE PDF aims to foster long-term stability in the education sector by ensuring fair compensation and working conditions for educators. The agreement’s focus on salary increases‚ retroactive payments‚ and inflation indexing will enhance teacher morale and retention‚ ultimately benefiting student outcomes. By addressing economic pressures‚ the FAE ensures educators’ financial stability‚ promoting a sustainable and supportive educational environment for years to come.

The Entente de Principe FAE PDF represents a significant step in addressing educators’ concerns. It ensures fair compensation and sustainable working conditions through salary increases and inflation indexing‚ reflecting the FAE’s commitment to educators’ welfare and the education sector’s future‚ pending member approval and implementation.

9.1 Summary of Key Points

The Entente de Principe FAE PDF highlights salary increases‚ retroactive payments‚ and inflation adjustments‚ ensuring fair compensation for educators. It addresses working conditions and career development‚ promoting stability in the education sector. The agreement‚ spanning 2023 to 2028‚ reflects negotiations between the FAE and the government‚ emphasizing transparency and member approval‚ with measures like annual indexation to safeguard purchasing power and support educators’ welfare.

9.2 Final Thoughts

The Entente de Principe FAE PDF represents a significant step in addressing educators’ concerns‚ balancing economic realities with professional needs. While fostering stability in education‚ it reflects the collaborative effort between the FAE and the government. Future reviews and potential amendments will ensure its relevance‚ maintaining a fair and supportive environment for teachers and staff‚ ultimately benefiting the education system and students.

References and Further Reading

For more details‚ refer to the official FAE PDF documents‚ government publications‚ and news articles discussing the agreement. Additional resources include union communications and educational policy briefs.

10.1 Official Documents

The official Entente de Principe FAE PDF is available on the FAE’s website‚ detailing the agreement’s terms. Additional documents include the Convention Collective 2023-2028 and meeting notes like AG 2020-2021 011‚ which outline the negotiation process and final terms. These documents are essential for understanding the agreement’s framework and implications for educators and the education sector.

10.2 Additional Resources

Supplemental materials include press releases‚ negotiation summaries‚ and meeting minutes‚ such as the 2024-01-19.pdf document. The FAE’s website offers detailed analyses and FAQs. Additional insights can be found in public statements and union meeting notes‚ providing a comprehensive understanding of the agreement’s development and implications for educators and the education sector. These resources are accessible online for further review and reference.

th6220d1028 installer manual

This manual provides a comprehensive guide for installing and configuring the TH6220D1028 thermostat‚ ensuring proper setup for optimal performance‚ energy efficiency‚ and safety․

Overview of the Thermostat Model

The TH6220D1028 thermostat is a programmable‚ energy-efficient device designed to provide precise temperature control for both conventional and heat pump systems․ Its sleek design and user-friendly interface make it a versatile option for residential and light commercial applications․ With compatibility for 24 Vac and 750 mV heating systems‚ it offers flexibility for various HVAC setups․

Featuring a large‚ easy-to-read display‚ the thermostat allows for intuitive operation․ It supports weekday/weekend programming‚ enabling customized temperature schedules․ Additionally‚ its smart home integration capabilities and Wi-Fi connectivity ensure seamless control and energy-saving features‚ making it a modern solution for home comfort and efficiency․

Importance of Proper Installation and Setup

Proper installation and setup of the TH6220D1028 thermostat are crucial to ensure optimal performance‚ safety‚ and energy efficiency․ Incorrect wiring or configuration can lead to system malfunctions‚ reduced efficiency‚ or even safety hazards․ Following the manual’s guidelines helps prevent these issues and guarantees reliable operation․

Correct installation also ensures accurate temperature control and compatibility with existing HVAC systems․ By adhering to the manual’s instructions‚ installers can avoid potential risks and optimize the thermostat’s features for comfort and energy savings․ Proper setup is essential for maximizing the device’s capabilities and maintaining long-term functionality․

Key Features of the TH6220D1028 Thermostat

The TH6220D1028 thermostat offers programmable scheduling‚ smart home integration‚ and energy-saving features for enhanced comfort and efficiency․ Its intuitive interface ensures easy operation and precise temperature control․

Additional features include a backlit display for visibility and compatibility with various HVAC systems‚ making it a versatile solution for modern home climate management and energy optimization․

Programmable Scheduling Options

The TH6220D1028 thermostat offers flexible programmable scheduling‚ allowing users to customize temperature settings for weekdays and weekends to match their lifestyle․ This feature ensures energy efficiency by adjusting temperatures when the home is unoccupied or during sleep hours․ The thermostat supports 5-1-1 programming‚ enabling distinct settings for weekdays‚ Saturday‚ and Sunday․ Users can also set up multiple daily schedules to maintain consistent comfort levels․ The intuitive interface makes it easy to program and adjust settings‚ while the energy-saving mode helps reduce unnecessary heating or cooling․ By tailoring temperature preferences‚ homeowners can optimize energy usage and lower utility bills without compromising comfort․ This feature is particularly useful for those with predictable routines or varying daily schedules․

Smart Home Integration Capabilities

The TH6220D1028 thermostat seamlessly integrates with smart home systems‚ offering advanced connectivity for enhanced convenience and energy management․ Using Wi-Fi technology‚ the thermostat can be controlled remotely through a dedicated app‚ allowing users to adjust settings‚ monitor energy usage‚ and receive alerts․ It is also compatible with popular voice assistants like Amazon Alexa and Google Assistant‚ enabling voice command functionality․ The thermostat supports geofencing‚ automatically adjusting temperatures based on the user’s location․ This feature ensures optimal energy savings and comfort by adapting to the homeowner’s schedule and preferences․ With these smart capabilities‚ the TH6220D1028 provides a modern‚ efficient‚ and user-friendly experience‚ making it a versatile choice for smart home environments․

Installation Requirements and Precautions

Ensure the power is turned off before starting․ Verify system compatibility and wiring configuration․ Use a level for proper mounting and avoid incorrect connections to prevent damage․

Pre-Installation Checks and Tools Needed

Before installing the TH6220D1028 thermostat‚ ensure the power to the HVAC system is turned off․ Verify system compatibility and review the wiring configuration in the manual․ Gather necessary tools‚ including a screwdriver‚ wire strippers‚ and a voltage tester․ Check for any existing damage to wires or terminals․ Ensure the furnace panel is accessible and consult the manual for specific pre-installation steps․ Familiarize yourself with the thermostat’s wiring diagram to avoid errors․ Use a level to ensure proper mounting․ Refer to the manual for detailed instructions and safety precautions to prevent system damage or hazardous conditions during installation․

Wiring Configuration and Diagrams

Refer to the wiring diagram in the manual for the TH6220D1028 thermostat‚ typically found on page 6․ Ensure compatibility with your HVAC system‚ such as 24 Vac conventional or heat pump systems․ Identify each wire’s function (e․g․‚ R‚ W‚ Y‚ G‚ C) and connect them correctly to avoid malfunctions․ Use the provided wiring diagram to match terminals on the new thermostat with your system․ Double-check connections to prevent short circuits or improper operation․ If unsure‚ consult a professional or the troubleshooting section for common wiring issues․ Proper wiring ensures safe and efficient operation of the thermostat and HVAC system․ Always turn off power before starting work․

Programming the Thermostat

Program the TH6220D1028 by setting daily and weekly schedules to optimize temperature control and energy efficiency․ Use smart features to adapt settings based on your lifestyle effortlessly․

Setting Up Daily and Weekly Schedules

To set up daily and weekly schedules on the TH6220D1028‚ navigate to the Menu and select Schedule Settings․ Choose between 5-1-1 or 7-day programming based on your needs․ For each day‚ set temperature points for Morning‚ Day‚ Evening‚ and Night to maintain comfort and efficiency․ Use the Copy feature to replicate schedules across multiple days․ After configuring‚ save your settings to ensure they take effect․ This feature allows you to tailor temperature adjustments to your lifestyle‚ reducing energy waste and enhancing comfort․ Proper scheduling can lead to significant energy savings while keeping your home comfortable throughout the day and week․ Regularly review and update your schedule as needed to reflect changes in your routine․

Using Smart Features for Energy Efficiency

The TH6220D1028 thermostat offers advanced smart features designed to optimize energy usage․ Enable geofencing to adjust temperatures based on your location‚ ensuring the system runs only when needed․ The thermostat also learns your schedule and preferences over time‚ automatically adapting to minimize energy waste․ Voice control integration with smart home systems allows for effortless adjustments․ Additionally‚ the energy usage report provides insights into your consumption patterns‚ helping you identify areas for improvement․ By leveraging these features‚ you can achieve significant energy savings while maintaining comfort․ Refer to the manual for detailed steps to activate and configure these settings for maximum efficiency․

Troubleshooting Common Issues

Identify and resolve common problems like wiring issues‚ display malfunctions‚ or programming errors․ Check connections‚ restart the system‚ and consult the manual for detailed solutions to ensure proper functionality․

Addressing Wiring and Connection Problems

Wiring issues are common and can prevent proper thermostat functionality․ Always turn off power before inspecting or adjusting connections․ Check the wiring diagram in the manual to ensure all wires are correctly connected to their respective terminals․ If wires are loose or misconnected‚ secure them properly․ If issues persist‚ consult a licensed HVAC technician․ For display or programming errors‚ restart the thermostat or reset it to factory settings․ Regularly inspect wires for damage or corrosion and replace them if necessary․ Proper connections ensure safe and efficient operation of the thermostat and HVAC system․ Refer to the troubleshooting section for detailed solutions to common wiring-related problems․

Resolving Display and Programming Errors

If the display is blank or unresponsive‚ ensure the thermostat is properly powered and wires are securely connected․ Restarting the device often resolves temporary glitches․ For programming errors‚ review the schedule setup and ensure all settings align with your preferences․ If issues persist‚ perform a factory reset by pressing and holding the menu button for 10 seconds․ Updating the thermostat’s firmware can also resolve software-related problems․ Always refer to the manual for specific reset and update instructions․ If errors continue‚ contact a certified technician or customer support for assistance․ Regular maintenance and updates help maintain optimal performance and prevent recurring issues․

Maintenance and Upkeep Tips

Regular maintenance ensures optimal performance․ Clean the display gently‚ replace batteries annually‚ and check wiring connections․ Update firmware regularly for enhanced functionality and efficiency․

Regular Cleaning and Battery Replacement

Regular cleaning and battery replacement are essential for maintaining the TH6220D1028 thermostat’s performance․ Use a soft‚ dry cloth to gently wipe the display and exterior surfaces to prevent dust buildup․ Replace batteries annually or when the low-battery indicator appears․ Ensure the thermostat is powered off before replacing batteries to avoid data loss․ Check terminals for corrosion and clean them with a cotton swab if necessary․ Proper maintenance prevents malfunctions and ensures accurate temperature control․ Refer to the manual for specific battery type recommendations․ Regular upkeep helps extend the thermostat’s lifespan and maintains energy efficiency․ Schedule these tasks to keep your system running smoothly year-round․

Updating Firmware for Optimal Performance

Updating the firmware of your TH6220D1028 thermostat is crucial for ensuring optimal performance and accessing new features․ Regular firmware updates improve functionality‚ enhance energy efficiency‚ and resolve potential bugs․ To update‚ connect the thermostat to your Wi-Fi network and navigate to the settings menu․ Select the firmware update option and follow on-screen instructions․ Always ensure the thermostat remains powered on during the update process to avoid interruptions․ After completion‚ restart the device to apply changes․ For detailed steps‚ refer to the manual or contact customer support․ Keeping the firmware up-to-date ensures your thermostat operates at its best‚ delivering precise temperature control and smart home integration capabilities․ Schedule regular updates to maintain peak performance and efficiency․