Archive: January 27, 2026

printable embroidery placement guide

Printable embroidery placement guides are invaluable tools for achieving professional-looking results, ensuring designs are consistently and accurately positioned on fabric;

These guides simplify the process, eliminating guesswork and minimizing errors, especially for repetitive projects or team uniform customization, like those offered by Miami Stitch.

Whether you’re a beginner utilizing an ETSPIL Embroidery Kit or a seasoned professional, precise placement is key to a polished final product, as highlighted in various beginner guides.

Utilizing these guides, alongside understanding stabilizers (as Stitch America, Inc. suggests), elevates your embroidery from hobby to a craft with professional-grade outcomes.

What is an Embroidery Placement Guide?

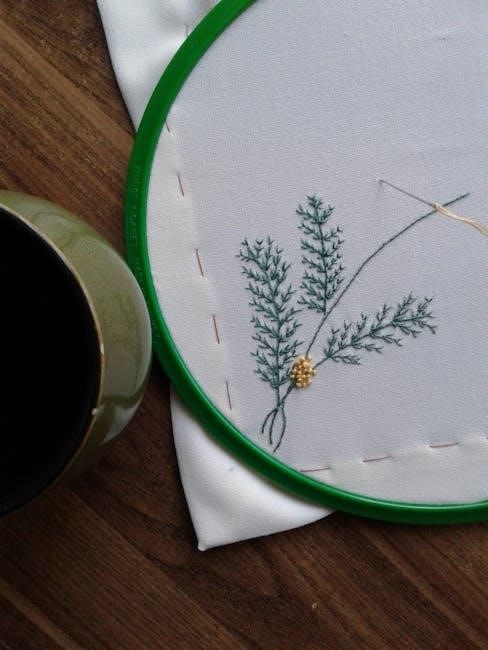
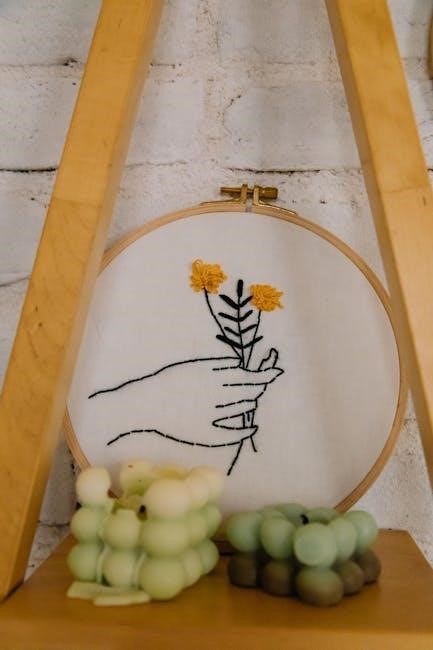
An embroidery placement guide is essentially a template, often printed on paper, designed to visually indicate the precise location for your embroidery design on a garment or fabric. These guides are particularly useful when dealing with multiple items, ensuring consistency across all pieces – a crucial aspect for businesses like Miami Stitch providing custom embroidery for uniforms and promotional apparel.

These guides aren’t just random markings; they’re carefully considered layouts that account for garment construction, wear patterns, and aesthetic balance. They can range from simple crosses or lines indicating a pocket position to more complex outlines showing the full design area.

The benefit of a printable guide, as opposed to marking directly on fabric, is its non-permanence and reusability. It allows for adjustments and test placements without damaging the material. Whether you’re a beginner following a kit like CYANFOUR’s or an experienced crafter, a guide streamlines the process, reducing errors and saving valuable time, as emphasized in various embroidery resources available online.

Ultimately, it’s about achieving a professional finish, similar to the expert craftsmanship offered by companies specializing in stitching.

Why Use a Printable Guide?

Utilizing a printable embroidery placement guide offers numerous advantages, significantly enhancing the efficiency and quality of your projects. For businesses like Miami Stitch, consistency is paramount, and guides ensure uniform design placement across multiple garments, crucial for branding and professional appearance.

These guides minimize errors, saving both time and materials. Instead of repeatedly marking fabric – a process prone to inaccuracies – a reusable template provides a reliable reference point. This is especially helpful for beginners learning techniques from kits like ETSPIL or CYANFOUR, reducing frustration and improving results.

Printable guides also allow for easy visualization and adjustments before committing to stitching. You can test different placements, ensuring the design complements the garment’s shape and style. Furthermore, they prevent direct marking of fabric, avoiding potential discoloration or damage, a consideration highlighted in stabilizer guides from Stitch America, Inc.

Ultimately, they contribute to a cleaner, more professional finish, elevating your embroidery work.

Understanding Embroidery Stabilizers

Embroidery stabilizers are essential companions to printable placement guides, providing necessary support during stitching, ensuring design integrity, and preventing fabric distortion, as advised by experts.

Types of Machine Embroidery Stabilizers

Selecting the correct stabilizer is crucial when paired with printable embroidery placement guides for optimal results. Different fabrics demand different levels of support, and understanding these options is key to preventing puckering or design distortion.

Cut-away stabilizers, as suggested in various guides, provide the most robust support, ideal for dense designs or stretchy fabrics, remaining fully intact after stitching. Tear-away stabilizers are easier to remove, suitable for lighter designs on stable woven fabrics, but require careful tearing to avoid damage.

Wash-away stabilizers dissolve in water, perfect for delicate fabrics or when a completely invisible backing is desired, often used with free-standing lace. Miami Stitch emphasizes quality, and choosing the right stabilizer complements their expert craftsmanship. Beginners, utilizing kits like CYANFOUR, benefit from understanding these distinctions for successful projects.

Proper stabilizer choice, alongside accurate placement guided by printable templates, ensures professional-looking embroidery every time.

Cut-Away Stabilizers

Cut-away stabilizers are the workhorse of machine embroidery, providing exceptional support, particularly when utilizing printable embroidery placement guides for precise design positioning. They remain fully intact underneath the stitching, offering maximum stabilization, crucial for dense designs or fabrics prone to stretching.

This makes them ideal for knits, jerseys, and other flexible materials, preventing distortion during and after the embroidery process. Miami Stitch likely utilizes cut-away stabilizers for projects requiring durability and shape retention, like corporate uniforms.

When combined with a printable guide, cut-away stabilizers ensure your design remains exactly where intended, even with fabric movement. While requiring trimming after stitching, the added stability is invaluable. Beginners using kits like ETSPIL will find cut-away stabilizers simplify complex designs, offering a solid foundation for learning.

Properly hooping with cut-away, alongside a placement guide, guarantees professional results.

Tear-Away Stabilizers

Tear-away stabilizers offer a convenient option for machine embroidery, especially when paired with printable embroidery placement guides for accurate design transfer. As the name suggests, these stabilizers are carefully torn away from the back of the finished embroidery, leaving minimal residue.

They are best suited for woven fabrics where significant stretch isn’t a concern, providing sufficient support during stitching without the permanent structure of cut-away. Utilizing a guide ensures precise placement before stitching commences, maximizing the stabilizer’s effectiveness.

While less robust than cut-away, tear-away is ideal for lighter designs and projects where a softer hand-feel is desired. Stitch America, Inc. likely recommends tear-away for specific fabric types. Beginners using embroidery kits may find tear-away easier to manage initially.

Careful tearing is essential to avoid damaging stitches; a printable guide aids in minimizing the need for excessive handling.

Wash-Away Stabilizers

Wash-away stabilizers represent a unique solution for machine embroidery, particularly beneficial when combined with printable embroidery placement guides for intricate designs. These stabilizers completely dissolve in water, leaving no trace behind – ideal for lace, sheer fabrics, or projects requiring an exceptionally soft finish.

Using a placement guide is crucial with wash-away, as the stabilizer becomes fragile when wet, making re-positioning impossible. Miami Stitch might utilize this for delicate apparel. They are excellent for freestanding lace or when you want a completely invisible support.

However, careful consideration is needed regarding thread type and wash temperature to ensure complete dissolution. Beginners using kits like those from CYANFOUR should follow instructions closely.

The guide’s accuracy minimizes the risk of distortion during washing, ensuring the embroidery remains perfectly aligned. Proper stabilizer choice, guided by a printable template, is key to success.

Choosing the Right Stabilizer for Your Fabric

Selecting the appropriate stabilizer is paramount for successful embroidery, and a printable placement guide complements this process by ensuring accurate application. The fabric’s characteristics dictate the stabilizer type; a misstep can lead to puckering or design distortion, issues professionals like those at Miami Stitch diligently avoid.

Consider the fabric weight and stretch. Lightweight, sheer materials benefit from wash-away stabilizers, while knits require cut-away or tear-away to prevent distortion. Using a guide alongside the stabilizer ensures consistent placement, regardless of fabric type.

Beginner kits, such as those from ETSPIL, often recommend specific stabilizers for their projects. Always hoop stabilizer with the fabric, as advised in various guides, and utilize temporary spray adhesive for secure adhesion.

A well-chosen stabilizer, guided by a printable template, provides the necessary support and stability for a flawless embroidered finish.

Stabilizer for Knitted Fabrics

Knitted fabrics present unique challenges due to their inherent stretch and tendency to distort during embroidery. Therefore, stabilizers for knits must provide robust support without compromising the fabric’s flexibility. A printable embroidery placement guide is crucial here, ensuring the stabilizer is accurately positioned to counteract stretching.

Cut-away stabilizers are generally preferred for knits, offering maximum support and preventing puckering, especially for dense designs. However, tear-away stabilizers can be used for lighter designs, provided they are carefully removed to avoid fabric distortion.

Miami Stitch emphasizes the importance of proper stabilization for apparel, and a guide aids in consistent application. Utilizing temporary spray adhesive, as recommended in various guides, further secures the stabilizer to the knit.

Combining the right stabilizer with a precise placement guide yields professional results on even the most challenging knit fabrics.

Stabilizer for Woven Fabrics

Woven fabrics, unlike knits, generally possess greater stability, offering more flexibility in stabilizer choices. However, a printable embroidery placement guide remains essential for accurate design positioning, particularly on fabrics prone to slight shifts during hooping.

Tear-away stabilizers are often suitable for woven fabrics, providing sufficient support during stitching and allowing for clean removal afterward. Cut-away stabilizers are ideal for heavier designs or fabrics that require extra reinforcement, mirroring the approach for knits.

Wash-away stabilizers can also be utilized, especially for delicate woven materials where minimal residue is desired. Stitch America, Inc. highlights the importance of selecting the correct stabilizer type.

Regardless of the chosen stabilizer, a precise placement guide, combined with techniques like temporary spray adhesive, ensures professional embroidery results on woven fabrics, as emphasized by various embroidery resources.

Preparing Your Fabric and Design

Proper preparation is crucial; hooping fabric with stabilizer, guided by a printable template, ensures design accuracy. Temporary spray adhesive further secures everything, preventing shifting during stitching.

This meticulous approach, recommended by multiple sources, guarantees professional results, mirroring the quality of Miami Stitch’s custom work.

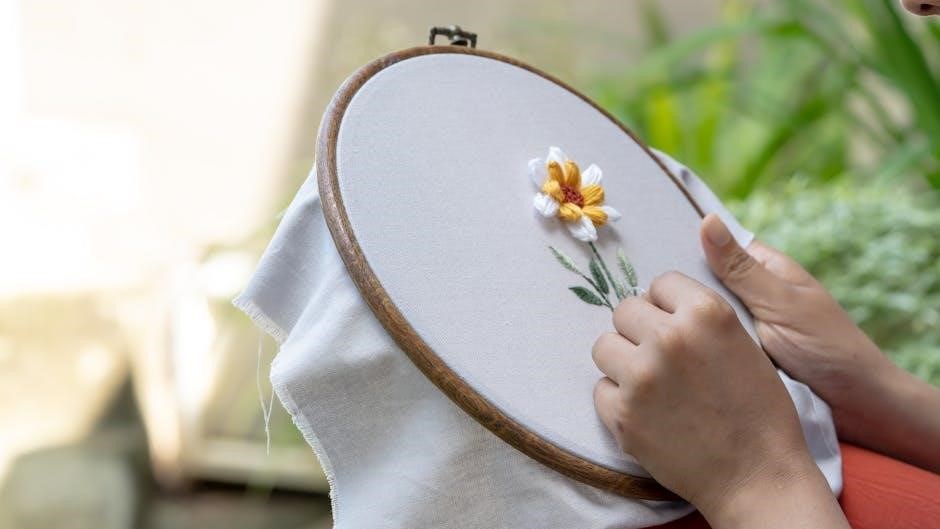
Hooping Fabric with Stabilizer

Hooping fabric correctly with stabilizer is foundational for successful machine embroidery, and a printable placement guide streamlines this process. Begin by adhering the stabilizer to the fabric using temporary spray adhesive – a technique consistently recommended for preventing shifting during stitching.

Carefully align your printed placement guide onto the stabilizer, ensuring the design’s intended position is accurately reflected. Then, center the fabric and stabilizer (with the guide) within the embroidery hoop, tightening it firmly but not excessively.

The goal is a taut, drum-like surface, free of wrinkles or distortions. Always hoop stabilizer with the fabric whenever possible, as emphasized in beginner guides. This combined approach, utilizing both a guide and proper hooping, minimizes puckering and ensures consistent, high-quality embroidery, comparable to the craftsmanship offered by professionals like Miami Stitch.

Remember, a secure hoop and well-adhered stabilizer are essential for preventing design movement and achieving a polished final product.

Using Temporary Spray Adhesive

Temporary spray adhesive is a crucial aid when working with printable embroidery placement guides, particularly for fabrics prone to shifting. Applying a light, even coat to the stabilizer before adhering the fabric ensures a secure bond, preventing movement during the hooping and stitching process.

This technique is consistently recommended as a best practice, especially for delicate or stretchy materials. Align your printed placement guide on the stabilizer before applying the adhesive, guaranteeing accurate design positioning.

Allow the adhesive to become tacky before carefully smoothing the fabric onto the stabilizer, referencing the guide for precise alignment. This method is particularly beneficial when creating custom designs or working with multiple layers, mirroring the attention to detail found in services like those offered by Miami Stitch.

Remember to use a temporary adhesive specifically designed for embroidery, ensuring it won’t leave residue on your fabric or needle.

Printable Placement Guide Templates

Readily available templates simplify embroidery, offering pre-designed layouts for common areas like pockets and sleeves, streamlining projects for both beginners and experienced crafters.

These guides, used with kits like CYANFOUR’s, ensure consistent, professional results, enhancing designs on apparel and various fabric crafts.

Common Embroidery Placement Areas

Embroidery flourishes beautifully in strategically chosen locations, enhancing garments and textiles. Pocket placement is a classic choice, adding a personalized touch to shirts, jackets, and bags; guides ensure consistent positioning for branded apparel, vital for businesses like Miami Stitch.

Sleeve placement, typically on the upper arm, offers subtle branding or decorative detail, ideal for uniforms or athletic wear. Accurate guides prevent distortion during wear, a concern addressed in stabilizer guides.

Center front or back panels of shirts and jackets provide prominent display areas for logos or intricate designs. Hat placement requires careful consideration of the hat’s structure and wearability, benefiting from precise templates.

Furthermore, collar placements are popular for monograms or small logos, while bag and tote placements depend on the bag’s design and intended use. Utilizing printable guides, alongside techniques from embroidery kits like ETSPIL, guarantees professional results.

Pocket Placement

Pocket embroidery is a highly visible and popular choice for adding logos, monograms, or decorative designs to shirts, jackets, and workwear. A printable placement guide is crucial for consistent positioning, especially for bulk orders handled by businesses like Miami Stitch.

Typically, designs are centered horizontally on the pocket, with consideration given to the pocket’s height and width. Guides help determine the optimal distance from the pocket’s edge, preventing the design from being obscured or awkwardly placed.

For left-chest pocket placements, standardization is key for a professional look. Utilizing a template ensures uniformity across all garments, mirroring the quality emphasized in embroidery kits like those from CYANFOUR.

Proper stabilizer selection, as highlighted by Stitch America, Inc., is vital for pocket embroidery, preventing puckering and ensuring design longevity. Accurate guides, combined with quality materials, deliver a polished, professional finish.

Sleeve Placement

Sleeve embroidery offers a subtle yet impactful branding opportunity, frequently utilized for corporate logos or individual personalization. A printable placement guide is essential for consistent design application, particularly important for businesses like Miami Stitch handling large-scale orders.

Common sleeve placement is on the upper arm, typically 2-3 inches from the shoulder seam. Guides ensure consistent vertical and horizontal positioning across all garments, maintaining a professional aesthetic.

Consideration must be given to arm movement; avoid placing designs where they might distort or become uncomfortable. Templates help visualize the design’s appearance in various arm positions.

Stabilizer choice, as emphasized by resources like Stitch America, Inc., is critical for sleeve embroidery due to fabric stretch. Utilizing a guide alongside appropriate stabilization prevents puckering and ensures design durability, mirroring the quality found in beginner kits like ETSPIL.

Creating Custom Guides

Custom printable embroidery placement guides offer flexibility beyond pre-designed templates, catering to unique designs and garment styles. This is particularly useful for personalized projects or when working with unconventional apparel, as often seen with creators utilizing Miami Stitch’s services.

Measuring and marking involves accurately determining the desired design position and transferring those measurements to a printable template. Precise measurements are crucial to avoid skewed or off-center embroidery.

Digital design tools, like graphic design software, allow for creating detailed guides with precise coordinates. These guides can be easily adjusted and reprinted as needed, offering scalability for larger production runs.

Remember to account for hoop size and stabilizer requirements when designing your guide. Proper preparation, alongside understanding stabilizer types (as detailed in beginner guides), ensures a smooth embroidery process, similar to the step-by-step instructions in kits like CYANFOUR.

Measuring and Marking

Accurate measuring and marking are foundational to creating effective printable embroidery placement guides. Begin by carefully measuring the garment to determine the ideal design center point, considering factors like collar placement or pocket alignment, crucial for projects like those handled by Miami Stitch.

Utilize a clear ruler or measuring tape, and mark the fabric lightly with a fabric-safe marker or tailor’s chalk. Avoid permanent markers that could stain or interfere with the embroidery process.

For symmetrical designs, ensure measurements are mirrored on both sides of the garment. Double-check all measurements before finalizing the guide, minimizing errors and rework, a practice emphasized in beginner embroidery resources.

Remember to account for hoop size and stabilizer overlap when transferring measurements to your printable template. Precise marking, combined with appropriate stabilizer use (as discussed by Stitch America, Inc.), guarantees professional results.

Digital Design Tools

Leveraging digital design tools significantly streamlines the creation of custom printable embroidery placement guides. Software like Adobe Illustrator or Inkscape allows for precise design layout and measurement accuracy, surpassing traditional methods.

These tools enable you to create templates with specific dimensions, incorporating key garment features and design placement indicators. You can easily adjust and replicate guides for various sizes and styles, beneficial for businesses like Miami Stitch handling diverse orders.

Consider utilizing pre-made embroidery design software features or importing garment mockups as backgrounds for accurate visualization. Digital guides offer flexibility and scalability, simplifying complex placements.

Furthermore, digital tools facilitate easy sharing and collaboration with team members, ensuring consistency across all embroidery projects. Combined with careful measuring (as discussed previously), these tools elevate guide creation, mirroring the precision found in kits like those from CYANFOUR.

Advanced Techniques & Considerations

Mastering advanced techniques involves adapting placement guides for challenging fabrics and designs, preventing puckering, and ensuring design integrity, like Stitch America recommends.

Careful stabilizer selection and temporary adhesive use (as noted on 20.02.2024) are crucial for optimal results and professional finishes.

Dealing with Stretchable Fabrics

Embroidery on stretchable fabrics, such as knits, demands a specialized approach to placement and stabilization to prevent distortion during wear and washing. Standard printable placement guides are a great starting point, but require adaptation.

Firstly, utilize a cut-away stabilizer, as it provides the most robust support, preventing the fabric from stretching during the embroidery process. Hoop the stabilizer with the fabric, ensuring a tight grip – a technique consistently recommended for optimal results. Consider applying a temporary spray adhesive, as suggested, to further secure the fabric to the stabilizer, minimizing shifting.

When using your printable guide, mark the design placement carefully, accounting for potential fabric movement. Reduce stitch density slightly to allow for fabric give. Post-embroidery, carefully trim away excess stabilizer, avoiding any damage to the stitches. Remember, Miami Stitch emphasizes attention to detail, and this is especially critical with delicate materials. Proper preparation and stabilization are key to achieving a professional finish on stretchable fabrics.

Preventing Puckering and Distortion

Puckering and distortion are common challenges in machine embroidery, often stemming from improper stabilization or tension. Utilizing a printable embroidery placement guide is only the first step; correct execution is vital.

Ensure your chosen stabilizer – tear-away, cut-away, or wash-away – is appropriate for your fabric type. For woven fabrics, a tear-away stabilizer might suffice, but knitted fabrics generally require cut-away for greater support. Always hoop the stabilizer with the fabric, creating a unified base. Temporary spray adhesive can further prevent shifting during stitching, a technique often recommended.

Pay close attention to your machine’s tension settings. Incorrect tension can cause the fabric to pull or bunch. Test stitch on a scrap piece of fabric before beginning your project. Following the guidance of resources like those from Stitch America, Inc., and carefully monitoring stitch density will minimize distortion. Remember, consistent quality, like that offered by Miami Stitch, relies on meticulous attention to these details.

Resources and Further Learning

Expanding your embroidery knowledge is a continuous journey. Numerous online resources and kits cater to all skill levels, from beginner-friendly options like the CYANFOUR Embroidery Kit to more advanced techniques.

For comprehensive guidance on machine embroidery stabilizers, explore resources offered by companies like Stitch America, Inc., and the informative guides available since 2020; Miami Stitch provides expert craftsmanship and can offer insights into best practices for custom projects.

Websites featuring tutorials, such as those accompanying the ETSPIL Embroidery Kit, demonstrate essential skills like floss separation and knot tying. Consider investing in a fabric embroidery book for portable learning, offering 30 essential hand embroidery techniques. Remember to check dates, as information evolves – a guide from August 2017 may need updating. Continued practice and exploration will refine your skills and unlock creative potential.

aprilaire 500 manual

Aprilaire 500 Manual: A Comprehensive Guide

This guide provides detailed instructions for the Aprilaire 500 humidifier, covering installation, troubleshooting, maintenance, and operation.
It’s essential for optimal performance and longevity of your whole-house humidity system, ensuring comfortable indoor air quality.

Understanding the manual is crucial for addressing issues like the unit not turning on, leaks, or incorrect humidity levels.
Referencing this resource will help you maintain a healthy and efficient home environment throughout the heating season.

Understanding the Aprilaire 500 Humidifier

The Aprilaire 500 is a popular choice for whole-house humidification, designed to add moisture to your home’s air during dry heating seasons. It operates by utilizing a fan to draw water up through a wicking evaporator pad, which then increases humidity as air passes over it.

This model typically integrates with your existing forced-air heating system, and requires a separate humidistat to control operation. The humidistat measures indoor humidity levels and signals the humidifier to turn on or off to maintain the desired setting.

Understanding the core components – the water panel, solenoid valve, and fan – is key to troubleshooting. The Aprilaire 500 aims to alleviate dry air symptoms like static electricity, dry skin, and respiratory discomfort. Proper installation and maintenance, as detailed in the manual, are vital for efficient and reliable performance.

Regularly checking for leaks and ensuring proper water supply are essential aspects of ownership.

Key Features and Specifications

The Aprilaire 500 boasts several key features, including a self-adjusting humidifying system that responds to changing conditions. It’s designed for easy installation into existing ductwork and operates quietly. A notable specification is its capacity to humidify up to 3,000 square feet, depending on climate and home construction.

Key specifications include: a 4.0-gallon water panel, a 120V electrical requirement, and compatibility with standard 24V humidistats. The unit’s dimensions are approximately 14” x 22” x 9”, requiring adequate space within the duct system.

The Aprilaire 500 also features a manual bypass damper, allowing for airflow even when the humidifier isn’t actively humidifying. This prevents duct pressure imbalances. Its durable construction ensures long-term reliability, and the readily available replacement parts simplify maintenance. Understanding these features and specs is crucial for optimal operation.

Aprilaire 500 Installation Overview

Installing the Aprilaire 500 typically involves mounting the humidifier to the supply-side ductwork of your furnace or air handler. A saddle valve is used to tap into the cold water supply line, and a separate connection is made to a drain. Proper ductwork preparation is essential, ensuring sufficient space and structural integrity.

The installation process requires basic plumbing and electrical knowledge. It’s crucial to shut off both the water and power supply before beginning. The humidifier should be positioned to allow for easy access to the water panel and other components for maintenance.

A DIYer can complete the installation with the right tools and careful adherence to the manual’s instructions, as demonstrated in online installation videos. However, professional installation is recommended if you’re uncomfortable with plumbing or electrical work. Correct installation ensures efficient and safe operation.

Water Supply Connection

Connecting the Aprilaire 500 to a cold water supply is typically achieved using a self-piercing saddle valve. This valve taps into a copper or CPVC water pipe, providing a constant water source for the humidifier. Ensure the chosen pipe section is accessible and free from corrosion.

Proper installation of the saddle valve is critical to prevent leaks. The valve should be securely tightened, and the piercing action should create a clean, watertight seal. It’s recommended to check for leaks immediately after installation and periodically thereafter.

A bypass valve is often included to allow for shutting off the water supply to the humidifier without interrupting water flow to other fixtures. This is useful during maintenance or when the humidifier is not in use. Always follow the manufacturer’s instructions for proper water line connection.

Electrical Connection and Wiring

The Aprilaire 500 humidifier requires a standard 120V electrical connection for operation. It’s crucial to disconnect power at the breaker box before commencing any wiring work to ensure safety. The unit typically includes a transformer to step down the voltage for internal components.

Wiring involves connecting the humidifier to the humidistat and the power source. Follow the wiring diagram provided in the manual carefully, paying attention to the color coding of the wires. Incorrect wiring can damage the unit or create a safety hazard.

Ensure all connections are secure and properly insulated. Use wire connectors approved for the gauge of wire being used. Grounding the humidifier is essential for safety. If you are uncomfortable with electrical work, consult a qualified electrician for assistance.

Humidistat Setup and Calibration

The Aprilaire 500 utilizes a humidistat to monitor and control humidity levels within your home. Proper setup and calibration are vital for accurate readings and efficient operation. Begin by mounting the humidistat in a central location, away from direct sunlight, drafts, or heat sources.

Calibration typically involves adjusting a dial or using digital settings to match the humidistat’s reading to a known accurate humidity measurement. Refer to the manual for specific calibration instructions for your model. Incorrect calibration can lead to over or under-humidification.

Familiarize yourself with the humidistat’s settings, including the desired humidity level and any automatic modes. Regularly check the humidistat’s accuracy and recalibrate as needed to maintain optimal indoor air quality and comfort throughout the heating season.

Initial Startup and Testing

After completing the installation of your Aprilaire 500, a thorough startup and testing procedure is essential. First, ensure the water supply is fully connected and turned on, checking for any leaks at the connections. Then, verify the electrical connection is secure and the power is switched on to the unit.

Observe the humidifier during its initial operation to confirm the water panel is adequately saturated and that water is being distributed correctly. Monitor the humidistat to ensure it’s calling for humidity and the unit responds accordingly. Listen for any unusual noises that might indicate a problem.

Allow the system to run for several hours while monitoring humidity levels throughout the house. Adjust the humidistat settings as needed to achieve your desired humidity level. Document any issues encountered during startup for future reference or troubleshooting.

Troubleshooting Common Issues

This section details solutions for typical Aprilaire 500 problems, including units that won’t start, lack of water output, leaks, and incorrect humidity readings.

Addressing these issues promptly ensures optimal performance and prevents further damage to your whole-house humidifier system.

Aprilaire 500 Not Turning On

If your Aprilaire 500 humidifier fails to power on, several factors could be at play. First, verify the power supply – ensure the unit is properly plugged into a functioning electrical outlet. Check the circuit breaker to confirm it hasn’t tripped. A blown fuse is another potential culprit, requiring replacement.

Next, inspect the humidistat, the control mechanism for your humidifier. Ensure it’s set to a demand setting (a humidity level higher than the current room humidity). A faulty humidistat can prevent the unit from activating. Confirm the humidistat wiring is secure and correct, referencing the wiring diagram in the manual.

Also, examine the transformer within the humidifier itself. A malfunctioning transformer won’t deliver the necessary power. If these steps don’t resolve the issue, there might be an internal component failure requiring professional service. Always disconnect power before inspecting internal parts.

Remember to consult the official Aprilaire 500 manual for detailed diagrams and safety precautions.

No Water Output – Potential Causes

If your Aprilaire 500 isn’t producing water, begin by checking the water supply. Ensure the water supply valve is fully open and that there are no kinks or obstructions in the water line leading to the humidifier. A frozen water line is a common issue during colder months, preventing water flow.

Inspect the saddle valve (if installed) for punctures or leaks. A damaged saddle valve won’t deliver adequate water pressure. Verify the water panel is clean and free of mineral buildup, as this can restrict water absorption. A clogged water panel significantly reduces output.

Also, check the solenoid valve, which controls water flow. A faulty solenoid valve may not open, halting water delivery. Confirm the humidistat is calling for humidity and that the solenoid valve is receiving power. If problems persist, consult the manual’s troubleshooting section for further guidance and potential solutions.

Regular maintenance and cleaning can prevent many water output issues.

Humidifier Leaks: Identification and Repair

Leaks in your Aprilaire 500 humidifier can cause water damage, so prompt identification and repair are crucial. Begin by inspecting all water connections – the water supply line, the solenoid valve, and the drain line – for any signs of drips or moisture. Tighten connections carefully, avoiding over-tightening which can damage fittings.

Check the humidifier base and water panel for cracks or damage. A cracked base or panel will inevitably leak. Examine the saddle valve (if applicable) for punctures or loose connections. Ensure the drain line is properly positioned and not clogged, allowing for adequate water drainage.

If the leak originates from the humidifier itself, it may indicate an internal issue requiring professional attention. Consult the Aprilaire 500 manual’s troubleshooting section for specific leak scenarios and repair recommendations. Always disconnect power before attempting any repairs.

Preventative maintenance can minimize the risk of leaks.

Excessive Humidity Levels

Experiencing excessive humidity with your Aprilaire 500 can lead to condensation, mold growth, and discomfort. First, verify your humidistat setting isn’t set too high. Lowering the setpoint is the simplest solution. Ensure the humidistat is calibrated correctly; refer to the manual for calibration instructions.

Check the furnace fan settings. If the fan runs continuously, it can contribute to higher humidity levels. Consider adjusting the fan to ‘auto’ mode, allowing it to cycle on and off with the heating system. Inspect the humidifier’s water output; a malfunctioning solenoid valve might be delivering too much water.

If problems persist, the humidistat itself may be faulty and require replacement. Consult the Aprilaire 500 manual’s troubleshooting guide for further assistance. Maintaining appropriate humidity levels is vital for a healthy and comfortable home environment.

Regular monitoring is key to preventing excessive humidity.

Strange Noises During Operation

Unusual sounds from your Aprilaire 500 humidifier can indicate several issues. A rattling noise often suggests loose components within the unit; carefully inspect for any vibrating parts and tighten them. Gurgling sounds may point to air trapped in the water line – try gently tapping the line to release any air bubbles.

Whining or squealing noises could stem from the humidifier’s motor, potentially indicating a need for lubrication or eventual replacement. Check the water panel for debris or mineral buildup, as this can cause scraping sounds. Ensure the unit is level; an uneven installation can amplify vibrations and create noise.

Refer to the Aprilaire 500 manual’s troubleshooting section for specific guidance on identifying and resolving noise issues. If the noise persists or worsens, it’s best to consult a qualified HVAC technician to prevent further damage.

Ignoring strange noises can lead to more significant problems.

Maintenance and Filter Replacement

Regular maintenance ensures optimal performance of your Aprilaire 500. This includes timely filter replacements and cleaning of humidifier components, extending its lifespan and efficiency.

Following the recommended schedule, detailed in the manual, guarantees consistent humidity control and healthy indoor air quality for your home.

Filter Replacement Schedule

Maintaining a consistent filter replacement schedule is paramount for the Aprilaire 500’s performance and the air quality within your home. The frequency of replacement depends heavily on your water quality and usage patterns, but a general guideline is provided in the official manual.

Typically, the evaporative pad (filter) should be replaced every 1-3 months during the heating season. However, if you have hard water or notice mineral buildup, more frequent replacements – even monthly – are recommended. Visual inspection of the pad is key; if it appears heavily scaled or restricted, it’s time for a new one.

The pre-filter, designed to catch larger particles, should be checked monthly and replaced as needed. This protects the evaporative pad and extends its life. Ignoring these schedules can lead to reduced humidity output, increased energy consumption, and potential damage to the unit. Always refer to your Aprilaire 500 manual for specific recommendations tailored to your water conditions.

Proper filter maintenance is a small investment that yields significant benefits in terms of air quality and humidifier longevity.

Cleaning the Humidifier Components

Regular cleaning of your Aprilaire 500 humidifier is vital for preventing mineral buildup and ensuring optimal performance. Before any cleaning, always disconnect the power supply to avoid electrical hazards. The water panel, or evaporative pad, requires periodic attention, even with regular filter changes.

The humidifier base should be inspected and cleaned at least annually, or more frequently if hard water is a concern. Use a mild solution of vinegar and water to dissolve mineral deposits, then rinse thoroughly. Avoid abrasive cleaners, as they can damage the plastic components.

The solenoid valve and water supply line should also be checked for obstructions and cleaned as needed. Inspect the drain line to ensure it’s clear and flowing freely. Consult your Aprilaire 500 manual for detailed cleaning instructions and diagrams.

Consistent cleaning extends the life of your humidifier and maintains healthy indoor air quality.

Winterization and Shutdown Procedures

Properly winterizing your Aprilaire 500 humidifier before extended periods of non-use is crucial to prevent damage from freezing temperatures. Begin by turning off the water supply to the unit. Then, disconnect the electrical power to ensure safety during the process.

Drain all remaining water from the humidifier tank, water panel, and supply lines. You can gently tilt the unit to facilitate complete drainage. Consider using compressed air to blow out any residual water in the lines, preventing ice formation.

Remove and discard the water panel. It’s recommended to install a new panel at the start of the next heating season. Refer to your Aprilaire 500 manual for specific winterization steps.

Following these procedures safeguards your investment and ensures a smooth startup when heating season returns.

Aprilaire 500 Humidistat Manual Settings

The Aprilaire 500 humidifier’s humidistat controls the desired humidity level in your home. Manual humidistats typically feature a dial or buttons to adjust the setpoint. Understanding these settings is key to achieving optimal comfort and preventing issues like condensation.

The dial usually ranges from 1 to 10, with lower numbers indicating lower humidity and higher numbers representing increased moisture. Start with a setting of 3 or 4 and adjust gradually based on your home’s needs and observed humidity levels.

Some models offer a “fan” setting, allowing the humidifier to operate continuously even when humidity is at the setpoint. Consult your Aprilaire 500 manual for detailed instructions on navigating the humidistat’s features.

Proper humidistat calibration ensures accurate humidity control and efficient operation of your system.

Finding the Official Aprilaire 500 Manual

Accessing the official Aprilaire 500 manual is crucial for comprehensive information regarding installation, operation, troubleshooting, and maintenance. Several online resources provide access to this vital document.

The primary source is the Aprilaire website (apraire.com). Navigate to their support section and search for “Aprilaire 500 manual” or use the model number to locate the correct PDF document. Downloading the manual directly from Aprilaire ensures you have the most up-to-date and accurate information.

Alternatively, you can find the manual on websites specializing in appliance documentation. However, always verify the source’s credibility to ensure the manual is legitimate and hasn’t been altered.

Having the official manual readily available will empower you to effectively manage and maintain your Aprilaire 500 humidifier.

pa 65 instructions

Panasonic DVD-PA65: Comprehensive Instructions

This guide details the Panasonic DVD-PA65’s operation, covering connections, playback, and settings. Instructions for the PA-65 Corp form, including revenue details, are also included.

The Panasonic DVD-PA65 is a portable DVD player designed for on-the-go entertainment, offering both DVD-Video and DVD-Audio playback capabilities. This comprehensive guide provides detailed instructions for optimal use. Understanding its features ensures a seamless viewing experience. The PA65 supports various disc formats, delivering high-quality audio and video.

Beyond entertainment, this document also incorporates instructions related to the PA-65 Corp form, a Pennsylvania tax form concerning corporate partnerships. This dual-purpose guide aims to assist users with both the device’s operation and relevant tax obligations. Refer to the included directory for corporate partner information and the PA-65 Corp IN (DR) MOD 04-24 form details.

Key Features and Specifications

The Panasonic DVD-PA65 boasts portable DVD playback with support for diverse disc formats. Key features include AV output connections for external displays and a headphone jack for private listening. It’s powered by a rechargeable battery, charged via a DC-IN jack.

Regarding the PA-65 Corp form, key aspects involve partnership revenue reporting to the state of Pennsylvania. Specifications for the form include the MOD 04-24 revision date. The purpose of this form is to provide detailed financial instructions for corporate partners, ensuring accurate tax filings. Access the directory for a complete list of partners.

Getting Started with Your DVD-PA65

Instructions cover unboxing, charging, and powering the device. For PA-65 Corp, begin with form purpose understanding and partner directory access.

Unboxing and Package Contents

Upon receiving your Panasonic DVD-PA65, carefully open the package. Instructions regarding the PA-65 Corp form are separate and should be reviewed later. Verify all components are present. Typically, the box includes the DVD-PA65 portable player itself, a charging adapter, an AV cable for connecting to a television, and this operating instructions manual;

Some packages may also contain headphones or a car adapter. Inspect each item for any physical damage that may have occurred during shipping. If anything is missing or damaged, immediately contact the retailer or Panasonic customer support for assistance. Retain the original packaging for potential returns or warranty claims. Remember to consult the PA-65 Corp documentation for tax-related details.

Charging the Device

To charge your Panasonic DVD-PA65, connect the provided charging adapter to the DC-IN jack. Ensure the adapter is compatible with your local power supply. A charging indicator light will illuminate, typically red, to signify charging is in progress. Allow approximately 3-4 hours for a full charge.

The instructions for the PA-65 Corp form are unrelated to device charging. Once fully charged, the indicator light may change to green or turn off. Disconnect the adapter to conserve energy. Avoid using the device while it’s charging, as this may impact battery lifespan. Refer to the ‘Battery Care’ section for optimal charging practices.

Powering On/Off

To power on the Panasonic DVD-PA65, locate and press the power button, usually found on the side or top of the device. The screen will illuminate, and the DVD player will initialize. To power off, press and hold the power button for a few seconds until the device shuts down completely.

Remember, the instructions pertaining to the PA-65 Corp form are separate from device operation. Avoid abruptly turning off the device during disc playback, as this could potentially cause damage. Ensure the device is fully powered off before disconnecting any cables or accessories.

Playback Functions

Instructions cover DVD-Video and DVD-Audio playback, utilizing controls like play, pause, stop, forward, and rewind for optimal viewing and listening.

DVD-Video Playback

Instructions for DVD-Video playback on the Panasonic DVD-PA65 ensure a high-quality viewing experience. Insert a compatible DVD disc, and the player will automatically recognize and begin playback. Utilize the playback controls – Play, Pause, Stop, Forward, and Rewind – to navigate through the movie.

The device supports various video formats commonly found on DVDs. Refer to the ‘Supported Disc Formats’ section for a complete list. For initial setup, consult the ‘Programming Quick-start Guide’ to familiarize yourself with the player’s functions. Ensure the disc is clean and free of scratches for optimal performance, avoiding potential read errors.

DVD-Audio Playback

Instructions for DVD-Audio playback on the Panasonic DVD-PA65 deliver a superior listening experience. Insert a DVD-Audio disc; the player will detect the audio format and initiate playback. Adjust the volume using the controls, and explore the ‘Audio Settings’ for equalizer adjustments to personalize your sound.

The DVD-PA65 supports various audio formats commonly found on DVD-Audio discs. Refer to the ‘Supported Disc Formats’ section for a comprehensive list. Ensure the headphones are properly connected via the headphone jack for private listening. Optimal audio quality is achieved with clean discs, preventing potential playback issues.

Supported Disc Formats

Instructions regarding disc compatibility are crucial for optimal performance of the Panasonic DVD-PA65. This portable player primarily supports DVD-Video and DVD-Audio discs. It also accommodates CD formats, including CD-DA and MP3-encoded CDs. However, compatibility with DVD-RW or CD-RW discs may vary depending on the recording format and finalization status.

The device is designed to read standard 12cm discs. Mini-discs or irregularly shaped discs are not supported. Refer to the device specifications for a complete list of compatible codecs and file types. Always ensure discs are clean and free of scratches to prevent read errors and ensure smooth playback.

Playback Controls (Play, Pause, Stop, Forward, Rewind)

Instructions for utilizing the playback controls on the Panasonic DVD-PA65 are straightforward. The ‘Play’ button initiates disc playback. Pressing ‘Pause’ temporarily halts the action, resuming from the same point upon re-pressing. ‘Stop’ completely ends playback, returning to the disc’s beginning or the chapter selection screen.

The ‘Forward’ and ‘Rewind’ buttons allow for navigating through the disc’s content. Holding these buttons enables fast-forwarding or rewinding. Some models feature variable speed control. Refer to the operating instructions for specific functions like frame-by-frame advance. Proper use ensures a seamless viewing experience.

Connections and Ports

Instructions detail AV output connections, a headphone jack for private listening, and the DC-IN jack specifically for charging the Panasonic DVD-PA65 device.

AV Output Connections

The Panasonic DVD-PA65 utilizes AV output connections to transmit audio and video signals to external devices like televisions or audio receivers. These connections typically involve a standard RCA composite video output (yellow connector) and RCA audio outputs (red and white connectors). Instructions emphasize ensuring secure connections for optimal signal quality.

Properly connecting these cables is crucial for viewing DVD content on a larger screen and experiencing enhanced audio. Refer to your television or receiver’s manual for compatible input locations. The guide details how to configure the DVD player’s output settings to match your connected device, ensuring correct color and sound reproduction. Instructions also advise checking cable integrity for any damage.

Headphone Jack

The DVD-PA65 features a standard 3.5mm headphone jack, allowing for private listening without disturbing others. Instructions recommend using compatible headphones for optimal audio quality. Plugging headphones into the jack automatically mutes the audio output through the AV connections, providing a focused listening experience.

The guide details adjusting the volume level using the player’s controls while headphones are connected. Instructions also caution against excessive volume levels to prevent potential hearing damage. Ensure the headphone plug is fully inserted into the jack for a stable connection and clear sound. This feature is ideal for travel or situations where quiet playback is desired.

DC-IN Jack (Charging)

The DVD-PA65 utilizes a DC-IN jack for charging the internal battery. Instructions emphasize using only the provided charging adapter to avoid damage to the device. Connecting the adapter initiates the charging process, indicated by a charging LED. The manual details typical charging times, varying based on battery level.

Instructions advise against using the device during charging if prolonged battery life is a concern. The DC-IN jack accepts a specific voltage; using an incorrect adapter could cause malfunction. Ensure the adapter is securely connected to both the player and a power outlet. Proper charging maintains optimal performance and extends battery lifespan.

Advanced Features & Settings

Explore screen adjustments (brightness, contrast) and audio customization (equalizer, volume). Instructions cover parental control setup for restricted content viewing.

Screen Settings (Brightness, Contrast)

Adjusting the screen settings on your Panasonic DVD-PA65 allows for optimal viewing in various lighting conditions. Brightness controls the overall lightness or darkness of the display, impacting how vivid images appear. Increasing brightness is beneficial in well-lit environments, while decreasing it conserves battery life and reduces eye strain in darker settings.

Contrast, conversely, determines the difference between the lightest and darkest shades displayed. Higher contrast enhances image detail and makes colors pop, but excessive contrast can lead to washed-out highlights or crushed blacks. Experiment with both settings to find a balance that suits your preferences and the content you are watching. Refer to the operating instructions for detailed guidance on navigating these settings within the DVD-PA65’s menu system.

Audio Settings (Equalizer, Volume)

The Panasonic DVD-PA65 offers audio customization options to enhance your listening experience. Volume control adjusts the overall sound output level, ensuring comfortable listening at any time. Beyond basic volume, an equalizer allows fine-tuning of specific frequencies – bass, mid-range, and treble – to tailor the sound to your preferences or the audio content.

Boosting bass can add impact to action scenes or music, while adjusting treble clarifies dialogue. Explore the equalizer presets for optimized sound profiles, or create custom settings. Consult the operating instructions for detailed steps on accessing and adjusting these audio features. Proper audio settings significantly improve the enjoyment of both DVD-Video and DVD-Audio playback.

Parental Control Settings

The Panasonic DVD-PA65 includes parental control features to restrict access to content based on ratings. These settings allow you to set a password, preventing unauthorized changes to these restrictions. You can then block playback of DVDs with specific age ratings, ensuring age-appropriate viewing for children.

Refer to the operating instructions manual for detailed guidance on setting up and managing the parental control system. The PA-65’s controls enable you to customize restrictions based on movie ratings, providing a safe viewing environment. Remember to securely store your password to maintain control over these settings.

Troubleshooting Common Issues

If you encounter problems, check for disc read errors, power issues, or sound malfunctions. Instructions detail solutions for these common PA-65 operational challenges.

Disc Read Errors

Experiencing difficulties reading discs with your Panasonic DVD-PA65? Several factors can contribute to this issue. First, ensure the disc is clean and free of scratches, as damage hinders playback. Try gently cleaning the disc with a soft, lint-free cloth.

Secondly, confirm the disc format is supported by the DVD-PA65 – refer to the ‘Supported Disc Formats’ section for compatibility details. Incorrect disc types won’t play. Finally, condensation can sometimes interfere with reading; allow the player and disc to reach room temperature.

If the problem persists, a faulty lens within the player might be the cause. Instructions for contacting Panasonic support for potential repair options are available online. Remember to consult the PA-65 documentation for further assistance.

No Power

If your Panasonic DVD-PA65 fails to power on, begin by verifying the charging adapter is securely connected to both the device’s DC-IN jack and a functioning power outlet. Confirm the outlet is supplying power by testing it with another device.

Next, check the charging adapter itself; ensure it’s the correct adapter specified for the DVD-PA65, as incompatible adapters can cause issues. Allow the device to charge for a sufficient period – a depleted battery may require extended charging time.

If these steps don’t resolve the issue, consult the PA-65 Corp instructions regarding power supply compatibility. If problems continue, contact Panasonic support for further troubleshooting or potential repair options.

No Sound

If you experience no sound during playback on your Panasonic DVD-PA65, first verify the volume level isn’t muted or set too low, both on the device and any connected headphones. Ensure the correct AV output connection is selected and securely plugged into your TV or audio system.

Check that the DVD disc itself contains audio tracks and isn’t damaged. Try playing a different disc to rule out a disc-specific issue. Review the audio settings within the DVD-PA65’s menu, confirming the equalizer and audio output settings are appropriately configured.

Regarding PA-65 Corp instructions, ensure audio components are compatible. If the problem persists, consult the manual or Panasonic support.

Maintenance and Care

Regularly clean the DVD-PA65 with a soft cloth. Store it in a cool, dry place, and follow battery care guidelines for optimal performance.

Cleaning the Device

To ensure the longevity and optimal performance of your Panasonic DVD-PA65, regular cleaning is essential. Always power off the device and disconnect it from any power source before commencing cleaning procedures. Use a soft, dry, lint-free cloth to gently wipe the exterior surfaces. Avoid using abrasive cleaners, solvents, or liquids, as these can damage the finish or internal components.

For the disc tray and loading area, a slightly dampened cloth can be used, ensuring no moisture enters the internal mechanisms. Pay particular attention to removing dust and fingerprints. The lens should not be cleaned by the user; professional cleaning is recommended if disc read errors persist. Proper cleaning maintains picture quality and prevents potential malfunctions.

Storing the Device

Proper storage is crucial for maintaining the Panasonic DVD-PA65’s condition when not in use. Before storing, ensure the device is completely powered off and any discs have been removed. Store the DVD-PA65 in a cool, dry place, away from direct sunlight, extreme temperatures, and humidity. Avoid storing it in areas prone to dust accumulation, which can damage internal components.

The original packaging is ideal for storage, providing protection against physical impacts. If the original packaging isn’t available, use a protective case or wrap the device in a soft cloth. Avoid placing heavy objects on top of the DVD-PA65 during storage to prevent potential damage to the screen or casing.

Battery Care

To maximize the lifespan of your Panasonic DVD-PA65’s battery, follow these guidelines. Avoid completely discharging the battery before recharging; partial charges are preferable; Do not leave the device plugged in for extended periods after it’s fully charged, as this can degrade battery performance. Store the device in a cool, dry place; extreme temperatures can harm the battery.

Only use the provided charging adapter or a compatible replacement. Avoid exposing the battery to direct sunlight or heat sources. If the device will not be used for an extended period, charge the battery to approximately 50% before storing it. Proper battery care ensures optimal performance and longevity.

PA-65 Corp Instructions (Pennsylvania Tax Form)

This form is for partnerships; it details corporate partner directories and revenue reporting. Instructions and the PA-65 Corp IN (DR) MOD 04-24 are included.

Purpose of the PA-65 Form

The PA-65 form serves as the Pennsylvania Corporate Income Tax Return for partnerships. It’s specifically designed for entities operating as partnerships within the Commonwealth. This crucial document facilitates the accurate reporting of income, deductions, and tax liabilities to the Pennsylvania Department of Revenue.

Partnerships utilize this form to calculate their Pennsylvania tax obligations, ensuring compliance with state tax laws. The PA-65 also requires detailed information regarding the partnership’s structure, including a comprehensive directory of its corporate partners. Accurate completion and timely submission of the PA-65 are essential for avoiding penalties and maintaining good standing with the state.

Furthermore, the form supports the state’s ability to collect revenue necessary for funding public services and infrastructure projects.

Directory of Corporate Partners

The PA-65 form necessitates a detailed listing of all corporate partners associated with the partnership filing the return. This directory serves as a critical component for verifying the partnership’s structure and ensuring accurate tax allocation among its members. Each corporate partner must be clearly identified, including their full legal name, address, and federal Employer Identification Number (EIN).

Providing a complete and accurate directory is paramount for compliance with Pennsylvania tax regulations. The Department of Revenue utilizes this information to cross-reference reported income and deductions, preventing discrepancies and potential audit triggers. Maintaining an updated directory is the responsibility of the partnership.

This ensures transparency and accountability in Pennsylvania’s corporate tax system.

PA-65 Corp IN (DR) MOD 04-24

Form PA-65 Corp IN (DR) MOD 04-24 is the official Pennsylvania Corporate Income Tax Return for partnerships. This specific revision, dated April 2024, must be used for filing tax year 2024 income. It requires detailed financial information, including gross income, deductions, and credits, to calculate the partnership’s taxable income and resulting tax liability.

The form includes schedules for various items, such as cost of goods sold, depreciation, and net operating loss carryovers. Accurate completion is crucial to avoid penalties and ensure compliance with Pennsylvania tax laws. Instructions accompanying the form provide guidance on proper completion and filing procedures.

Electronic filing is often encouraged or required.

PDF

the first global revolution pdf

The First Global Revolution PDF: A Comprehensive Overview (Updated 01/01/2026)

Published in 1991 by Pantheon Books, this report by Alexander King and Bertrand Schneider, a Council of the Club of Rome publication, details the coming world order.

A complete, unabridged first edition, spanning 292 pages, is readily accessible via Archive.org, offering insights into the “great transition” and a new global society.

The book builds upon the 1972 work, “The Limits to Growth”, exploring challenges to the existing order, global warming, and the need for supranational institutions.

The Club of Rome, a global think tank, initiated discussions on critical global issues in the late 1960s. Its foundational report, “The Limits to Growth” (1972), sparked widespread debate concerning resource depletion, population growth, and environmental sustainability. This seminal work laid the groundwork for subsequent investigations into the planet’s future.

“The First Global Revolution” (1991), authored by Alexander King and Bertrand Schneider, represents a follow-up to this earlier analysis. It’s presented as “A report by the Council of the Club of Rome”, signifying a continuation of the organization’s commitment to exploring systemic challenges. The report doesn’t merely reiterate past concerns; it proposes a radical shift in global governance and societal structures.

The Club of Rome’s reports are characterized by their interdisciplinary approach, drawing upon systems dynamics, modeling, and future studies. They aim to identify long-term trends and potential crises, prompting proactive measures to mitigate risks and foster a more sustainable future. “The First Global Revolution” embodies this ethos, advocating for a fundamental transformation of the world order.

The Context of “The First Global Revolution” ⎻ Following “The Limits to Growth”

“The First Global Revolution” emerges directly from the concerns raised in “The Limits to Growth”. The earlier report highlighted the potential for ecological and economic collapse if unchecked growth continued. However, it didn’t offer detailed solutions, focusing primarily on identifying the problems.

Published nearly two decades later, King and Schneider’s work attempts to address this gap, proposing a pathway towards a “great transition” to a new global society. It acknowledges the limitations of national sovereignty in tackling planetary challenges like global warming and environmental degradation.

The context of the early 1990s – marked by increasing globalization and growing environmental awareness – heavily influenced the report’s perspective. The authors argue that a fundamental restructuring of governance is necessary, potentially involving supranational institutions and a shift away from traditional democratic models. This report isn’t a prediction of inevitability, but a call for proactive change.

Authors: Alexander King and Bertrand Schneider

Alexander King, a British scientist and economist, was a founding member and former Director General of the Club of Rome. His extensive background in industrial organization and policy shaped his perspective on global challenges and the need for systemic change. He brought a pragmatic, scientifically grounded approach to the report’s analysis.

Bertrand Schneider, a French-born scholar and consultant, specialized in international relations and future studies. He contributed significantly to the Club of Rome’s research and publications, focusing on the interconnectedness of global issues. His expertise lay in synthesizing complex information and identifying emerging trends.

Together, King and Schneider combined their expertise to produce “The First Global Revolution,” a report reflecting the Club of Rome’s evolving thought. Their collaboration aimed to move beyond simply identifying problems, towards proposing a framework for a new global order. They envisioned a world requiring innovative solutions and a willingness to embrace radical change.

Core Concepts and Themes

Central to the report is the “great transition” towards a new global society, differing drastically from today’s world, alongside challenges to the existing world order.

Key themes include global warming, environmental threats, and the necessity for supranational institutions to enforce a potentially draconian environmentalist regime.

The “Great Transition” and a New Global Society

The core of “The First Global Revolution” revolves around the concept of a “great transition,” signifying a fundamental shift in global society. This isn’t presented as a gradual evolution, but rather a profound reshaping, as different from the current world order as the present is from past eras.

The report posits that humanity is entering the initial phases of constructing this new global society, driven by escalating challenges like environmental degradation and the limitations of existing political structures. This transition necessitates a re-evaluation of fundamental principles governing international relations and governance.

The authors envision a world requiring collaborative, supranational approaches to address global issues, moving beyond the constraints of individual nation-states. This new society demands a willingness to embrace change, risk-taking, and continuous learning, appealing to those who actively seek exploration and discovery.

Ultimately, the “great transition” represents a call for a radical reimagining of how humanity organizes itself to ensure long-term survival and sustainability.

Challenges to the Existing World Order

“The First Global Revolution” identifies several critical challenges threatening the stability of the current world order. Paramount among these is the escalating threat of global warming and the greenhouse effect, deemed a significant danger to the planet’s very survival.

The report argues that traditional nation-state structures are inadequate to effectively address these interconnected global crises. The limitations of democratic governments, as currently configured, are also highlighted as impediments to decisive action.

To overcome these hurdles, the authors propose a fundamental restructuring of governance, advocating for the erosion of national sovereignty in favor of stronger, supranational institutions; This shift is presented not as a choice, but as a necessity for enforcing effective environmental regulations.

The existing order, therefore, faces a direct challenge from the urgency of environmental concerns and the perceived need for a more centralized, globally coordinated response.

The Role of Global Warming and Environmental Threats

“The First Global Revolution” places global warming and the greenhouse effect at the very center of its analysis, portraying them not merely as environmental issues, but as existential threats to planetary survival. The report emphasizes the severity and urgency of these challenges.

According to the authors, the magnitude of the environmental crisis necessitates radical and unprecedented measures. These threats are presented as so overwhelming that they demand a fundamental re-evaluation of existing political and social structures.

The report contends that addressing these threats requires moving beyond national interests and embracing a global perspective. This necessitates the creation of powerful, supranational bodies capable of enforcing stringent environmental policies.

Ultimately, the authors suggest that the severity of environmental threats justifies a potentially “draconian environmentalist regime” to ensure the planet’s long-term viability.

Key Arguments and Predictions

The report advocates for supranational institutions, restructuring democratic governments, and potentially a “draconian environmentalist regime” to address global challenges and ensure planetary survival.

These predictions stem from the belief that existing systems are inadequate to handle the scale of impending environmental and societal transformations.

The Need for Supranational Institutions

The report strongly argues that the escalating global crises, particularly environmental threats like global warming and the greenhouse effect, necessitate a shift away from the traditional nation-state model.

According to King and Schneider, national governments are inherently limited in their capacity to address issues that transcend borders and require coordinated, global solutions.

Therefore, “The First Global Revolution” proposes the establishment of powerful, supranational institutions capable of enforcing policies and regulations on a worldwide scale.

These institutions would possess authority over national governments, potentially overriding sovereignty in the interest of collective planetary well-being.

The authors believe this is crucial for implementing a “draconian environmentalist regime” – a set of stringent measures deemed necessary to avert ecological disaster, even if they infringe upon individual liberties or national interests.

This concept reflects a perceived urgency and a belief that only a centralized, global authority can effectively manage the planet’s resources and ensure its long-term sustainability.

Restructuring Democratic Governments

“The First Global Revolution” doesn’t advocate for the outright abolition of democratic principles, but rather a significant restructuring of how democratic governments function within a new global framework.

The report suggests that traditional democratic processes are often too slow, inefficient, and susceptible to short-term political considerations to effectively address long-term global challenges.

King and Schneider propose a move towards more technocratic and centralized governance models, where decisions are guided by expert knowledge and long-term planning rather than popular opinion.

This could involve limiting the scope of national elections, increasing the power of unelected bodies, and prioritizing global interests over national sovereignty.

The authors imply that a degree of diminished citizen participation may be necessary to ensure the effective implementation of policies required for planetary survival.

Essentially, the report envisions a shift from representative democracy to a more managed and directed form of governance, prioritizing efficiency and sustainability over traditional democratic ideals.

A Draconian Environmentalist Regime – Implications

“The First Global Revolution” posits that the severity of environmental threats, particularly global warming, necessitates a “draconian” environmentalist regime to enforce necessary changes.

This implies a system characterized by strict regulations, potentially infringing upon individual liberties and economic freedoms in the name of ecological preservation.

The report suggests the need for powerful supranational institutions with the authority to enforce these regulations globally, overriding national laws and sovereignty.

Such a regime could involve limitations on consumption, restrictions on travel, and significant interventions in industrial processes.

The implications are far-reaching, potentially leading to a highly controlled society where environmental concerns supersede other values.

Critics argue this approach risks authoritarianism and the suppression of dissent, while proponents maintain it’s a necessary evil for planetary survival. The report doesn’t shy away from the potential for harsh measures.

Detailed Analysis of the Report’s Sections

Part I of the report provides an overview of “The First Global Revolution”, focusing on the “great transition” and shaping a new global society.

The “Wheel of Humankind” serves as a conceptual framework, guiding the analysis of societal evolution and future possibilities within the report.

Part I: Report on The First Global Revolution ⎻ Overview

Part I initiates a comprehensive exploration of the impending global changes, framing them as “The First Global Revolution.” This section establishes the core premise: humanity is entering a period of profound transformation, necessitating a shift in societal structures and global governance.

The report emphasizes that this transition will be dramatically different from the current world order, mirroring the societal shifts following previous historical epochs. It delves into the interconnectedness of global challenges, particularly environmental threats like global warming and the greenhouse effect.

A key argument presented is the inadequacy of existing nation-states to address these challenges effectively. Consequently, the report advocates for the establishment of supranational institutions capable of enforcing a “draconian environmentalist regime” to ensure planetary survival. This overview sets the stage for a detailed examination of the necessary restructuring of democratic governments and the potential implications of such a radical shift.

The Wheel of Humankind – A Conceptual Framework

Central to “The First Global Revolution” is the “Wheel of Humankind,” a conceptual framework used to understand the cyclical nature of societal evolution and the drivers of change. This model posits that humanity progresses through distinct phases, each characterized by specific dominant paradigms and challenges.

The report suggests that we are currently at a pivotal point, transitioning from one phase to another. This transition is not merely incremental but represents a fundamental shift in values, beliefs, and societal structures. The wheel illustrates how past solutions become limitations, necessitating revolutionary changes to overcome emerging obstacles.

Understanding this framework is crucial for grasping the report’s core arguments. It provides a lens through which to view the need for supranational governance, the restructuring of democratic systems, and the urgency of addressing global environmental threats. The wheel emphasizes the interconnectedness of these elements within a larger historical context.

Chapter Breakdown and Key Findings (Based on Available Content)

Part I of “The First Global Revolution” provides an overview of the impending changes, framing the “great transition” as a shift towards a fundamentally new global society – one drastically different from the present. Key findings emphasize the inadequacy of current systems to address escalating global challenges.

The report highlights global warming and the greenhouse effect as existential threats, necessitating radical measures. These include potentially dismantling the nation-state system and establishing robust supranational institutions with the authority to enforce stringent environmental regulations.

Further chapters delve into the restructuring of democratic governments, suggesting a move away from traditional models to accommodate the demands of global governance. The book is geared towards those willing to embrace risk and explore uncharted territories, advocating for a proactive approach to shaping the future.

Criticisms and Controversies

The report faces scrutiny regarding potential loss of national sovereignty, accusations of an elitist agenda seeking control, and debates surrounding the accuracy of its predictions.

Critics express concerns about centralized power and the implications of a “draconian environmentalist regime” as outlined within the document’s framework.

Concerns Regarding Loss of National Sovereignty

A central criticism of “The First Global Revolution” revolves around the proposed need for supranational institutions to manage global challenges like environmental threats and climate change. This proposition sparks significant anxieties regarding the erosion of national sovereignty and self-determination.

The report suggests a shift away from the traditional nation-state model, advocating for a more integrated global governance structure. Critics argue this could diminish the authority of democratically elected national governments, transferring power to unelected bodies operating on a global scale.

This potential transfer of authority raises concerns about accountability and responsiveness to local needs and cultural values. Opponents fear that a centralized global authority might impose uniform policies insensitive to the unique circumstances of individual nations, ultimately undermining national identity and autonomy. The document’s emphasis on restructuring democratic governments further fuels these anxieties.

The fear is not simply about losing control over policy decisions, but also about the potential for a homogenized global culture, diminishing the diversity and richness of national traditions and perspectives.

Accusations of Elitist Agenda and Control

“The First Global Revolution” has faced accusations of promoting an elitist agenda aimed at consolidating control in the hands of a select few. Critics point to the Club of Rome’s composition – comprised of influential figures from various fields – as evidence of a detached, privileged perspective.

The report’s proposals for restructuring governments and establishing supranational institutions are interpreted by some as a blueprint for a new world order orchestrated by a global elite, operating outside of democratic oversight. This fuels conspiracy theories regarding hidden motives and a desire for centralized power.

Concerns are raised about the potential for these institutions to serve the interests of powerful corporations and financial entities, rather than the well-being of the global population. The perceived top-down approach to problem-solving reinforces the notion of an imposed agenda.

The language used within the report, particularly regarding the need for a “draconian environmentalist regime,” is seen by some as indicative of authoritarian tendencies and a willingness to sacrifice individual liberties for perceived collective goals.

Debate on the Accuracy of Predictions

“The First Global Revolution” presented several predictions regarding environmental threats, societal shifts, and the necessity for global governance. A significant debate revolves around the accuracy of these forecasts, particularly concerning the urgency and severity of issues like global warming.

While the report correctly identified the potential for environmental degradation, critics argue that the timeframe for catastrophic events was overly pessimistic, and the proposed solutions were impractical or overly restrictive. Some predictions haven’t materialized as anticipated.

Proponents maintain that the report served as a crucial early warning, prompting increased awareness of environmental challenges and influencing subsequent policy discussions. They argue that even if specific timelines were off, the underlying trends remain valid.

The debate extends to the feasibility of establishing effective supranational institutions and restructuring democratic governments. Skeptics question whether such changes are politically viable or desirable, citing concerns about national sovereignty and individual freedoms.

Availability and Access to the PDF

The full text of “The First Global Revolution” is available online through Archive.org, offering free access to this pivotal 1991 report.

Various editions and formats exist, including the complete, unabridged first edition with 292 pages, easily downloadable as a PDF.

Finding the Full Text Online (Archive.org Link)

Locating a digital copy of “The First Global Revolution” is remarkably straightforward thanks to the Internet Archive’s extensive collection. Archive.org hosts a complete, unabridged first edition of the report, allowing researchers and interested readers to access the full 292-page text without cost.

The direct link to the PDF is https://archive.org/details/the-first-global-revolution-a-report-by-the-council-of-the-club-of-rome-alexande. This resource provides a valuable opportunity to study the original document and its predictions firsthand.

Advanced embedding details, examples, and helpful information are also available on the Archive.org page, enhancing the user experience and facilitating research. The platform supports various browsing and download options, ensuring accessibility for a wide range of users and devices.

Different Editions and Formats

While the primary accessible version online is the unabridged first edition hosted on Archive.org, it’s important to note that “The First Global Revolution” was originally published in 1991 by Pantheon Books as a physical book. This initial printing serves as the foundation for most digital reproductions.

Variations in format beyond the standard PDF may exist, potentially including scanned copies or transcriptions found on various websites. However, the Archive.org version is generally considered the most reliable and complete digital representation of the original text.

Information regarding subsequent editions or translations is currently limited in readily available online resources. The focus remains on the 1991 edition, offering a direct window into the Club of Rome’s perspectives at the time of its publication. Researchers should verify the source and completeness of any alternative formats encountered.

Legality and Copyright Considerations

The copyright status of “The First Global Revolution” is a crucial aspect when accessing and distributing the PDF version. As the book was published in 1991, it falls under copyright laws, potentially restricting unauthorized reproduction and distribution.

However, the availability of the full text on Archive.org suggests a degree of permissible access, potentially due to fair use principles or agreements with copyright holders. Users should exercise caution and respect intellectual property rights.

Downloading and utilizing the PDF for personal research and educational purposes is generally considered acceptable. However, large-scale distribution or commercial use without explicit permission from the copyright owner may constitute infringement. It’s advisable to consult copyright law resources for definitive guidance and ensure compliance with legal requirements.

Impact and Legacy

The report significantly influenced subsequent environmental policies and continues to spark debate in the 21st century regarding global governance and sustainability.

Its predictions regarding global warming and the need for international cooperation remain strikingly relevant, fueling ongoing discussions and interpretations.

Influence on Subsequent Environmental Policies

The First Global Revolution’s stark warnings about environmental threats, particularly global warming and the greenhouse effect, resonated deeply within emerging policy circles during the early 1990s and beyond.

While not directly translating into specific legislation, the report’s emphasis on the necessity for a fundamental shift in societal values and governance structures provided intellectual fuel for the burgeoning environmental movement.

It bolstered arguments advocating for international environmental agreements and the establishment of supranational bodies capable of enforcing environmental regulations, influencing the discourse surrounding climate change negotiations.

The report’s call for a “draconian environmentalist regime,” though controversial, prompted discussions about the potential need for strong, centralized control to address ecological crises, shaping the debate on environmental policy approaches.

Furthermore, the book’s holistic perspective, linking environmental issues to economic and social systems, encouraged a more integrated approach to policymaking, influencing the development of sustainable development initiatives.

The Report’s Relevance in the 21st Century

Despite being published in 1991, “The First Global Revolution” maintains a surprising relevance in the 21st century, as many of its predictions and concerns have materialized or intensified.

The escalating climate crisis, increasing global interconnectedness, and the perceived inadequacies of national governments to address transnational challenges all echo the report’s central themes.

The ongoing debate surrounding national sovereignty versus global governance, and the need for international cooperation on issues like pandemics and economic stability, directly reflects the report’s arguments.

The book’s exploration of societal transitions and the potential for disruptive change resonates in an era marked by rapid technological advancements and geopolitical shifts.

Critically, the report serves as a historical document, illustrating the long-standing awareness of global systemic risks and prompting continued reflection on the future of humanity and the planet.

Continuing Discussions and Interpretations

“The First Global Revolution” continues to fuel debate and diverse interpretations, particularly concerning its proposals for supranational governance and potential limitations on democratic processes.

Online forums and academic circles actively dissect the report’s arguments, often focusing on the perceived tension between global problem-solving and individual liberties.

The report’s call for a “draconian environmentalist regime” remains a point of contention, with critics raising concerns about authoritarian tendencies and the erosion of national self-determination.

Contemporary discussions frequently examine the report’s relevance in light of current events, such as the rise of global institutions and the increasing urgency of environmental action.

The availability of the full text PDF on platforms like Archive.org has broadened access, fostering ongoing analysis and contributing to a more nuanced understanding of its complex ideas.