
Welcome to the Honeywell T6 installation guide, designed to help you install and configure your thermostat efficiently. This manual provides essential safety tips, compatibility details, and step-by-step instructions for a smooth setup process.
1.1 Overview of the Honeywell T6 Thermostat
The Honeywell T6 thermostat is a programmable, smart home-enabled device designed for efficient temperature control. It offers advanced features like geofencing, energy-saving modes, and compatibility with various HVAC systems. Its user-friendly interface and customizable settings make it ideal for modern homes seeking precise climate management and energy efficiency.
1.2 Importance of Proper Installation
Proper installation of the Honeywell T6 thermostat ensures safe operation, optimal performance, and compatibility with your HVAC system. Incorrect installation can lead to safety hazards, inefficient heating or cooling, and potential damage to the device or system. Always follow the manual’s guidelines to guarantee reliability and maintain warranty validity.
System Requirements and Compatibility
The Honeywell T6 is compatible with 24V HVAC systems, including heat pumps and dual-fuel setups. Ensure R, C, and W/O/B wires are available for proper installation and functionality.
2.1 Compatible HVAC Systems
The Honeywell T6 thermostat is compatible with 24V HVAC systems, including heat pumps, dual-fuel setups, gas furnaces, and air conditioners. It supports multi-stage heating and cooling systems, ensuring versatility for various home configurations and energy-efficient performance.
2.2 Required Tools and Materials
Ensure a smooth installation with the following tools and materials: a screwdriver, wire strippers, voltage tester, level, drill bits, wall anchors, and batteries. Optional materials include a decorative cover plate for aesthetics. These items will help you complete the setup efficiently and securely.
2.3 Network and Smart Home Integration Requirements
The Honeywell T6 requires a stable internet connection for smart home integration. Ensure your router supports 2.4 GHz Wi-Fi for compatibility. It works seamlessly with platforms like Apple HomeKit, Google Assistant, and Amazon Alexa. A Honeywell Home account is necessary for remote access and voice control functionality. Check compatibility with your smart home system.
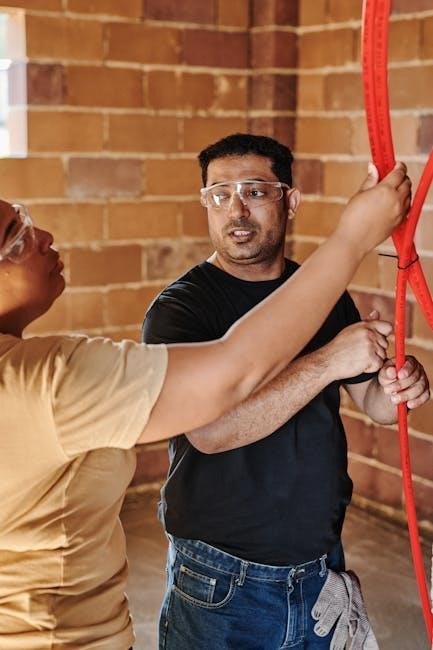
Safety Precautions and Warnings
Ensure safe installation by following guidelines to avoid electrical hazards and improper placement. Keep the thermostat away from direct sunlight, heat sources, and drafts. Comply with local regulations.
3.1 General Safety Guidelines
Adhere to all safety guidelines to ensure a secure installation. Power off the HVAC system before starting. Avoid touching electrical components to prevent shocks. Keep the thermostat away from direct sunlight, heat sources, and drafts for accurate temperature readings. Follow local regulations and manufacturer instructions carefully to prevent hazards.
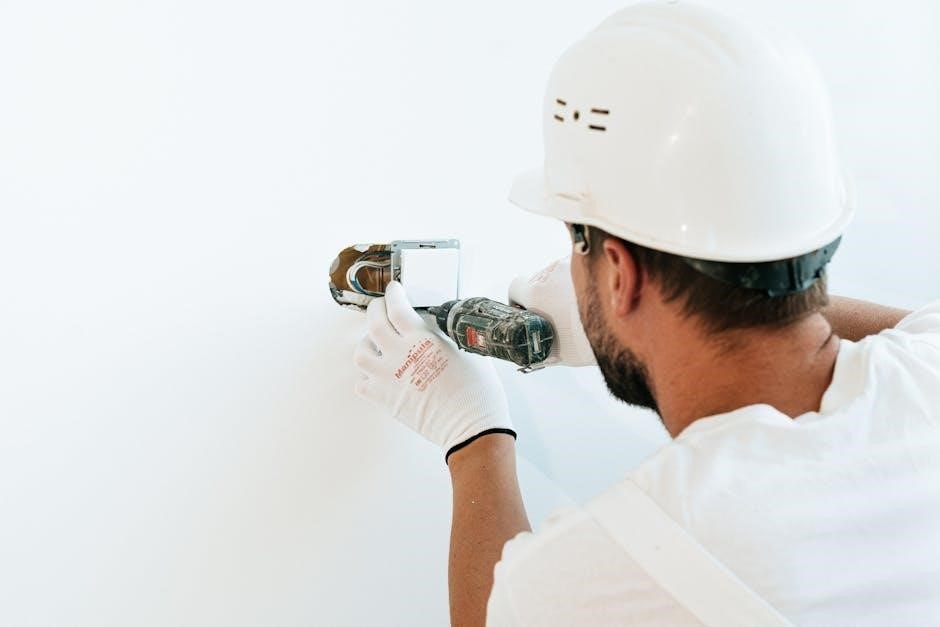
3.2 Handling Electrical Components Safely
Always switch off the power supply at the circuit breaker before handling any electrical components. Use insulated tools to prevent shocks. Ensure wires are securely connected to avoid short circuits. Never touch live wires or components. Follow proper grounding procedures and use protective gear to ensure safe installation and operation of the Honeywell T6 thermostat.
3.3 Environmental Placement Considerations
The Honeywell T6 thermostat should be installed away from direct sunlight, drafts, and heat sources to ensure accurate temperature readings. It should be placed at least 1.2 to 1.5 meters above the floor for optimal performance. Avoid areas with high humidity or extreme temperatures to maintain reliability and functionality.
Pre-Installation Steps
Before installation, remove the old thermostat, prepare the site, and understand the wiring diagram. Ensure the area is clean and accessible for a smooth setup process.
4.1 Preparing the Installation Site
Ensure the installation site is clean, dry, and free from obstructions. Turn off power to the HVAC system at the circuit breaker before starting. Clear the area around the old thermostat to prevent damage to wires or surrounding surfaces during removal and replacement. This preparation ensures a safe and efficient installation process.
4.2 Removing the Old Thermostat
Turn off the HVAC system at the circuit breaker before removing the old thermostat. Gently pull the thermostat away from the wall to access the wires. Disconnect the wires from the old unit, taking note of their colors and labels for proper reconnection. Carefully remove any remaining adhesive or hardware from the wall to prepare for the new installation.
4.3 Understanding the Wiring Diagram
Refer to the wiring diagram to identify terminals and their purposes. Match the wires from your old thermostat to the corresponding terminals on the Honeywell T6. Ensure compatibility with your HVAC system and double-check connections before proceeding. If unsure, consult the manufacturer’s guide or contact a professional for assistance.
Installation Process
Mount the Universal Wall Plate (UWP) using wall anchors and screws. Insert wires through the wiring hole, matching terminals as per the diagram. Tighten securely. Install batteries and attach the thermostat to the UWP. Ensure a snug fit and refer to the wiring diagram for accurate connections. Proceed methodically for a successful setup.
5.1 Mounting the Universal Wall Plate (UWP)
Begin by removing the old thermostat and preparing the wall. Align the UWP with the wall anchors, ensuring it is level. Use the provided screws to secure the plate firmly. Insert the wires through the wiring hole, organizing them neatly. Tighten the mounting hardware to ensure a stable and even installation surface.
5.2 Connecting the Wires to the Thermostat
Ensure the power is off at the circuit breaker before handling wires. Match each wire to its corresponding terminal on the thermostat (R, W, Y, G, C). Use the slider tabs for R and C wires to secure them properly. Insert each wire into its designated terminal, ensuring a snug fit for reliable connectivity. Refer to the wiring diagram for accurate placement. After connecting, double-check all connections to confirm they are secure and correctly matched. Turn the power back on and test the thermostat to ensure proper functionality.
5.3 Installing the Batteries
Insert two AA alkaline batteries into the battery compartment located on the back of the thermostat. Ensure the positive and negative terminals align correctly. Close the compartment securely to maintain power. Batteries provide backup power when the C wire is not connected, ensuring continuous operation of your Honeywell T6 thermostat.
5.4 Securing the Thermostat to the Wall Plate
Align the thermostat with the Universal Wall Plate (UWP), ensuring it fits snugly. Gently press the device onto the plate until it clicks securely into place. Use the provided screws to tighten the thermostat to the wall plate, ensuring stability. Avoid overtightening to prevent damage. Verify the display is level and fully attached.
Initial Setup and Configuration
Power on the thermostat and follow the on-screen prompts to set your preferred temperature, schedule, and smart home integration settings for optimal performance.
6.1 Turning On the Thermostat for the First Time
After installation, switch the power on at the circuit breaker. The Honeywell T6 will boot up, displaying the home screen. Ensure batteries are installed or the C-terminal is connected for power. If using a C-wire, verify it’s securely attached to the thermostat and HVAC system for reliable operation.
6.2 Setting Up the Initial Temperature and Schedule
Access the menu to set your preferred temperature and schedule. Use the touchscreen or buttons to adjust the temperature. Program your heating/cooling schedule by setting times and temperatures for different periods. Choose between “Hold” for constant settings or “Run Schedule” to follow your programmed times; Ensure the time and date are accurate for proper operation. Test your settings to confirm they work correctly.
6.3 Configuring Smart Home Integration
Connect your Honeywell T6 thermostat to your smart home system by enabling Wi-Fi and linking it through the Honeywell Home app. Ensure your thermostat is registered and synchronized with your smart hub. Enable remote access for voice control via Amazon Alexa or Google Assistant. Set up geofencing for location-based temperature adjustments and energy tracking.
Troubleshooting Common Issues
Identify and resolve issues like blank displays, connectivity problems, or temperature inaccuracies. Check wiring connections, restart the thermostat, and refer to error codes for diagnostic guidance.
7.1 Common Installation Errors and Solutions
Common issues include incorrect wiring, loose connections, or improper thermostat placement. Ensure wires are securely attached, and the thermostat is level. Verify compatibility with your HVAC system and check for firmware updates. Resetting the thermostat or consulting the wiring diagram can often resolve these issues quickly and effectively.
7.2 Understanding Error Codes and Alerts
Error codes on the Honeywell T6 indicate specific issues, such as wiring problems or system malfunctions. Alerts may appear for low battery, connectivity issues, or temperature limits. Refer to the manual for code definitions and troubleshooting steps to resolve issues promptly and ensure optimal performance.
7;3 Resetting the Thermostat to Factory Settings
To reset the Honeywell T6 to factory settings, press and hold the Honeywell Home logo for 5 seconds. This restores default settings, erasing schedules and preferences. After the reset, reconnect to your smart home system and reconfigure your settings for optimal performance.
Maintenance and Upkeep
Regular maintenance ensures optimal performance of your Honeywell T6 thermostat. Clean the display gently with a soft cloth. Replace batteries annually or when low battery alerts appear. Check for software updates regularly to keep your system up-to-date. Refer to the manual for detailed instructions.
8.1 Cleaning the Thermostat
Clean your Honeywell T6 thermostat to ensure optimal functionality. Use a soft, dry cloth to gently wipe the display and exterior surfaces. Avoid using harsh chemicals or liquids, as they may damage the screen. Regular cleaning prevents dust buildup and maintains clear visibility of temperature settings and controls.
8.2 Replacing Batteries
Replace the Honeywell T6 thermostat batteries when the low-battery indicator appears. Use two AA alkaline batteries for optimal performance. Open the battery compartment, insert the new batteries ensuring correct polarity, then close the compartment securely. This ensures continuous operation and maintains your programmed settings and smart home connectivity.
8.3 Updating Software and Firmware
Regularly update your Honeywell T6 thermostat’s software and firmware to ensure optimal performance and access new features. Connect the thermostat to Wi-Fi, navigate to the settings menu, and select “Update” to download and install the latest version. Always follow on-screen instructions carefully to complete the update successfully.
Advanced Features and Customization
Explore advanced features like smart home integration, geofencing, and customizable energy-saving settings to optimize your Honeywell T6 thermostat’s performance and tailor it to your preferences.
9.1 Enabling Smart Home Integration
To enable smart home integration with your Honeywell T6, connect it to your Wi-Fi network during initial setup. This allows voice control via Amazon Alexa or Google Assistant and integration with other smart devices for seamless home automation and energy management.
9.2 Setting Up Geofencing and Location-Based Control
Open the Honeywell app and navigate to the location-based control section. Enable geofencing and set a radius around your home. Define actions like switching to energy-saving mode when you leave and resuming comfort settings upon arrival. Customize settings for multiple users and test the feature to ensure accuracy.
9.3 Customizing Energy-Saving Settings
Adjust temperature ranges and schedules to optimize energy use. Enable smart features like geofencing and auto-home/away modes. Set energy-saving goals and monitor usage through the app. Customize settings for peak and off-peak hours to maximize efficiency without compromising comfort. Fine-tune these settings to match your lifestyle and preferences for optimal performance.
Warranty and Support Information
The Honeywell T6 is backed by a manufacturer’s warranty. For assistance, contact customer support at 1-800-633-3991 or visit customer.honeywell.com for resources and manuals.
10.1 Understanding the Manufacturer’s Warranty
The Honeywell T6 warranty covers defects in materials and workmanship. Typically, the warranty period spans several years from the date of purchase. For specific terms, refer to the product documentation or contact Honeywell support directly to verify coverage details.
10.2 Contacting Honeywell Customer Support
For assistance with your Honeywell T6 thermostat, visit customer.honeywell.com or call 1-800-633-3991. Support is available to address installation, troubleshooting, and general inquiries. Ensure you have your product details ready for efficient service.
10.3 Accessing Online Resources and Manuals
Visit the official Honeywell Home website for comprehensive resources, including PDF manuals, installation guides, and troubleshooting tips. The T6 Pro Series manual is available for models like TH6320U2008, TH6220U2000, and TH6210U2001. Refer to these resources for detailed instructions and support.

Appendices
The appendices provide additional reference materials, including technical specifications, detailed wiring diagrams, and a glossary of terms to support your understanding and installation of the Honeywell T6 thermostat.
11.1 Technical Specifications
Technical specifications for the Honeywell T6 Pro include models TH6320U2008, TH6220U2000, and TH6210U2001. Compatibility with various HVAC systems such as forced air, hydronic, and heat pumps is supported. The thermostat operates on 24V AC power and can function with or without a common wire (C terminal). It uses AA batteries for backup power. Dimensions are approximately 4.5 x 4.5 inches, and it supports both English and metric units for precise temperature control.
11.2 Detailed Wiring Diagram
The wiring diagram provides a clear visual guide for connecting the Honeywell T6 Pro thermostat. It illustrates the proper placement of wires in terminals R, C, W, Y, G, and O. The Universal Wall Plate (UWP) simplifies installation by aligning wires correctly. Refer to the diagram for specific model configurations, ensuring accurate connections to avoid system malfunctions.
11.3 Glossary of Terms
Terminals: Points where wires connect to the thermostat. Thermostat: Device controlling HVAC system temperature. Universal Wall Plate (UWP): Mounting system for installation. Smart Home Integration: Connectivity with smart systems. Wiring Diagram: Visual guide for wire connections. Factory Settings: Default thermostat configuration.
Completion of the Honeywell T6 installation ensures optimal performance. Verify all connections, test functionality, and adjust settings for energy efficiency. Refer to customer support for further assistance or troubleshooting.
12.1 Final Checks Before Completion
Before completing the installation, ensure all wires are securely connected to the correct terminals. Verify the thermostat turns on and responds to temperature adjustments. Check for proper mounting and level alignment. Test smart home integration if applicable, and confirm the schedule is set correctly for optimal performance and energy savings.
12.2 Tips for Optimal Performance
For optimal performance, maintain a level installation and keep the thermostat away from direct sunlight or heat sources. Regularly update software and clean the device. Set energy-saving schedules and enable geofencing for smart home integration. Ensure proper battery maintenance and check for any firmware updates to maximize efficiency and functionality.