oster bread machine manual 5838
Features of the Oster 5838 ExpressBake Bread Maker
- Equipped with ExpressBake for fast bread making in under 60 minutes.
- Features a 13-hour delay timer for convenient scheduling.
- Includes a 1-hour keep-warm function to maintain freshness.
- Offers 8 customizable settings for various bread types.
- Compact design with a user-friendly control panel.
1.1. ExpressBake Function for Fast Bread Making
The Oster 5838 ExpressBake Bread Maker features an innovative ExpressBake function, allowing users to bake bread in as little as 58 minutes. This setting is perfect for busy individuals who want fresh homemade bread quickly. The ExpressBake function bypasses the traditional rising process, enabling rapid baking while maintaining flavor and texture. It is ideal for creating a variety of bread types, including whole wheat and gluten-free options. For best results, use bread machine flour and ensure water temperature is between 115°F and 125°F, as specified in the manual. This feature makes the Oster 5838 a versatile and efficient choice for home bakers.
1.2. 13-Hour Delay Bake Timer
The Oster 5838 ExpressBake Bread Maker includes a convenient 13-hour delay bake timer, allowing users to prepare ingredients and set the machine to start baking at a later time. This feature is ideal for busy schedules, enabling fresh bread to be ready upon waking up or returning home. The delay timer works seamlessly with all settings, including ExpressBake, and ensures consistent results. It provides flexibility for meal planning and adds convenience to the bread-making process. Simply load the ingredients, set the timer, and enjoy freshly baked bread at your desired time.
1.3. 1-Hour Keep Warm Feature
The Oster 5838 features a 1-hour keep warm function, ensuring your bread stays fresh and warm after baking. This feature automatically activates once the baking cycle completes, maintaining the perfect temperature for up to 60 minutes. It prevents the bread from cooling too quickly, which can make it dense or hard. This is especially useful for those who want to enjoy their bread warm without rushing. The keep warm function adds convenience and enhances the overall baking experience, making it a valuable addition to this bread maker’s capabilities.

Getting Started with the Oster 5838
Unbox and place the machine on a stable surface. Plug it in and familiarize yourself with the control panel. Read the manual for initial setup guidance. Ensure all parts are clean before first use. Start with a basic recipe, carefully measuring ingredients. Select the desired settings and let the machine do the work. This straightforward process makes baking bread easy and enjoyable for beginners.
2.1. Unboxing and Initial Setup
Unboxing the Oster 5838, ensure all components are included: bread pan, paddle, and manual. Place the machine on a stable, heat-resistant surface. Remove packaging materials and wash the bread pan and paddle with warm soapy water before first use. Dry thoroughly to prevent rust. Plug in the machine and familiarize yourself with the control panel. Read the user manual for detailed setup instructions. Conduct a test run without ingredients to ensure proper function. This initial setup ensures a smooth and safe baking experience, helping you get started with homemade bread effortlessly.
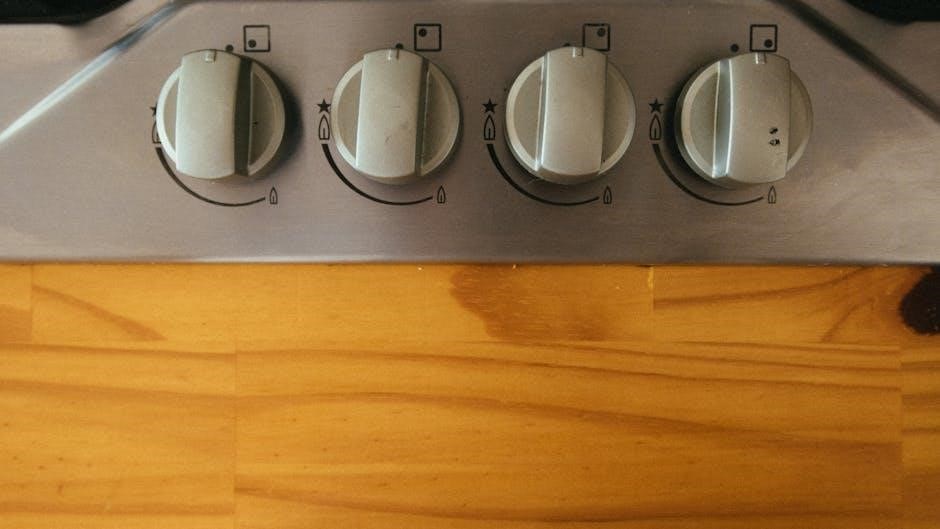
2.2. Understanding the Control Panel
The Oster 5838 control panel is user-friendly, featuring clearly labeled buttons for easy navigation. Key components include the LCD display, which shows selected settings, and buttons for cycle selection, crust color, delay start, and start/stop. Use the menu button to choose from 8 pre-programmed settings, including basic, whole wheat, and dough. Adjust the crust color with light, medium, or dark options. The delay timer allows scheduling up to 13 hours in advance. Familiarize yourself with these controls to customize your bread-making experience. Refer to the manual for detailed instructions on optimizing each function.
2.3. Basic Operation and Settings
Start by placing the machine on a stable surface and ensuring all parts are clean. Measure ingredients precisely, then add them to the bread pan. Secure the pan in the machine and select your desired settings using the control panel. Choose from 8 pre-programmed options, including basic, whole wheat, and dough modes. Use the crust color button to select light, medium, or dark crust. Set the delay timer if you want to bake later. Press Start, and the machine will handle mixing, rising, and baking. After completion, the 1-hour keep-warm feature ensures your bread stays fresh. Refer to the manual for optimal settings.

Recipes and Customization Options
The Oster 5838 manual includes a variety of bread recipes and customization tips. Users can experiment with whole wheat, gluten-free, and sweet bread options. The ExpressBake setting allows for quick results, while adjustable crust color and delay timers enhance flexibility. Customizable settings enable tailored recipes for different bread types, ensuring versatility and creativity in baking.
3.1. Basic Bread Recipes
The Oster 5838 manual provides simple and delicious basic bread recipes, perfect for beginners. These include classic white bread, whole wheat, and French bread. Recipes typically require 1-1/2 to 3 cups of bread flour, 1 teaspoon of salt, 1 tablespoon of sugar, 1 packet of active dry yeast, and 1 to 1-1/3 cups of water. Optional ingredients like butter or oil enhance flavor and texture. The manual also offers guidance on measuring ingredients accurately and using the ExpressBake setting for faster results. These recipes are great for mastering the basics before experimenting with custom variations. Users can find these recipes in the included manual or online;
3.2. Customizing Recipes for Different Bread Types
The Oster 5838 manual encourages creativity by allowing users to customize recipes for various bread types. For instance, whole grain bread can be enhanced with nuts or seeds, while rye bread benefits from the addition of caraway seeds. French bread can be perfected by adjusting yeast levels and water temperature. The machine also supports gluten-free recipes with specialized flours. Users can experiment with herbs, spices, or cheese for unique flavors. The manual provides tips on adjusting ingredient ratios and settings to ensure optimal results for each bread type, making it easy to tailor recipes to personal preferences or dietary needs.
3.3. Using the ExpressBake Setting
The ExpressBake setting on the Oster 5838 allows users to bake bread in just 58 minutes, perfect for quick recipes. For best results, measure ingredients precisely, especially hot water, which should be between 115°F and 125°F using a cooking thermometer. The manual recommends using Red Star Quick Rise yeast for this setting. Simply load the ingredients, select ExpressBake, and let the machine work. This feature is ideal for busy individuals who want freshly baked bread without the wait. Cleanup is easy, but avoid abrasive cleaners to maintain the machine’s finish.
Maintenance and Cleaning
- Unplug the machine before cleaning to ensure safety.
- Use a damp cloth to wipe down the exterior and interior.
- Avoid using abrasive cleaners or scouring pads to prevent damage.
- Regularly clean the bread pan and paddles for optimal performance.
- Store the machine in a dry place when not in use.
4.1. Cleaning the Bread Maker
Regular cleaning is essential for maintaining the Oster 5838 ExpressBake Bread Maker. Always unplug the machine before cleaning to ensure safety. Use a damp cloth to wipe down the exterior and interior surfaces, avoiding harsh chemicals or abrasive cleaners. For stubborn dough residue, mix baking soda and water to create a gentle paste, then scrub and rinse thoroughly. Clean the bread pan and paddles after each use, as dried dough can be difficult to remove. Avoid soaking electrical parts in water. Dry all components completely to prevent rust or mold buildup. Regular maintenance ensures optimal performance and longevity of the machine.
4.2. Maintaining the Machine for Longevity
To ensure the Oster 5838 ExpressBake Bread Maker lasts long, regular maintenance is crucial. Lubricate moving parts occasionally with food-safe silicone spray to prevent rust and wear. Check and replace worn-out components like paddles or seals as needed. Store the machine in a dry place, away from direct sunlight, to protect electrical components. Avoid using abrasive cleaners or scrubbers, as they can damage surfaces. Always follow the manual’s guidelines for care and operation. Proper upkeep ensures consistent performance and extends the machine’s lifespan, allowing you to enjoy homemade bread for years to come.
4.3. Storing the Machine Properly
Store the Oster 5838 ExpressBake Bread Maker in a cool, dry location to prevent moisture buildup. Avoid exposure to direct sunlight or extreme temperatures. Clean the machine thoroughly before storage to remove any residue. Use the original packaging if available for protection. If not, wrap it in a soft cloth or plastic cover. Ensure all accessories are stored separately to avoid damage. Proper storage preserves the machine’s condition and ensures it remains functional for future use. Always unplug the machine before storing it to enhance safety and longevity.

Troubleshooting Common Issues
- Machine not turning on: Check power connection and ensure it’s properly plugged in.
- Bread uneven: Verify ingredient measurements and leveling.
- Paddle issues: Clean or replace worn-out paddles.
- Bread undercooked: Ensure thermostat is functioning correctly.
5.1. Common Problems and Solutions
Users may encounter issues like uneven bread texture or the machine not turning on. For uneven bread, ensure correct ingredient measurements and proper leveling. If the machine doesn’t start, check the power connection. Paddle malfunctions can be resolved by cleaning or replacing worn-out parts. Undercooked bread may result from incorrect thermostat settings. Regular cleaning prevents dough residue buildup. Always unplug the machine before cleaning and avoid abrasive materials. Refer to the manual for specific troubleshooting steps to maintain optimal performance and extend the machine’s lifespan. Proper maintenance ensures consistent results and prevents common operational issues.
5.2. Error Prevention Tips
- Regularly clean the machine to prevent dough residue buildup.
- Use a cooking thermometer to ensure water temperature accuracy.
- Measure ingredients precisely to avoid uneven bread texture.
- Check the power connection if the machine fails to start.
- Avoid using abrasive cleaners to prevent damage to the pan or paddle.
- Ensure the paddle is properly installed before each use.
- Refer to the manual for specific settings to prevent undercooked bread.
- Store the machine in a dry place to maintain longevity.
By following these tips, users can minimize common issues and ensure consistent results.

Additional Resources and Support
- Access the user manual and recipe guide for detailed instructions.
- Explore the included cookbook for diverse bread recipes.
- Contact customer service at 1-800-438-0935 for assistance.
- Download the manual and recipes from official sources.
6.1. User Manual and Guide
The Oster 5838 ExpressBake Bread Maker comes with a comprehensive user manual that provides detailed instructions for operation, maintenance, and troubleshooting. The manual includes a variety of recipes to help users maximize the machine’s capabilities. It covers essential topics like measuring ingredients, setting the timer, and using the ExpressBake function. The guide also offers tips for customizing recipes and ensuring optimal performance. Available as a free PDF download, the manual is a valuable resource for both beginners and experienced users. It ensures a smooth and enjoyable bread-making experience with the Oster 5838.
- Includes detailed operating instructions.
- Features troubleshooting tips and maintenance advice.
- Provides a variety of bread and dough recipes.
- Available for free download as a PDF.
6.2. Cookbook and Recipe Ideas
The Oster 5838 ExpressBake Bread Maker comes with a variety of recipe ideas to inspire your bread-making journey. The included cookbook provides detailed instructions for classic bread recipes, as well as options for customization. Users can explore recipes for whole wheat, gluten-free, and artisan bread, among others. The manual also offers guidance for using the ExpressBake setting to create delicious bread quickly. Additional recipe ideas are available online, allowing users to experiment with new flavors and ingredients. Whether you’re a beginner or an experienced baker, the Oster 5838’s cookbook and recipe resources will help you create perfect loaves every time.
- Includes recipes for various bread types.
- Offers customization options for different dietary needs.
- Provides guidance for using the ExpressBake function.
- Additional recipes available online;
6.3. Customer Service and Warranty Information
The Oster 5838 ExpressBake Bread Maker is backed by dedicated customer support. For assistance, call 1-800-438-0935 for breadmaker-specific inquiries or 1-800-334-0759 for general Oster appliance support. Customer service is available Monday through Friday, 9AM to 5PM ET. The product is covered by a limited warranty, which typically includes coverage for parts and labor against defects for a specified period. For detailed warranty terms and conditions, refer to the user manual or visit the Oster website. Additionally, the manual provides troubleshooting tips to address common issues before contacting support.
- Customer service available via phone and website.
- Warranty covers parts and labor against defects.
- Manual includes troubleshooting guidance.