cuisinart soft ice cream maker instructions
The Cuisinart Soft Ice Cream Maker is a user-friendly, budget-friendly appliance designed for creating delicious homemade soft-serve ice cream with ease and convenience.
1.1 Overview of the Product and Its Features
The Cuisinart Soft Ice Cream Maker is a budget-friendly, user-friendly appliance designed for homemade soft-serve ice cream. It features a built-in mixing system, automatic dispensing, and a 1.5-quart capacity. The machine includes a freezer bowl, mixing paddle, and a chute for mix-ins. It offers a simple, intuitive design with a dial for operation and a lid for adding ingredients. The product comes with 15 built-in recipes, making it versatile for creating various flavors and desserts with ease and convenience.
1.2 Benefits of Using the Cuisinart Soft Ice Cream Maker
Using the Cuisinart Soft Ice Cream Maker offers numerous benefits, including the convenience of homemade soft-serve ice cream. It allows for customization with unique flavors and mix-ins, making it ideal for creative dessert lovers. The machine is cost-effective compared to store-bought options and easy to operate, ensuring anyone can enjoy professional-quality treats at home. Its compact design and straightforward functionality make it a versatile addition to any kitchen, perfect for family gatherings or personal indulgence.

Safety Precautions and Essential Tips
Always read the manual before use. Avoid electrical hazards by keeping cords dry. Never insert hands or objects into moving parts. Ensure proper ventilation and follow cleaning guidelines.
2.1 General Safety Guidelines
Always read the manual thoroughly before using the Cuisinart Soft Ice Cream Maker; Ensure the machine is unplugged before cleaning or disassembling. Avoid exposing electrical components to water to prevent shocks. Never insert fingers or objects into moving parts. Keep children away during operation. Store the appliance on a stable, dry surface. Follow all safety precautions to minimize risks of injury or damage. Regularly inspect cords and parts for wear. Proper maintenance ensures safe and efficient operation.
2.2 Avoiding Common Mistakes During Operation
To ensure smooth operation, avoid overfilling the machine, as this can disrupt the mixing process. Always pre-freeze the bowl for the recommended time to achieve optimal consistency. Never operate the machine without the lid properly secured. Avoid using abrasive cleaners, as they may damage the parts. Do not wash components in the dishwasher, as this can cause damage or pose safety risks. Proper assembly and adherence to instructions are crucial for consistent results and longevity of the machine.

Initial Setup and Assembly
Unpack and identify all components, ensuring they are undamaged. Assemble the machine by securely attaching the mixing paddle and other parts as per the manual.
3.1 Unpacking and Identifying Components
When you unpack your Cuisinart Soft Ice Cream Maker, carefully inspect each component to ensure there are no damages. The main parts include the base, mixing bowl, lid, mixing paddle, and churn. These components are essential for the machine’s operation. Familiarize yourself with each part, as described in the manual, to understand their roles in the ice cream-making process. Proper identification ensures smooth assembly and function.
3.2 Assembling the Machine for First Use
Before first use, assemble the machine by placing the pre-chilled mixing bowl onto the base. Align the parts carefully to ensure a secure fit. Attach the lid and mixing paddle according to the manual’s instructions. Make sure all components are properly aligned and locked in place. Double-check that the machine is stable and all safety features are engaged. This step ensures smooth operation and prevents any potential issues during use.
Preparing the Machine for Use
Pre-freeze the bowl for 6-8 hours and prepare the ice cream base according to the recipe. Ensure the machine is clean and ready for use.
4.1 Pre-Freezing the Bowl
Pre-freezing the bowl is essential for optimal performance; Place the bowl in the freezer for 6-8 hours or overnight. Ensure it is completely frozen before use. Avoid washing the bowl in the dishwasher, as this could damage its finish or functionality. Always handle the frozen bowl with care to prevent accidental injury. Once frozen, remove it from the freezer and proceed with assembling the machine. This step ensures the ice cream maker operates efficiently and produces the desired soft-serve consistency.
4.2 Mixing and Preparing the Ice Cream Base
Combine heavy cream, whole milk, granulated sugar, and flavorings like vanilla or cocoa in a bowl. Mix until the sugar dissolves. For unique flavors, add ingredients like melted chocolate, fruit purees, or nuts. Chill the mixture in the refrigerator for at least 2 hours or overnight to ensure proper emulsification. Avoid overmixing, as this can introduce air bubbles. Ensure the base is cold before pouring it into the pre-frozen bowl for the best results. This step is crucial for achieving smooth, creamy ice cream.

Step-by-Step Guide to Making Soft Ice Cream
Ensure the bowl is pre-frozen, pour in the chilled base, and turn on the machine. Let it churn until the desired consistency is achieved, usually within 20-25 minutes.
5.1 Adding Ingredients to the Machine
Once the machine is running, slowly pour the pre-chilled ice cream mixture through the lid opening. Ensure the bowl is not overfilled, leaving space for expansion. Add mix-ins like chocolate chips or nuts during the last 2 minutes of churning for even distribution. Avoid overloading the machine, as this can affect performance and consistency. Always follow the recommended quantities specified in the manual for optimal results and smooth operation.
5.2 Operating the Machine and Monitoring Progress
Turn the power dial to the ON position to start the machine; The mixing paddle will begin rotating, churning the mixture into soft-serve ice cream. Allow it to run for about 20 minutes, or until the desired consistency is reached. Monitor the progress through the lid to ensure the mixture doesn’t over-churn. Stop the machine once the ice cream is thick and creamy. Avoid overloading the machine, as this can hinder its performance and lead to uneven results.
Dispensing and Serving Soft Ice Cream
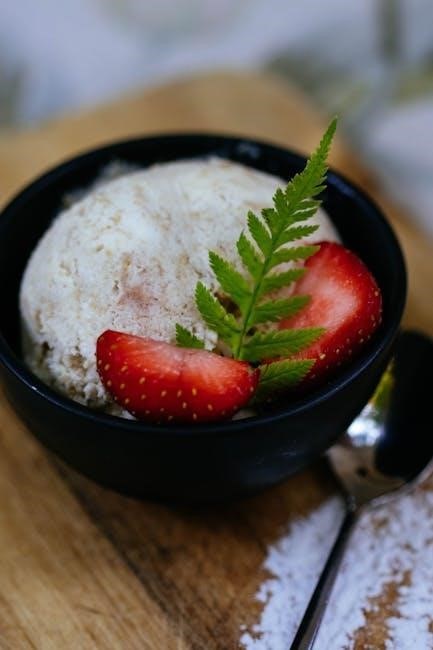
Dispense soft-serve ice cream into cones or cups, holding the container just below the spout. Add toppings like sprinkles, whipped cream, or chocolate sauce for extra flavor.
6.1 Tips for Achieving the Perfect Soft-Serve Consistency
Achieve the ideal soft-serve consistency by ensuring the machine is pre-chilled and ingredients are chilled. Monitor the machine during operation to avoid over-churning. Stop when the mixture reaches a smooth, creamy texture. Avoid overfilling the bowl, as this can disrupt consistency. For best results, dispense slowly and steadily, holding cones or cups at an angle to prevent drips. Proper techniques ensure a perfect, creamy soft-serve every time.
6.2 Adding Toppings and Mix-Ins
Add toppings and mix-ins to enhance your soft-serve ice cream. Sprinkle toppings like sprinkles, nuts, or chocolate chips immediately after dispensing for a decorative touch. Mix-ins such as fruit, candy, or cookie dough can be folded into the ice cream during or after churning. For a layered effect, drizzle sauces like caramel or chocolate over the top. Experiment with creative combinations to personalize your treats and make every serving unique and delicious.
Cleaning and Maintenance
Regularly clean the Cuisinart Soft Ice Cream Maker by unplugging it, disassembling parts, and washing with warm water. Avoid dishwashers to prevent damage. Dry thoroughly after cleaning for optimal performance and longevity.
7.1 Disassembling and Washing Parts
To clean the Cuisinart Soft Ice Cream Maker, unplug it and disassemble the parts, including the mixing paddle and bucket. Wash these components with warm, soapy water, avoiding abrasive cleaners. Rinse thoroughly and dry with a soft cloth. Do not place parts in the dishwasher, as this may damage them or pose a risk of electric shock. Regular cleaning ensures optimal performance and prevents bacterial growth. Always dry parts completely before reassembling the machine for its next use.
7.2 Regular Maintenance for Longevity
Regular maintenance is crucial for extending the life of your Cuisinart Soft Ice Cream Maker. After each use, ensure all parts are thoroughly cleaned and dried to prevent bacterial growth. Check for wear and tear on moving components and lubricate if necessary. Store the machine in a cool, dry place when not in use. Avoid exposing the freezer bowl to direct heat or flames. Refer to the manual for specific care instructions and avoid using harsh chemicals. Proper maintenance ensures consistent performance and longevity. Always follow manufacturer guidelines for servicing and repairs.
Troubleshooting Common Issues
If the machine doesn’t turn on, check the power cord and outlet. For uneven churning, ensure the bowl is pre-frozen and ingredients are balanced. Address leaks by verifying lid alignment and tightness. If the paddle stalls, reduce mix-in quantities or adjust consistency for smoother operation. Regular maintenance and adherence to manual guidelines can prevent many issues. Consult customer support if problems persist.
8.1 Resolving Machine Malfunctions
If the machine fails to turn on, ensure the power cord is securely plugged in and the outlet is functioning. Check for blockages in the paddle or chute. If the motor overheats, allow it to cool before restarting. For consistent operation, verify that the freezer bowl is properly pre-frozen and the lid is securely locked.Consult the manual for troubleshooting specific error conditions, and contact Cuisinart support if issues persist despite these measures.
8.2 Addressing Ice Cream Texture Problems
If the ice cream is too soft, ensure the freezer bowl was pre-chilled adequately and ingredients are chilled. For a firmer texture, churn slightly longer. If ice crystals form, check the base mixture for excess water content. Avoid overmixing, as it can lead to an icy texture. Ensure proper lid sealing to maintain consistent churning. If issues persist, consult the manual for troubleshooting or adjust the base recipe to achieve desired consistency and prevent recurring texture problems.
Advanced Features and Customization
The Cuisinart Soft Ice Cream Maker offers built-in features for mix-ins and unique flavor combinations, allowing users to create personalized soft-serve treats with endless creativity and possibilities.
9.1 Using Built-In Recipes
The Cuisinart Soft Ice Cream Maker comes with 15 built-in recipes, ranging from classic vanilla and chocolate to unique flavors like orange, mango, and passion fruit. These recipes are designed to guide users in creating delicious and consistent results. Refer to the manual for detailed instructions on how to prepare each recipe, ensuring the perfect balance of ingredients and mixing times. This feature makes it easy for both beginners and experienced users to achieve professional-quality soft-serve ice cream at home.
9.2 Experimenting with Unique Flavors
Experimenting with unique flavors is where the Cuisinart Soft Ice Cream Maker truly shines. Users can go beyond traditional recipes by incorporating fresh fruits, nuts, or even candy pieces. The machine’s design allows for easy mixing of ingredients, enabling creative combinations like mango-peach swirl or mint-chocolate chip. With its intuitive operation, the maker empowers users to craft one-of-a-kind flavors, making every batch a personalized treat. This feature adds endless fun and creativity to the ice cream-making process.
The Cuisinart Soft Ice Cream Maker offers a fun and easy way to create delicious, personalized treats at home, encouraging creativity and enjoyment for all users.
10.1 Final Tips for Enjoying Your Cuisinart Soft Ice Cream Maker
To maximize your experience, always clean the machine thoroughly after use and refer to the manual for maintenance tips. Experiment with unique flavors and mix-ins for personalized treats. For best results, follow the recipe guidelines and avoid overfilling the bowl. Regularly check and replace worn parts to ensure optimal performance. Enjoy creating delicious, creamy desserts with your Cuisinart Soft Ice Cream Maker!
- Regular cleaning ensures longevity and hygiene.
- Use built-in recipes or create your own unique flavors.
- Avoid overfilling to maintain consistent results.
- Refer to the manual for troubleshooting and maintenance.
10.2 Encouragement to Explore Creative Possibilities
Unlock your culinary creativity with the Cuisinart Soft Ice Cream Maker by experimenting with unique flavors and mix-ins. Try combining fresh fruits, nuts, or even candy pieces for personalized treats. Don’t be afraid to venture beyond traditional recipes—this machine is perfect for crafting one-of-a-kind desserts. Whether it’s a birthday party or a cozy night in, your Cuisinart Soft Ice Cream Maker empowers you to create memorable, custom frozen delights that impress and delight!
- Experiment with seasonal fruits and spices.
- Add mix-ins like chocolate chips or crushed cookies.
- Try vegan or gluten-free bases for dietary flexibility.