Homelite Weed Eater Instruction Manual: A Comprehensive Guide
Discover essential guidance for maintaining your Homelite weed eater, encompassing assembly, operation, troubleshooting, and specific model details for optimal performance.
Explore a wealth of information, including historical context from forums discussing older models like the Super XL and XL-12 series, alongside manual resources.
Find valuable insights into carburetor adjustments, fuel mixture ratios, and locating replacement parts, ensuring your Homelite runs smoothly for years to come.
Homelite has a rich history in outdoor power equipment, initially renowned for its chainsaws, but also producing a significant line of weed eaters and string trimmers. These tools gained popularity for their robust construction and reliable performance, becoming a staple for homeowners and landscaping professionals alike. Early models, like those discussed in online forums, often required diligent maintenance, with users sharing tips on carburetor adjustments and spark plug replacements to keep them running efficiently.
Throughout the years, Homelite weed eaters evolved, with series like the XL-12 and Super XL representing key advancements. However, discussions suggest a shift in market focus may have impacted newer series adoption. This manual aims to provide comprehensive guidance, drawing from both official resources and the collective knowledge of Homelite enthusiasts, ensuring you can effectively operate and maintain your specific model, whether a vintage classic or a more recent design. Understanding your weed eater’s lineage and common issues is crucial for long-term usability.
Understanding Homelite Model Numbers
Homelite model numbers are crucial for identifying your specific weed eater and accessing the correct parts and documentation. The numbering system, while not always intuitive, often provides clues about the tool’s features and intended use. For instance, the “XL-12” series, frequently discussed in online forums, represents a particular generation of Homelite trimmers with distinct characteristics, including early features like brass fuel lines with wicks.
The “Super XL” designation typically indicates a more powerful and robust model, often favored for heavier-duty trimming tasks. Serial numbers, found on the machine’s housing, are equally important for determining the manufacturing date and specific revisions. Locating these numbers allows you to pinpoint the exact specifications for your unit, aiding in troubleshooting and repair. Understanding these identifiers is the first step towards effective maintenance and ensuring compatibility with replacement components.
Safety Precautions & Warnings

Operating a Homelite weed eater demands strict adherence to safety guidelines. Always wear appropriate personal protective equipment (PPE), including eye protection, hearing protection, long pants, and sturdy footwear. Be acutely aware of your surroundings, ensuring no people or pets are within the trimming radius. Inspect the trimmer before each use, checking for loose parts or damage.
Never operate a Homelite weed eater with a damaged guard or without the guard properly installed. Avoid using the trimmer in wet conditions or near flammable materials. When refueling, always shut off the engine and allow it to cool completely. Store fuel in a properly labeled container, away from heat sources. Disconnect the spark plug wire before performing any maintenance or repairs to prevent accidental starting.

Assembly & Initial Setup
Begin by carefully unpacking all components and referencing the parts diagram; then, securely attach the cutting head and adjust the shoulder strap for comfort.
Attaching the Cutting Head
Securely fastening the cutting head is crucial for safe and effective operation. First, ensure the engine is completely off and the spark plug wire is disconnected as a safety precaution. Locate the drive shaft extending from the gearbox. Align the cutting head with the drive shaft, paying close attention to the designated slots or grooves.
Push the cutting head firmly onto the drive shaft until it clicks or locks into place – a positive engagement is vital. Some models may require a retaining clip or nut to be tightened, ensuring the head remains securely attached during use. Inspect the attachment to confirm it’s stable and doesn’t wobble.
Verify the head spins freely, but without excessive play; Improper attachment can lead to the head detaching during operation, posing a significant safety hazard. Always double-check the connection before starting the Homelite weed eater. Refer to your specific model’s diagram for precise instructions, as attachment mechanisms can vary.
Loading String Trimmer Line
Begin by ensuring the weed eater is switched off and the spark plug is disconnected for safety. Locate the spool housing on the cutting head – it usually has a removable cover. Open the cover and carefully remove the empty spool. Wind the new trimmer line onto the spool, following the arrow indicating the correct winding direction.
Avoid overcrowding the spool; leave a small gap to prevent jamming. Secure the line ends within the designated slots or holes on the spool. Reinsert the loaded spool into the housing, ensuring it seats correctly.
Replace the cover and gently tug on the line ends to release a small amount for initial trimming. Different Homelite models may have slightly varying spool loading mechanisms, so consult your manual for specific guidance. Proper loading ensures smooth line feed and optimal cutting performance.
Adjusting the Shoulder Strap
Proper shoulder strap adjustment is crucial for comfortable and efficient operation. Begin by loosening all strap buckles. Position the weed eater and place the shoulder strap over your shoulder, ensuring the pad rests comfortably.
Adjust the strap length to distribute the weight evenly, relieving strain on your arms and back. The engine housing should hang close to your body, but not interfere with movement. Tighten the buckles securely, ensuring they don’t slip during use.
Periodically check the strap adjustment, especially during extended use, as it can shift with movement. A well-adjusted strap minimizes fatigue and maximizes control, allowing for prolonged trimming sessions with reduced discomfort.
Operation Instructions
Master starting procedures, trimming techniques, and strategies for tackling dense vegetation, ensuring safe and effective weed control with your Homelite equipment.
Starting the Homelite Weed Eater
Before attempting to start your Homelite weed eater, ensure the cutting head is clear of obstructions and the machine is placed on a stable, level surface. Always verify the fuel tank contains the correct fuel mixture – a crucial step for reliable ignition.
Engage the choke lever, typically located near the carburetor, to provide a richer fuel mixture for cold starts. Prime the fuel bulb several times until fuel is visible within it; this action delivers fuel to the carburetor. Firmly grasp the starter grip and pull the cord with a smooth, controlled motion. Avoid jerking the cord, as this can damage the starter mechanism.
Repeat the starting process several times, gradually reducing choke engagement as the engine attempts to ignite. Once the engine sputters or briefly runs, disengage the choke. Allow the engine to warm up for a few moments before applying full throttle. If the weed eater fails to start after multiple attempts, consult the troubleshooting section for potential issues like a fouled spark plug or carburetor problems.
Proper Trimming Techniques
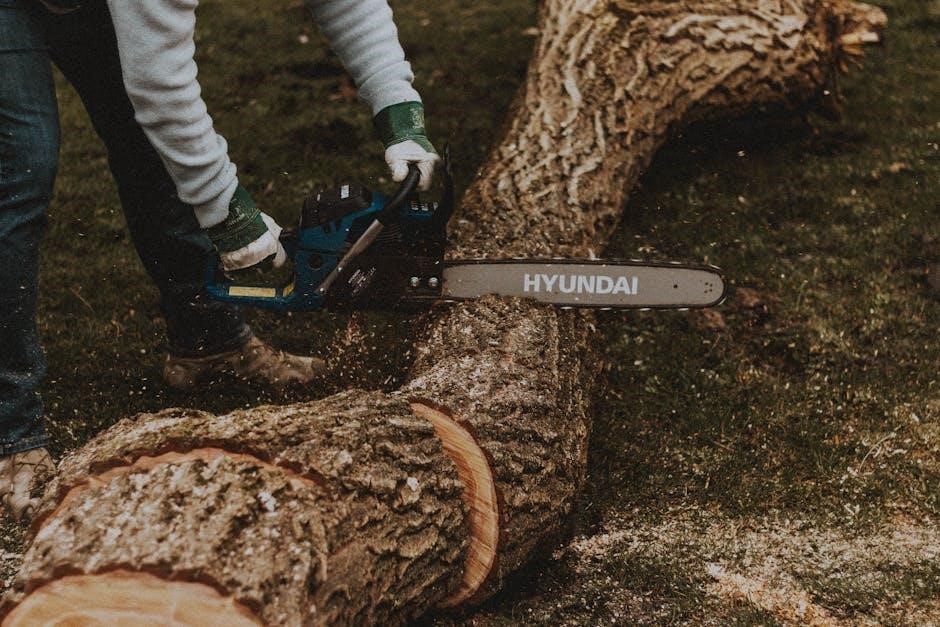
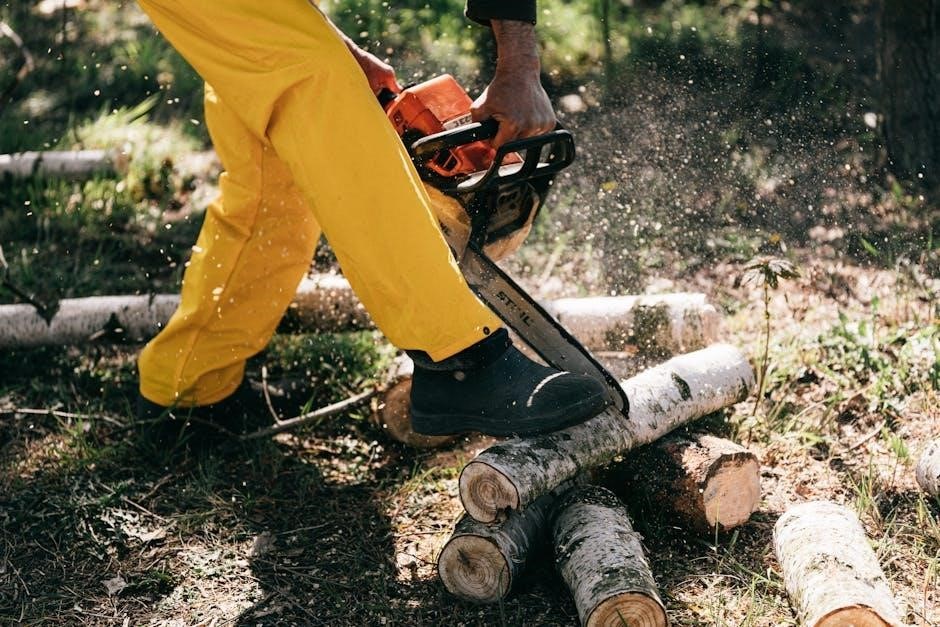
Employ a sweeping motion, moving the Homelite weed eater from side to side, maintaining a slight angle towards the vegetation. Avoid forcing the trimmer head into thick weeds; instead, use a controlled approach, gradually working through the growth. Keep the cutting head at a consistent height above the ground to achieve a uniform trim.
Walk at a steady pace, allowing the rotating line to effectively cut the weeds; Overlap each pass slightly to prevent uncut patches. Be mindful of objects that could become projectiles, such as rocks or debris, and avoid trimming near them. When trimming around trees or shrubs, exercise caution to prevent damage to the bark.

Utilize the edge of the cutting line for precise trimming along sidewalks, driveways, and flowerbeds. Maintain a safe distance from people and pets during operation. Regularly inspect the trimmer line for wear and replace it as needed to ensure optimal cutting performance and safety.
Dealing with Tough Weeds
Encountering stubborn, thick weeds requires a strategic approach. Reduce your walking speed and employ short, controlled bursts, allowing the trimmer line to gradually work through the dense vegetation. Avoid overwhelming the engine by forcing the head into the toughest areas; instead, make multiple passes.
Consider utilizing a heavier gauge trimmer line for increased cutting power when tackling particularly resilient weeds. Ensure the line is properly loaded and extended to maximize its effectiveness. Angle the cutting head slightly to attack the weeds from different directions, improving cutting efficiency.
Periodically clear away cut debris to prevent it from hindering the trimmer’s progress. If the engine begins to bog down, momentarily release the trigger and allow it to regain speed before continuing. Remember safety first, and wear appropriate protective gear.

Maintenance & Troubleshooting
Ensure peak performance by routinely cleaning air filters, replacing spark plugs, and adjusting the carburetor; address common issues with provided solutions.
Cleaning the Air Filter
Maintaining a clean air filter is crucial for optimal Homelite weed eater performance. A dirty air filter restricts airflow to the carburetor, leading to reduced power, hard starting, and increased fuel consumption. Regularly inspect the air filter – ideally after every 5 hours of use, or more frequently in dusty conditions.
To clean the filter, carefully remove it from the air filter housing. Most Homelite models utilize a foam or felt filter. If foam, wash it gently in warm, soapy water. Rinse thoroughly and allow it to dry completely before re-oiling lightly with air filter oil. A felt filter can often be tapped to remove loose debris, or gently brushed with a soft brush.
Avoid using compressed air, as this can damage the filter material. If the filter is excessively dirty or damaged, it’s best to replace it with a new one. A clean air filter ensures proper engine operation and extends the life of your Homelite weed eater. Remember to securely reattach the filter to the housing before resuming operation.
Replacing the Spark Plug
A faulty spark plug can cause starting difficulties, misfires, and reduced engine power in your Homelite weed eater. Replacing it is a relatively simple maintenance task. Before beginning, disconnect the spark plug wire to prevent accidental starting. Use a spark plug wrench to carefully remove the old spark plug.
Consult your Homelite owner’s manual for the correct spark plug specification – using the wrong plug can damage the engine. Gap the new spark plug according to the manual’s instructions, typically using a spark plug gapping tool. Carefully thread the new spark plug into the cylinder head by hand to avoid cross-threading.
Once hand-tight, tighten the spark plug with the wrench, but do not overtighten. Reconnect the spark plug wire securely. A new spark plug restores reliable ignition, ensuring smooth operation and maximizing the performance of your Homelite weed eater. Regular replacement, typically annually, is recommended.
Fuel Mixture Ratios (Gas & Oil)
Homelite weed eaters, particularly older models, require a precise fuel mixture of gasoline and 2-cycle engine oil for proper lubrication and operation. Using the incorrect ratio can lead to engine damage or failure. Generally, a 40:1 ratio is recommended – this equates to 4 ounces of high-quality 2-cycle oil per gallon of gasoline.
Always use fresh gasoline and a reputable brand of 2-cycle oil specifically designed for air-cooled engines. Avoid using oil intended for automotive engines. Thoroughly mix the oil and gasoline in a clean, approved fuel container before adding it to the weed eater’s fuel tank.
Ensure the fuel is well-mixed before each use. Some newer Homelite models may specify a different ratio; always refer to your owner’s manual for the correct fuel mixture specification for your specific model.
Carburetor Adjustment
Adjusting the carburetor on a Homelite weed eater is often necessary to address issues like hard starting, stalling, or lack of power. Typically, carburetors feature high and low-speed adjustment screws. Before attempting adjustments, ensure the air filter is clean and the spark plug is in good condition.
Start by turning both screws clockwise until lightly seated – do not overtighten. Then, back out the low-speed screw approximately 1.5 turns and the high-speed screw 2 turns. Start the engine and allow it to warm up. Fine-tune the low-speed screw for smooth idling, and the high-speed screw for optimal performance under load.

If adjustments don’t resolve the issue, a carburetor rebuild or cleaning may be required. Consult a qualified technician if you’re uncomfortable performing these tasks.
Identifying Common Issues & Solutions
Homelite weed eaters, particularly older models, can exhibit common problems. Hard starting often stems from a dirty carburetor or stale fuel. Stalling may indicate a clogged air filter, incorrect fuel mixture, or a faulty spark plug. Loss of power frequently points to carburetor issues or a worn spark plug.
For hard starting, clean the carburetor and use fresh fuel. A clogged air filter should be cleaned or replaced. Ensure the correct fuel-to-oil ratio is used (see Fuel Mixture Ratios section). If the engine still stalls, inspect and replace the spark plug if necessary.
Remember to disconnect the spark plug wire before performing any maintenance. Online forums often provide model-specific troubleshooting advice and manual resources.

Specific Homelite Models & Manuals
Delve into details of the Super XL and XL-12 series, accessing scanned manuals and online resources for your specific Homelite weed eater model.
Homelite Super XL Series Information
The Homelite Super XL chainsaw series, popular from the mid-1970s, represents a significant era in Homelite’s manufacturing history. Forum discussions reveal a strong following for these saws, often noted for their durability and ability to cut firewood effectively, even after decades of use. Many owners have successfully restored these older models with carburetor rebuild kits and careful tuning.
Notably, the Super XL came in various colors, including a striking metallic blue and white combination, alongside the more common red; Identifying the exact year of manufacture and engine displacement (cc) can be challenging, requiring reference to the serial number and available online resources. Owners frequently seek information regarding original specifications, like bar length – some models, like the Homelite 150, reportedly featured a 14-inch bar despite a larger engine.
Finding manuals specifically for the Super XL can be done through online archives and enthusiast communities, as individuals have scanned and shared these resources. These manuals are invaluable for understanding the saw’s components, proper maintenance procedures, and troubleshooting common issues.
Homelite XL-12 Series Details
The Homelite XL-12 series represents a transition in Homelite chainsaw design, often considered a predecessor to later models. Discussions indicate these saws were initially priced higher than the older XL-1xx series, potentially impacting their market success. Early XL-12 models featured distinctive components, such as brass fuel lines incorporating a wick for fuel delivery – a characteristic of early production runs.
Owners often seek information about identifying “early features” on these saws, suggesting variations existed within the XL-12 range. Restoring an XL-12 can involve sourcing specific parts to maintain its original functionality. Online forums serve as valuable resources for locating manuals and sharing restoration tips.
Despite being older models, the XL-12 series remains popular among enthusiasts, appreciated for their relative simplicity and potential for restoration. Accessing scanned manuals, often distributed by collectors, is crucial for proper maintenance and repair.
Locating Online Manuals & Resources
Finding Homelite weed eater and chainsaw manuals can be challenging due to the brand’s history, but several online resources offer assistance. Dedicated forums, as highlighted in discussions, often feature sections where members distribute scanned manuals they’ve collected. These forums provide a community-driven approach to locating documentation.
Individuals have proactively created threads specifically for sharing these manuals, recognizing the difficulty in responding to individual requests promptly. Websites specializing in vintage or obsolete equipment manuals may also contain Homelite resources.
Furthermore, searching online auction sites and parts retailers can sometimes uncover original manuals included with purchased equipment or available for separate sale. Patience and persistent searching are key to locating the specific manual needed for your Homelite model.

Parts & Repair
Secure replacement components for your Homelite, noting engine similarities with chainsaws; restoration projects benefit from online parts sources and community expertise.
Finding Replacement Parts
Locating Homelite weed eater replacement parts can present challenges due to the brand’s history and discontinued models. However, several avenues remain open for dedicated owners. Online auction sites, like eBay, frequently host listings from individuals restoring older Homelite equipment, offering both new-old-stock (NOS) and used parts.
Specialty small engine parts retailers often carry common components like carburetor kits, spark plugs, and fuel lines. Forums dedicated to Homelite chainsaws and outdoor power equipment are invaluable resources; members often share sources for hard-to-find parts or even offer parts from their own collections.
When searching, having the Homelite model number is crucial for ensuring compatibility. Cross-referencing part numbers is also recommended. Be aware that some parts may be superseded by newer versions, so verifying fitment before purchase is essential. Don’t overlook the possibility of adapting parts from similar small engines, but proceed with caution and research.
Homelite Chainsaw Engine Similarities
Interestingly, a significant overlap exists between the engines used in Homelite weed eaters and their popular chainsaw models, particularly those from the Super XL and XL-12 series. This shared engineering simplifies parts sourcing, as many components – pistons, rings, connecting rods, and even carburetors – are interchangeable.
For example, discussions online highlight the commonality between the engines found in the Super XL chainsaw and certain Homelite weed eater models from the 1970s. This means that troubleshooting guides and repair manuals for Homelite chainsaws can often provide valuable insights into weed eater engine maintenance.
However, it’s vital to confirm compatibility based on specific model numbers. While many parts are shared, variations exist. Understanding this connection can be a boon for owners seeking to restore or repair older Homelite equipment, expanding the available resource pool.
Restoration Tips for Older Models
Restoring a vintage Homelite weed eater requires patience and resourcefulness. Online forums reveal a dedicated community sharing knowledge about these classic machines. A common starting point is a complete carburetor overhaul, often resolving starting and running issues. Kits are available, but sourcing individual parts may be necessary.
Pay close attention to fuel lines; the original brass lines with wicks degrade over time and should be replaced with modern equivalents. Thorough cleaning of the air filter and fuel tank is crucial. Inspect the ignition system – points, coil, and spark plug – for wear or damage.
Consider repainting the unit to restore its original aesthetic. Blue and red were common colors for Super XL models. Remember, careful disassembly and documentation are key to a successful restoration, preserving a piece of outdoor power equipment history.