ge stove self cleaning oven instructions
GE Stove Self Cleaning Oven Instructions: A Comprehensive Guide
Navigating the world of self-cleaning ovens can be tricky; our guide offers expert advice, addressing common debates about this hotly contested feature for GE stoves․

Understanding Your GE Self-Cleaning Oven
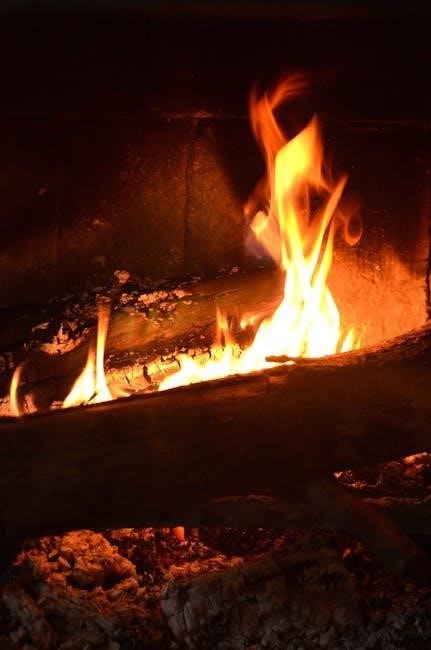
GE self-cleaning ovens utilize extremely high temperatures – exceeding 880°F – to burn away food residue into ash․ This process happens within a fully locked oven, ensuring safety․ Understanding this intense heat is crucial; it’s not simply a ‘steam clean’ function․ Different GE models offer varying cycle lengths and features, from standard to light or heavy-duty options․
The self-clean cycle is designed for convenience, but knowing how it works empowers you to use it effectively and troubleshoot potential issues․ Familiarize yourself with your specific model’s manual for detailed instructions and safety guidelines before initiating the cleaning process․
Safety Precautions Before Self-Cleaning

Prior to initiating the self-clean cycle, several safety measures are paramount․ Always remove oven racks, baking stones, and any aluminum foil, as high temperatures can warp or damage them․ Wipe up any large spills or loose debris to minimize smoke and odor․
Ensure adequate ventilation by opening windows or using a range hood․ The self-clean cycle generates significant heat and potentially irritating fumes․ Keep children and pets away from the oven during operation due to the extremely high temperatures and locked door functionality․
Types of GE Self-Cleaning Cycles
GE offers various self-cleaning cycles tailored to different cleaning needs․ The Standard Self-Clean Cycle is the most common, utilizing high heat to burn away residue – typically lasting several hours․ Some models feature a Light Self-Clean Cycle, designed for lighter cleaning and shorter durations․
For heavily soiled ovens, a Heavy Duty Self-Clean Cycle may be available, extending the cleaning time for optimal results․ Cycle availability varies by model; consult your oven’s manual to determine which options are present on your specific GE appliance․
Standard Self-Clean Cycle
The Standard Self-Clean cycle is the workhorse of oven cleaning, employing extremely high temperatures – often exceeding 900°F – to incinerate baked-on food and spills․ This process typically takes between two to four hours, depending on the soil level and your GE model․
During this cycle, the oven door automatically locks for safety, and the oven interior will become very hot․ It’s crucial to ensure proper ventilation and avoid interrupting the cycle․ Once complete, allow the oven to cool completely before wiping away the resulting ash residue․
Light Self-Clean Cycle (if applicable)
Some newer GE models feature a Light Self-Clean cycle, designed for lighter cleaning needs and quicker turnaround times․ This cycle operates at a lower temperature than the standard clean, typically around 700°F, making it suitable for ovens with minimal buildup․
The Light Self-Clean cycle generally completes in approximately 90 minutes․ While it produces less smoke and odor, it may not be effective for heavily soiled ovens․ Always refer to your specific model’s manual to confirm availability and optimal usage․
Heavy Duty Self-Clean Cycle (if applicable)
Certain GE ovens offer a Heavy Duty Self-Clean cycle, engineered for tackling significant baked-on grease and food residue․ This cycle utilizes the highest temperatures, often exceeding 900°F, and extends the cleaning duration, typically lasting between 3 to 5 hours․
Expect more smoke and stronger odors with this intense cleaning process․ Proper ventilation is crucial․ This cycle is ideal for ovens that haven’t been cleaned in a considerable period, but use cautiously due to its intensity․
Preparing Your Oven for the Self-Clean Cycle
Thorough preparation is key for a successful self-clean․ Begin by completely removing oven racks, broiler pans, and any other accessories․ These items can become discolored or warped at self-clean temperatures․ Next, carefully wipe up any loose debris, large spills, or food particles from the oven floor․
Ensuring proper ventilation is vital; open kitchen windows or use exhaust fans to minimize odors during the high-heat cycle․ A prepared oven ensures optimal cleaning and safety․
Removing Oven Racks and Accessories
Before initiating the self-clean cycle, complete removal of all oven racks is crucial․ These racks can warp, discolor, or even become damaged due to the extremely high temperatures reached during cleaning․ Also, remove broiler pans, baking stones, thermometers, and any other accessories stored inside the oven cavity․
Proper removal prevents damage and ensures efficient cleaning․ Store these items in a safe, accessible location until the self-clean cycle is fully completed and the oven has cooled․
Wiping Up Loose Debris and Spills
Prior to running the self-clean cycle, a quick manual cleanup significantly improves results․ Remove large food particles, grease splatters, and any loose debris from the oven floor․ Addressing spills beforehand minimizes smoke and odors during the high-heat cleaning process․
This step isn’t about a deep clean, but preventing excessive smoke․ A damp cloth is sufficient; avoid harsh chemicals․ A little preparation goes a long way towards a more effective self-clean․
Ensuring Proper Ventilation
Adequate ventilation is crucial during the self-clean cycle due to the high temperatures and potential for odors․ Open windows in the kitchen and turn on the exhaust fan, or both, to create airflow․ This helps dissipate any fumes produced during the cleaning process, keeping your home comfortable․
Consider the location of your oven․ If it’s near smoke detectors, be prepared to temporarily disable them to avoid false alarms caused by the cleaning cycle’s smoke․
Initiating the Self-Clean Cycle

Starting the self-clean cycle on your GE stove is generally straightforward, utilizing the control panel․ Press the “Self Clean” button – it may require holding it for a few seconds․ The display will then prompt you to select a clean time, if your model offers adjustable settings․
Once selected, the oven will automatically lock the control panel for safety during the high-temperature cleaning process, preventing accidental operation․
Using the Control Panel to Start the Cycle
To begin, ensure the oven is completely off․ Locate the “Self Clean” button on your GE stove’s control panel; it’s often clearly labeled․ Pressing this button initiates the process, and the display will illuminate, guiding you through the steps․
Some models require a confirmation press, while others immediately prompt for cycle selection․ Familiarize yourself with your specific model’s interface for a seamless start․
Setting the Clean Time (if adjustable)
Not all GE ovens offer adjustable clean times․ If your model permits, after initiating the self-clean cycle, the control panel will display options for cleaning duration – typically ranging from 2 to 4 hours․
A longer cycle tackles heavier soil, while a shorter one suits lighter messes․ Consider the oven’s condition when selecting a time; always refer to your owner’s manual for recommended settings based on your GE stove model․
Locking the Control Panel During Cleaning
For safety, GE self-cleaning ovens automatically lock the control panel once the cycle begins․ This prevents accidental interruption or changes to the cleaning process while the oven reaches extremely high temperatures․
The lock feature is crucial, safeguarding against burns and ensuring the cycle completes effectively․ Attempting to override the lock during operation is strongly discouraged․ The panel will automatically unlock once the oven has cooled sufficiently․
What to Expect During the Self-Clean Cycle
During the self-clean cycle, your GE oven will heat to extremely high temperatures, often exceeding 800°F, to burn off food residue․ Some smoke is normal, especially with heavy build-up, and proper ventilation is essential․
You may also notice odors, which dissipate as the cycle concludes․ The oven door will automatically lock for safety and remain locked until cool enough to unlock․ This is a standard safety precaution․
Oven Temperature and Smoke
The self-clean cycle elevates oven temperatures to approximately 800-1000°F, effectively incinerating baked-on food․ Expect some smoke, particularly if significant grease or food particles are present․ This is a normal byproduct of the high-heat cleaning process․
The amount of smoke varies; lighter cleaning needs produce less․ Ensure adequate kitchen ventilation by opening windows or using a range hood․ A burning smell is also common, but excessive smoke warrants investigation․
Potential Odors
During the self-clean cycle, GE ovens can emit noticeable odors, stemming from the burning of food residue at extremely high temperatures․ This is generally harmless, often described as a burning or chemical smell․
The intensity of the odor depends on the amount of accumulated grime․ Proper ventilation – opening windows and utilizing the range hood – is crucial to minimize the smell․ Sensitive individuals or those with respiratory issues should avoid the kitchen during cleaning․
Automatic Door Locking Mechanism
GE self-cleaning ovens feature an automatic door locking system for safety during the high-temperature cleaning cycle․ This prevents accidental opening, protecting users from burns․ The door locks before the cycle begins and remains locked until the oven cools sufficiently․
Do not attempt to force the door open during cleaning; this could damage the locking mechanism․ The control panel will indicate when the door is locked and when it’s safe to unlock and open it again․
After the Self-Clean Cycle is Complete
Once the self-clean cycle finishes, allow ample time for the oven to cool down completely before attempting to open the door․ The locking mechanism will release automatically as the temperature decreases․ A small amount of ash residue will remain; this is normal․
Carefully wipe away the ash with a damp cloth once cooled․ Ensure the control panel is unlocked before use․ Avoid using abrasive cleaners, as they can damage the oven’s interior surface․
Allowing the Oven to Cool Down

Patience is key after the self-clean cycle concludes․ The oven reaches extremely high temperatures, and immediate access is unsafe․ Do not attempt to force the door open; the locking mechanism is designed to prevent this until sufficient cooling occurs․
Allow several hours for complete cooling, or preferably overnight․ This ensures both your safety and prevents potential damage to the oven’s components․ A fully cooled oven is essential before any cleaning or use․
Wiping Away Ash Residue

Once the oven is completely cool, a fine layer of ash will remain․ This is a normal byproduct of the self-clean process, consisting of carbonized food particles․ Use a damp cloth or sponge to gently wipe away this residue from all interior surfaces – walls, floor, and door․
Avoid abrasive cleaners or scouring pads, as these can scratch the oven’s enamel․ For stubborn spots, a paste of baking soda and water can be effective․ Ensure all ash is removed before using the oven again․
Unlocking the Control Panel
After the self-clean cycle has fully completed and the oven has cooled, the control panel will remain locked as a safety precaution․ To unlock it, simply press the “Start” or “Clear/Off” button on the control panel․ This action will disengage the lock feature, allowing you to resume normal oven operation․
If the control panel doesn’t unlock, consult your GE oven’s user manual for model-specific instructions, or contact GE customer support for assistance․ Do not attempt to force the buttons․
Troubleshooting Common Self-Clean Issues
Encountering problems during a self-clean cycle is not uncommon․ Common issues include error codes displayed on the control panel, indicating a specific malfunction․ The oven failing to reach the necessary cleaning temperature can also occur, potentially due to a faulty heating element․
Excessive smoke or unusual odors might signal unburned food residue․ Always refer to your oven’s manual for error code definitions and solutions, and prioritize safety when addressing these concerns․
Error Codes and Their Meanings
GE oven error codes provide valuable diagnostic information․ A common code, “F2” or “F2 E0”, often indicates a door lock issue during the self-clean cycle․ “F1” suggests a control board malfunction, requiring professional attention․ Other codes relate to temperature sensor failures or heating element problems․
Consult your specific GE oven model’s manual for a complete list and detailed explanations of each error code․ Ignoring these signals can lead to further damage, so prompt investigation is crucial․
Oven Not Reaching Cleaning Temperature
If your GE oven fails to reach the high temperatures needed for self-cleaning, several factors could be at play․ A faulty oven temperature sensor is a common culprit, preventing accurate heat regulation․ A malfunctioning heating element might also struggle to generate sufficient heat․
Check your electrical connection and ensure the oven receives adequate power․ If problems persist, professional diagnosis and repair are recommended to avoid potential safety hazards․
Excessive Smoke or Odor
During the self-clean cycle, some smoke and odor are normal, resulting from burning food residue․ However, excessive smoke or a particularly strong, unpleasant smell indicates a problem․ Large food spills or grease buildup can contribute to this, as can a buildup of carbonized material․
Ensure proper ventilation by opening windows․ If the issue persists, discontinue the cycle and consult a qualified technician to inspect the oven’s components․
Maintaining Your Self-Cleaning Oven
Consistent, simple upkeep extends your GE oven’s lifespan and optimizes self-cleaning performance․ Regular wipe-downs between self-clean cycles are crucial, removing loose debris and preventing buildup․ Addressing spills immediately minimizes carbonization, reducing smoke and odor during cleaning․
Avoid letting food residue accumulate; a little prevention saves significant scrubbing later․ This proactive approach ensures efficient operation and prolongs the intervals between deep cleans․
Regular Wipe-Downs Between Cycles
Consistent wiping is key to a smoothly functioning self-cleaning oven․ After each use, or at least weekly, wipe interior surfaces with a damp cloth and mild detergent․ This removes splatters, grease, and food particles before they bake onto the oven walls․
Focus on the bottom and sides, where spills are most common․ A quick wipe-down minimizes the need for frequent, intense self-cleaning cycles, preserving oven components and reducing energy consumption․
Avoiding Spills and Food Build-Up
Proactive spill prevention dramatically reduces cleaning needs․ Utilize oven liners designed for GE stoves to catch drips and overflows, simplifying cleanup․ When cooking sauces or dishes prone to bubbling, place a baking sheet on the rack below to contain potential messes․
Cover dishes when possible, and promptly address any spills as they occur․ Consistent attention to preventing build-up extends the life of your oven and minimizes reliance on the self-clean function․

Self-Clean Alternatives: Manual Cleaning Methods
For those hesitant about the self-clean cycle, effective manual options exist․ A paste of baking soda and water, applied and left overnight, loosens baked-on food․ Follow with a vinegar spray to fizz and lift residue, then wipe clean․
Commercial oven cleaners offer powerful results, but require careful use – always follow product instructions and ensure adequate ventilation․ Remember to prioritize safety and protective gear when utilizing these alternatives․
Using Baking Soda and Vinegar
A natural and effective cleaning duo, baking soda and vinegar tackle oven grime gently․ Create a paste with ½ cup baking soda and water, coating the oven’s interior – avoiding heating elements․ Let sit overnight for optimal results․
The next day, spray vinegar onto the baking soda paste; the fizzing action helps loosen debris․ Wipe clean with a damp cloth, repeating as needed․ This method is ideal for lighter cleaning and avoids harsh chemicals․
Commercial Oven Cleaners (with caution)
While effective, commercial oven cleaners require careful handling due to their harsh chemical composition․ Always wear gloves and eye protection, ensuring excellent ventilation by opening windows and doors․ Follow the product’s instructions meticulously, applying evenly and avoiding heating elements․
Rinse thoroughly with water after the recommended dwell time, removing all traces of the cleaner․ Consider this a last resort, prioritizing natural methods whenever possible for a safer cleaning experience․
GE Oven Model Specific Instructions (Where to Find)
GE offers a wealth of resources tailored to your specific oven model․ The most reliable source is the official GE Appliances website; locate your model number (usually on a label inside the oven door frame) and enter it into their support section․
Here, you’ll find downloadable owner’s manuals, detailed diagrams, and frequently asked questions addressing unique features and cleaning recommendations for your GE stove․ You can also access GE’s customer service for personalized assistance․
Understanding the Oven Lock Feature
GE self-cleaning ovens feature an automatic door lock for safety during the high-temperature cycle․ This prevents accidental opening, ensuring the intense heat remains contained and protecting users from burns․ The lock engages automatically before the cycle begins and remains active until the oven cools sufficiently․
Do not force the door open while locked; attempting to do so could damage the locking mechanism․ The control panel will typically display a “Locked” indicator while the feature is engaged․
Dealing with a Stuck Oven Door During/After Cleaning
If your GE oven door remains locked after the cool-down period, avoid forceful attempts to open it․ The locking mechanism may still be sensing residual heat․ First, ensure the oven is completely off and has cooled for several hours․
Check the control panel for any error messages․ If the issue persists, consult your owner’s manual or contact GE’s customer support for assistance; do not attempt repairs yourself․

Preventative Measures to Reduce Cleaning Frequency
Minimizing oven messes proactively reduces the need for frequent self-cleaning cycles․ Utilize oven liners to catch drips and spills, especially when baking․ Regularly wipe up splatters immediately after they occur, before they bake onto the oven surfaces․
Consider using covered baking dishes and avoid overfilling them․ Prompt attention to spills significantly extends the time between necessary deep cleans, preserving your GE oven’s performance․