Archive: February 26, 2024

PDF

road trip printables pdf

Road trip printables are versatile tools designed to enhance your journey, offering entertainment, organization, and memory-keeping solutions. Perfect for families, they make trips enjoyable and stress-free, while creating lasting memories.

What Are Road Trip Printables?

Road trip printables are downloadable PDF resources designed to make your journey more enjoyable and organized. These printable files include games, checklists, journals, and activities tailored for travelers. They offer a fun way to keep kids entertained, such as scavenger hunts, while also helping adults stay organized with packing lists and itineraries. Many printables are customizable, allowing you to personalize them for your trip. They are easy to print and use, making them a convenient addition to any road trip. Whether you’re planning a cross-country adventure or a weekend getaway, road trip printables provide a practical and creative way to enhance your travel experience.

Benefits of Using Road Trip Printables

Road trip printables offer a variety of benefits that enhance your travel experience. They provide entertainment for kids and adults alike, keeping everyone engaged during long drives. Printable games, scavenger hunts, and activities reduce boredom and create shared memories. Additionally, printables like checklists and itineraries help with organization, ensuring you don’t forget essentials and stay on track. They also serve as a budget-friendly alternative to buying expensive travel games or guides. Customizable options allow you to tailor printables to your specific needs, making them versatile for any trip. Overall, road trip printables are a practical and fun way to make your journey more enjoyable, organized, and memorable for the whole family.

Popular Road Trip Printable Resources

Discover versatile and engaging road trip printables, featuring scavenger hunts, games, and checklists. These resources are widely sought after for their ease of use and variety.

Free Road Trip Printables Available Online

Free road trip printables offer a budget-friendly way to keep everyone entertained; Websites like The DIY Life provide an array of fun activities such as scavenger hunts, games, and checklists. These printable resources are perfect for families, ensuring that long drives remain engaging for kids and adults alike. Many online platforms also offer customizable templates, allowing you to tailor activities to your group’s preferences. Additionally, blogs like Kendra John Designs share tips and printables to help make road trips smooth and enjoyable. With these free resources, you can create lasting memories without spending a dime.

Premium Road Trip Printables and Their Advantages

Premium road trip printables offer enhanced features and exclusive content, making them a worthwhile investment for travelers seeking a more polished and organized experience. These high-quality resources often include customizable templates, detailed itineraries, and unique designs that cater to specific preferences. Unlike free versions, premium printables provide ad-free, high-resolution downloads and access to exclusive activities like themed scavenger hunts or interactive games. Many premium sets also include additional bonuses, such as planning guides or memory-keeping journals. While they require a small cost, the convenience, quality, and versatility of premium road trip printables make them a valuable addition to any adventure, ensuring a seamless and enjoyable journey for all passengers.

Games and Activities for Road Trips

Road trip printables offer a variety of engaging games like bingo and the license plate game, keeping kids entertained and fostering family bonding during long drives.

Printable Road Trip Scavenger Hunts

Printable road trip scavenger hunts are a fun and interactive way to keep everyone entertained during long drives. They typically include lists of items to spot, such as roadside attractions, specific vehicle types, or natural landmarks. These printables are easily accessible online and can be customized to suit different age groups, making them perfect for family trips. By engaging passengers in a shared activity, scavenger hunts foster teamwork and observation skills while adding an extra layer of enjoyment to the journey. They are a great way to ensure that the drive is as memorable as the destination itself.

Other Fun Road Trip Games and Challenges

Beyond scavenger hunts, there are plenty of other engaging road trip games and challenges to keep everyone entertained. The license plate game, where participants spot plates from as many states or provinces as possible, is a classic. Road trip bingo, with customizable cards featuring roadside objects, adds excitement for kids and adults alike. The alphabet game, where players find letters in sequence on signs and billboards, is another timeless favorite. These activities not only pass the time but also encourage teamwork and observation skills. They provide a fun way to enjoy the journey and create shared memories, making the trip as enjoyable as the destination.

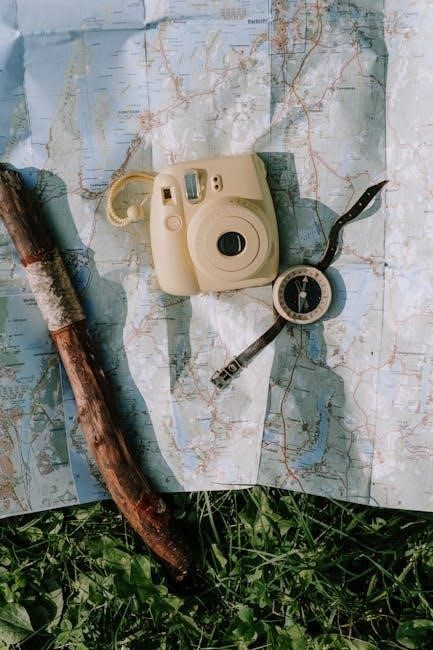
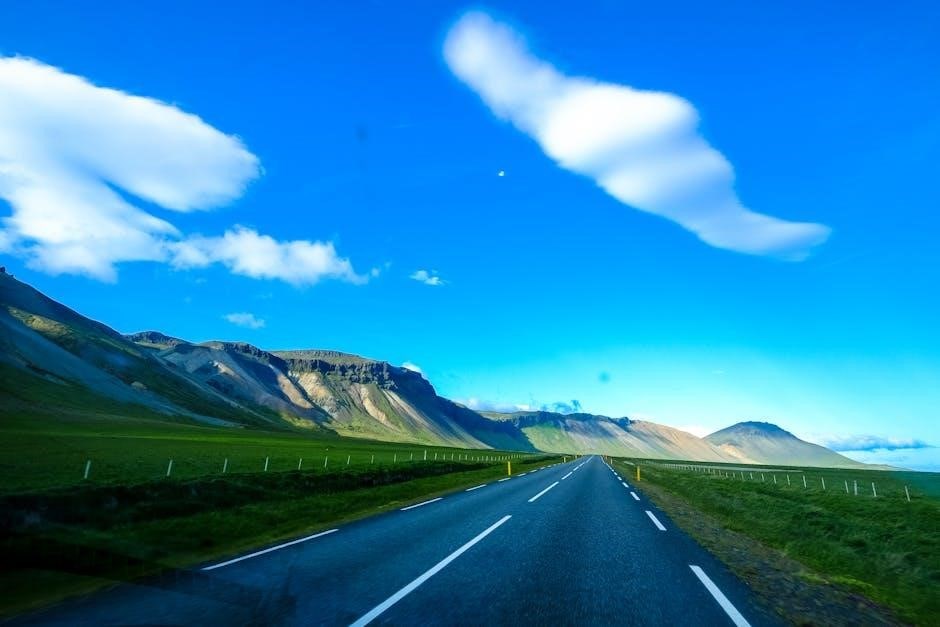
Planning Your Road Trip

Planning your road trip becomes seamless with printable checklists, itineraries, and maps. These tools help organize and customize your journey, ensuring everything is prepared for a smooth adventure.

Printable Road Trip Checklists

Printable road trip checklists are essential for a stress-free journey. These detailed lists ensure you don’t forget essentials like snacks, maps, or emergency supplies. Customize them to fit your needs, whether it’s a family trip or a solo adventure. Checklists help organize tasks, from packing clothes to preparing the vehicle. They also keep everyone on the same page, reducing last-minute chaos. Many free templates are available online, offering categories like “road trip packing list” or “car maintenance checklist.” Premium options may include editable PDFs for personalized planning. Using these checklists ensures a smooth start and a more enjoyable trip. They’re a simple yet effective way to stay organized and focused on the fun ahead.

Customizable Road Trip Itineraries

Customizable road trip itineraries are perfect for tailoring your adventure to suit your preferences. These printable PDFs allow you to plan every detail, from stops and meals to sightseeing spots. With editable templates, you can adjust the schedule to fit your travel style, ensuring a balanced mix of driving and exploration. Many itineraries include space for notes, making it easy to track changes or add spontaneous ideas. They also help you stay organized, keeping track of accommodations, dining options, and must-see attractions; Whether you’re planning a cross-country journey or a weekend getaway, customizable itineraries make the process seamless and enjoyable. They’re a great way to maximize your time and create a memorable trip tailored to you.

Travel Journals and Mementos

Travel journals and mementos capture memories, offering a personal touch to your adventure. Printable road trip journals and photo booth props help document experiences and preserve cherished moments.

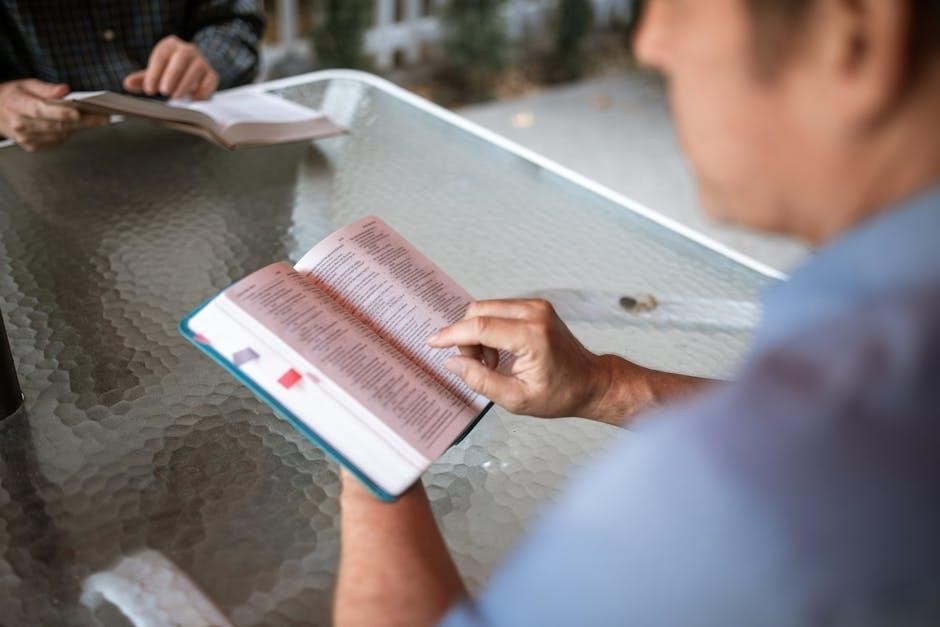
Printable Road Trip Journals

Printable road trip journals are a fantastic way to document your adventures. These downloadable templates allow travelers to record daily experiences, note favorite sights, and reflect on memories. Many journals are designed with families in mind, offering spaces for kids to draw or write about their journey. Customizable pages let you tailor the journal to your trip’s unique vibe. Whether it’s a simple log or a decorated keepsake, printable journals add a personal touch to your travels. They also serve as a lasting memento, capturing the essence of your road trip long after the journey ends. Make every mile a memory with these thoughtful and creative tools.

Creating Memories with Road Trip Photo Booth Props

Printable road trip photo booth props are a fun way to capture memorable moments during your journey. These downloadable PDFs include items like hats, glasses, speech bubbles, and themed accessories that everyone can enjoy. Simply print, cut out, and use them to create playful, shareable photos. Props add a creative and interactive element to your trip, encouraging laughter and bonding. They’re perfect for documenting milestones, scenic stops, or spontaneous moments. Customize your props to match your trip’s theme for a personalized touch. With these printables, every photo becomes a unique keepsake, preserving the joy and adventure of your road trip for years to come.

Tips for Using Road Trip Printables

Organize printables in a binder or folder for easy access. Print them on sturdy paper and laminate if possible. Pack a variety of games and activities to keep everyone entertained throughout the trip.

How to Organize Your Printables for the Trip

Organizing your road trip printables is key to a stress-free adventure. Start by printing all materials on sturdy paper and consider laminating them for durability. Use a binder or folder with clear dividers to categorize items like games, checklists, and journals. Include page protectors to keep activities clean and reusable. Create a table of contents to quickly locate specific printables. Store snacks and writing utensils nearby for easy access. Digital backups on a tablet or smartphone can serve as extras. Finally, review and update your printables before departure to ensure they meet your trip’s needs. This system keeps everything tidy and within reach, ensuring a smooth and enjoyable journey.

Making the Most of Your Road Trip Printables

To maximize the value of your road trip printables, start by printing them on high-quality paper or cardstock for durability. Consider laminating games and reusable activities to withstand repeated use. Organize your printables in a binder or folder, separating them into categories like games, journals, and checklists. Bring a set of colorful pens or markers to add a personal touch to journals and scavenger hunts. Encourage everyone to participate in games and challenges to foster bonding. For digital convenience, save PDF versions on your tablet or smartphone as backups. Finally, take time to review and customize your printables before the trip to ensure they align with your travel plans and preferences. This approach ensures your printables enhance your adventure and create lasting memories.

Road trip printables are an excellent way to enhance your travel experience, offering a mix of fun, organization, and memory-making tools. Whether you’re planning a quick weekend getaway or an epic cross-country adventure, these resources cater to all ages and preferences. From scavenger hunts to customizable itineraries, they ensure everyone stays entertained and engaged. By incorporating printable journals, checklists, and photo booth props, you can capture memories and reflect on your journey long after it ends. With their versatility and ease of use, road trip printables are a must-have for any traveler. So, pack your printables, hit the road, and enjoy the journey!

PDF

the skin of our teeth pdf

Thornton Wilder’s The Skin of Our Teeth (1942) is a Pulitzer Prize-winning play exploring human resilience, blending farce, satire, and allegory. Its title, from Job 19:20, reflects life’s fragility and enduring survival.

1.1 Overview of the Play

The Skin of Our Teeth, written by Thornton Wilder, is a Pulitzer Prize-winning play that blends farce, satire, and allegory to explore human resilience. The story revolves around the Antrobus family, who endure historical catastrophes like the Ice Age and the Great Flood. Combining humor and profundity, the play breaks theatrical conventions, often addressing the audience directly. Its unique style and timeless themes of survival and adaptability have made it a landmark of American drama, offering a profound reflection on humanity’s enduring spirit amidst chaos and uncertainty.

1.2 Historical Context and Relevance

Written in 1942 during World War II, The Skin of Our Teeth reflects the anxieties and hopes of its era. Thornton Wilder crafted the play amidst global upheaval, completing it less than a month after the Pearl Harbor attack. The play’s themes of survival and resilience resonated deeply with audiences facing wartime uncertainties. Its innovative style, blending farce and satire, broke from theatrical norms, earning it the 1943 Pulitzer Prize for Drama. The play’s historical relevance lies in its exploration of humanity’s enduring spirit, offering a timeless commentary on crisis and adaptation that remains poignant today.

Thornton Wilder: The Playwright

Thornton Wilder, a Pulitzer Prize-winning playwright, novelist, and intellectual, is renowned for works like Our Town and The Skin of Our Teeth, blending philosophy and theater.

2.1 Biography and Literary Contributions

Thornton Wilder, born in 1897 and passing in 1975, was a celebrated American playwright and novelist. His works, such as Our Town and The Skin of Our Teeth, seamlessly merged philosophy with theater. Wilder’s innovative style broke conventions, earning him multiple Pulitzer Prizes. His writing often explored timeless themes of human existence, blending nostalgia with universal truths. As a scholar and educator, Wilder taught drama and literature, influencing generations of writers. His literary legacy endures through plays that continue to resonate, offering profound insights into the human condition and the cyclical nature of history.

2.2 Themes and Style in His Works

Thornton Wilder’s works are renowned for their exploration of universal themes such as human endurance, the cyclical nature of history, and the search for meaning. His writing often employs allegory and breaks theatrical conventions, blending farce, satire, and burlesque. Wilder’s plays, like The Skin of Our Teeth, feature a unique narrative style that engages audiences directly, often through asides and interruptions. His use of minimalistic settings and timeless characters underscores the timelessness of his themes, creating a profound connection with audiences. This blend of intellectual depth and theatrical innovation solidified Wilder’s legacy as a visionary playwright.

Plot Summary

The play follows the Antrobus family through three acts, each depicting their survival of catastrophic events: the Ice Age, a Great Flood, and a war, showcasing their enduring resilience.

3.1 Act I: The Antrobus Family and the Ice Age

Act I introduces the Antrobus family as they navigate the challenges of the Ice Age. The scene opens in their New Jersey home, blending humor and existential themes. Mr. and Mrs. Antrobus, along with their children Henry and Gladys, embody an “Everyman” family, showcasing humanity’s primal survival instincts. Sabina, the family’s maid, provides witty commentary, questioning the purpose of their struggles. The act highlights the family’s resilience as they confront the impending doom of the Ice Age, symbolizing humanity’s enduring ability to adapt and survive against overwhelming odds. The mix of farce and allegory sets the tone for the play’s exploration of human perseverance.

3.2 Act II: The Great Flood and Its Aftermath

Act II shifts to the Great Flood, where the Antrobus family confronts another existential threat. The scene transitions to a biblical narrative, with Mr. Antrobus attempting to save humanity and animals aboard an ark. Sabina, the cynical maid, narrates and critiques the chaos, while the stage manager interrupts, breaking the fourth wall. The family’s resilience shines as they adapt to the flood’s devastation, losing possessions but maintaining unity. The act underscores themes of survival, renewal, and the cyclical nature of history, as the Antrobuses emerge determined to rebuild, embodying humanity’s enduring spirit amidst catastrophe. The blend of humor and allegory deepens the play’s philosophical undertones.

3;3 Act III: War and the Family’s Resilience

Act III depicts the Antrobus family navigating the aftermath of war, set amid the ruins of their home. Sabina and the family members survive, showcasing their unyielding resilience. The stage manager interrupts the action, adding a meta-theatrical layer. Mr. Antrobus, now an older patriarch, reflects on humanity’s cyclical struggles. The family’s unity prevails despite the chaos, symbolizing hope and renewal. Sabina’s cynicism contrasts with the family’s determination, highlighting the duality of despair and resilience; The act concludes with the Antrobuses rebuilding, emphasizing humanity’s capacity to endure and adapt, even in the face of catastrophic destruction and uncertainty.

Major Themes and Symbolism

The Skin of Our Teeth explores human endurance, the cyclical nature of history, and the symbolic role of family as a microcosm of society’s resilience and survival.

4.1 Human Endurance and Survival

Thornton Wilder’s The Skin of Our Teeth vividly portrays human endurance as a central theme, depicting the Antrobus family’s resilience through catastrophic events like the Ice Age, flood, and war. The play underscores survival as an inherent human trait, blending humor and absurdity to highlight the struggle between existence and annihilation; By navigating these crises, the characters embody the universal human capacity to persevere, reflecting Wilder’s belief in humanity’s ability to endure even in the face of overwhelming adversity. This theme resonates deeply, particularly given the play’s creation during WWII, offering a timeless commentary on survival and hope.

4.2 The Cyclical Nature of History

Thornton Wilder’s The Skin of Our Teeth explores the cyclical nature of history, depicting humanity’s recurring struggles and triumphs. The play spans from the Ice Age to modern times, illustrating how events repeat themselves across generations; Wilder uses the Antrobus family as an allegory for humanity, showcasing their survival through crises like floods and wars. The character Sabina remarks on the futility of progress, highlighting history’s tendency to repeat itself. This theme reflects Wilder’s view of human existence as a continuous, imperfect cycle, where lessons are forgotten and rediscovered, underscoring the inevitability of history’s repetition.

4.3 The Role of Family and Unity

In The Skin of Our Teeth, the Antrobus family embodies the enduring strength of unity amidst chaos. Through their survival of the Ice Age, the Great Flood, and war, Wilder underscores the family as humanity’s bedrock. Despite internal conflicts, the Antrobuses consistently reunite, exemplifying resilience through cooperation and loyalty. Sabina’s sarcastic remarks often mask her deep commitment to the family, highlighting the complexities of unity. Wilder portrays the family as a microcosm of society, where unity, despite its challenges, is essential for survival. This theme resonates as a timeless message about the importance of togetherness in overcoming adversity.

The Play’s Unique Style

Thornton Wilder’s The Skin of Our Teeth uniquely blends farce, satire, and burlesque, breaking theatrical conventions with its non-realistic storytelling and meta-theatrical elements, earning a Pulitzer Prize.

5.1 Blend of Farce, Burlesque, and Satire

The Skin of Our Teeth masterfully combines farce, burlesque, and satire, creating a unique theatrical experience. Wilder’s play defies traditional drama by mixing comedic elements with profound themes. The Antrobus family’s escapades, from escaping an ice age to surviving a flood, are portrayed with absurd humor and wit. This blend allows Wilder to critique societal norms while maintaining a lighthearted tone. Time magazine aptly described it as “Hellzapoppin with brains,” highlighting its intellectual depth. The play’s unconventional style emphasizes its universality, making it a timeless commentary on human resilience and folly.

5.2 Break from Theatrical Conventions

The Skin of Our Teeth boldly departs from traditional theatrical norms, embracing experimental storytelling. Completed just after Pearl Harbor, it won the 1943 Pulitzer Prize for Drama. The play interweaves farce, burlesque, and satire, defying genre boundaries. Its narrative telescopes vast historical events into a family saga, creating a unique allegorical framework. The stage manager interrupts the action, adding meta-theatrical elements. This unconventional approach challenges audiences to reflect on humanity’s recurring struggles, making it a groundbreaking work in American theater. Wilder’s innovative style underscores the play’s timeless relevance and intellectual depth.

Critical Reception and Legacy

The Skin of Our Teeth won the 1943 Pulitzer Prize for Drama, praised for its innovative blend of farce and satire. Time magazine called it a “Hellzapoppin with brains,” highlighting its intellectual depth. The play’s unique style and timeless themes have ensured its enduring relevance, with modern adaptations continuing to captivate audiences, solidifying its legacy as a landmark of American theater. Its reissue with Tappan Wilder’s afterword further cemented its place in literary history.

6.1 Pulitzer Prize and Acclaim

The Skin of Our Teeth garnered widespread acclaim, earning Thornton Wilder the 1943 Pulitzer Prize for Drama. Time magazine described it as a “Hellzapoppin with brains,” praising its blend of farce, satire, and intellectual depth. The play’s innovative departure from traditional theater conventions was celebrated, as it seamlessly combined humor with profound reflections on human endurance. Its success marked a pivotal moment in Wilder’s career, solidifying his reputation as a visionary playwright. The Pulitzer recognition underscored the play’s timeless relevance, ensuring its continued admiration and study in theatrical and literary circles. Its legacy endures as a masterpiece of American drama.

6.2 Modern Relevance and Adaptations

The Skin of Our Teeth remains a timeless exploration of human resilience, resonating with contemporary audiences. Its themes of survival, familial bonds, and the cyclical nature of history continue to captivate. The play has seen numerous adaptations, including stage revivals and educational productions, highlighting its enduring appeal. A reissued edition with an updated afterword by Tappan Wilder has introduced the work to new generations. Its unique blend of humor and profundity ensures its relevance in modern theater, making it a staple in both academic and performance settings. Its universal themes continue to inspire fresh interpretations and adaptations, cementing its place in theatrical history.

antistasi guide

Welcome to the Antistasi Guide, your comprehensive resource for mastering the Arma 3 modded scenario. Learn guerrilla warfare tactics, resource management, and strategic base-building to lead your rebellion to victory.

1.1 What is Antistasi?

Antistasi is a popular mod for Arma 3, focusing on guerrilla warfare and asymmetric conflict. Players lead a rebel faction, engaging in a persistent multiplayer struggle against opposing forces. The scenario emphasizes resource management, base-building, and strategic influence over the population. It offers a unique blend of tactical combat and long-term strategy, challenging players to outlast and outmaneuver their opponents in a dynamic, immersive environment.

1.2 Core Concepts of Guerrilla Warfare

Guerrilla warfare in Antistasi revolves around hit-and-run tactics, avoiding direct confrontations, and leveraging terrain to outmaneuver superior forces. Key principles include maintaining low visibility, using ambushes, and exploiting enemy weaknesses. Resource management, civilian support, and strategic positioning are crucial. Players must balance aggression with caution, as prolonged engagements risk overwhelming retaliation. The goal is to harass, disrupt, and erode enemy morale, ultimately achieving victory through persistence and clever tactics rather than direct confrontation.

Early Game Strategies

Mastering the early game involves securing starting gear, efficient looting, and managing aggression levels. These foundational steps ensure survival and set the stage for mid-game progression and success.

2.1 Starting Gear and Equipment

Your journey begins with basic gear—pistols, shotguns, and minimal armor. Starting equipment is limited, so prioritize looting from enemy soldiers and supply caches to unlock better weapons and gear. Efficiently managing these early resources is crucial for survival and laying the groundwork for future progression. Always scavenge thoroughly to ensure you’re well-equipped for the challenges ahead.

2.2 Looting and Resource Gathering

Looting is a cornerstone of survival in Antistasi. Scavenge enemy bodies, convoys, and supply caches for weapons, ammo, and gear; Resources are finite, so use them wisely to avoid wasting valuable equipment. Prioritize gathering essentials like medical supplies and explosives, as these are scarce. Looting effectively will enhance your arsenal and strengthen your rebellion, ensuring you’re prepared for future challenges.

2.3 Managing Aggression Levels

Aggression levels determine enemy behavior and difficulty. High aggression triggers tougher patrols, airpower, and armor. Keep aggression low by avoiding prolonged fights and minimizing civilian casualties. Use stealth and hit-and-run tactics to control your notoriety. Monitor the war level, as it escalates with aggression, introducing heavier threats. Balancing these factors is crucial for survival and long-term success in your guerrilla campaign.

Base Management

Secure base setup is vital for survival. Choose hidden locations, fortify defenses, and store resources. Maintain low visibility to avoid enemy raids and ensure your hideout remains undetected for as long as possible.

3.1 Setting Up a Secure Base

Establishing a secure base is crucial for survival. Choose a secluded, elevated location with natural camouflage to avoid detection. Use local materials for construction to blend in. Ensure proximity to resources like factories or towns for easy access. Fortify your base with defensive positions, traps, and hidden entrances. Keep your base off the map to prevent enemy patrols from locating it. Relocate if compromised, as early-game defenses are often vulnerable.

3.2 Defending Your Hideout

Defending your hideout requires strategic planning. Position AI squad members in defensive roles, utilizing cover and elevated spots for maximum effectiveness. Set up traps like mines and explosive devices around the perimeter. Maintain low visibility by avoiding heavy firepower and keeping lights off. Use scouts to monitor enemy movements and prepare for quick evacuations if overwhelmed. Prioritize hiding your commander to prevent game-ending losses.

3.4 Relocating Your Base

Relocating your base is crucial when compromised. Choose secluded areas with natural cover, such as forests or hills, for better defense. Transfer essential supplies and equipment first. Ensure your new location is near resources and objectives. Avoid areas with high enemy traffic. Use scouts to secure the perimeter and eliminate any nearby threats before establishing operations. Keep your commander safe during the move to prevent setbacks.

Mid-Game Progression

Focus on upgrading gear, training AI, and capturing key territories. Balance resource allocation between weapons, armor, and influence. Maintain low aggression and utilize hit-and-run tactics to outmaneuver opponents.

4.1 Unlocking Advanced Gear

Acquiring advanced gear is crucial for mid-game progression. Loot from enemy convoys and caches to obtain better weapons and armor. Use stolen resources to purchase equipment from the black market. Prioritize upgrades like battle rifles and anti-tank launchers to counter enemy armor. Manage funds wisely, as investing in gear directly enhances your rebel group’s combat effectiveness and survivability.

4.2 Training and AI Management

Training your AI squad members is essential for mid-game progression. Use resources to unlock advanced training options, improving their combat effectiveness. Manage AI via the High Command menu, assigning roles like medics or engineers. Squad leaders will coordinate units, enhancing overall tactics. Invest in training to boost morale and survivability, ensuring your team remains formidable against increasingly equipped enemies.

4.3 Capturing Key Territories

Capturing key territories is crucial for gaining resources and influence. Focus on strategic locations like factories and airbases to disrupt enemy supply lines. Fortify these areas with mines and roadblocks to maintain control. Holding territories denies enemy funding and boosts civilian support. Use hit-and-run tactics to harass enemy forces, forcing them to overextend resources. This strategy weakens their economy and strengthens your rebellion’s grip on the map.

Late Game Challenges

In the late game, high aggression brings advanced enemy gear like tanks and jets. Capturing territories becomes crucial to drain their resources and force surrender.

5.1 High War Level Strategies

At high war levels, focus on ambushing heavy armor and air assets to deplete enemy funds. Use terrain and hit-and-run tactics to exploit their logistical weaknesses, as direct confrontations are costly. Prioritize AT launchers and explosives to counter advanced threats. Maintain low visibility to avoid prolonged engagements and protect your base from escalating attacks. Relocate if necessary to preserve your forces.

5.2 Dealing with Airpower and Armor

Counter airpower by using AT launchers and surface-to-air missiles, targeting helicopters first. Against armor, employ anti-tank mines and RPGs, focusing on flanks and rear. Use cover and elevated positions for ambushes. Avoid direct confrontations with superior forces, opting for hit-and-run tactics to disrupt enemy logistics and weaken their offensive capabilities effectively.

5.3 Winning Conditions

Victory is achieved by reducing enemy funds and gaining majority civilian support. Capture key territories like airbases, ports, and industrial areas to disrupt enemy supply lines. Once enemy forces are depleted and civilian support is secured, the war level will drop, and the oppressors will surrender. Persistence and strategic play are crucial to outlast and overwhelm the opposition, ultimately leading to a successful rebellion.

Guerrilla Tactics and Discipline

Master hit-and-run attacks, ambushes, and mobility to outmaneuver superior forces. Avoid prolonged engagements and prioritize stealth. Discipline ensures survival, allowing rebels to outlast and overwhelm oppressors effectively.

6.1 Hit-and-Run Tactics

Hit-and-run tactics are essential for guerrilla warfare. Strike quickly at enemy convoys or patrols, then withdraw to avoid prolonged engagements. Use terrain and cover to your advantage, minimizing exposure. Focus on weakening the enemy’s supply lines and morale without direct confrontations. These tactics preserve your limited resources while maximizing disruption. They are a cornerstone of asymmetric warfare, allowing rebels to exploit enemy vulnerabilities effectively.

6.2 Avoiding Prolonged Engagements

Avoiding prolonged engagements is critical for guerrilla forces. Engage only when necessary, then retreat to safe zones. Prolonged fights risk heavy reinforcements and unnecessary losses. Use cover, terrain, and mobility to disengage. Guerrilla forces thrive on quick, decisive strikes, not drawn-out battles. This tactic preserves resources and forces the enemy to overextend. It’s a cornerstone of asymmetric warfare, keeping you alive and operational for future missions.

6.3 Maintaining Low Visibility

Maintaining low visibility is essential for survival. Avoid large-scale operations and keep movements stealthy. Use terrain and cover to stay undetected. Enemy forces respond aggressively to high-profile actions. Minimize the use of heavy weapons and avoid destroying civilian infrastructure. Keep your base hidden in remote areas and restrict movement during daylight. Low visibility ensures the enemy remains unaware of your strength and plans, giving you a strategic advantage in guerrilla warfare.

Resource Management

Resource management is crucial for sustaining your rebellion. Efficiently gather supplies, manage funds for AI training, and prioritize gear to maintain operational effectiveness in the long term.

7.1 Funding and Economy

Funding and economy are the lifeblood of your rebellion. Secure resources by capturing key territories, looting supply caches, and completing missions. Use these funds strategically to train AI, purchase gear, and fortify bases. Balancing expenses is vital to avoid depletion, ensuring your forces remain equipped and operational throughout the campaign. Proper financial management can make the difference between victory and defeat.

7.2 Gear and Equipment Prioritization

Gear and equipment prioritization is essential for survival and progression. Focus on acquiring versatile weapons, ample ammunition, and medical supplies. Early-game gear is limited, so prioritize looting and unlocking advanced equipment. Use funds strategically to purchase or upgrade gear, ensuring your team is well-equipped for evolving challenges. Balance offensive and defensive needs to maintain effectiveness in various combat scenarios and adapt to the enemy’s increasing firepower.

7.3 Managing Civilian Support

Managing civilian support is crucial for resource gathering and intelligence. Civilians can provide valuable information about enemy movements and supply caches. Gaining their trust through non-aggressive actions and propaganda ensures steady support. Avoiding civilian casualties is vital, as harming them reduces support and can lead to failure. Use civilians as scouts to gather intel and maintain a positive reputation to strengthen your rebellion’s influence and sustainability in the long term.

Community and Multiplayer

Joining the Antistasi community enhances your experience with multiplayer collaboration, shared strategies, and dynamic server interactions. Engage with fellow players, discover new tactics, and build a stronger resistance together.

8.1 Joining the Antistasi Community

Becoming part of the Antistasi community offers a wealth of benefits for players. Join the official subreddit, where you can find guides, updates, and tips from experienced players. Engage in discussions about tactics, mod recommendations, and server setups. The community also hosts Discord channels, providing real-time support and collaboration opportunities. Participating in these forums helps you stay updated and connected with other rebels, fostering a stronger collective effort in the game.

8.2 Finding and Joining Servers

To join an Antistasi server, navigate to the Arma 3 Server Browser and filter for “Antistasi” in the mod search. You can also find community-hosted servers through forums or Discord announcements. Look for servers with active players and compatible mods. New players may prefer servers with lower war levels for a smoother experience. Ensure your game is updated with the required mods before connecting to avoid issues.

8.3 Collaborating with Other Players

Collaboration is key to success in Antistasi. Team up with fellow players to share resources, coordinate strategies, and execute missions. Communicate effectively using Discord or in-game chat to plan attacks and base defense. Assign roles to maximize efficiency, with some focusing on combat while others handle logistics. United efforts ensure better survival and progression, fostering a strong rebel alliance to overthrow oppressive forces.

Antistasi offers a challenging yet rewarding experience, blending guerrilla tactics with strategic planning. Persistence and adaptability are key to overcoming oppressive forces and securing victory.

9.1 Final Tips for Success

To succeed in Antistasi, master guerrilla warfare principles: prioritize hit-and-run tactics, avoid prolonged engagements, and maintain low visibility. Manage aggression levels carefully to avoid overwhelming enemy responses. Keep your commander safe, as losing them can be catastrophic. Relocate your base if compromised and continuously adapt your strategy based on the war level and enemy movements. Stay disciplined, conserve resources, and focus on wearing down the enemy over time.

9.2 Continuous Learning

Continuous learning is key to mastering Antistasi. Stay updated with the latest mods and community tips to refine your strategies. Adapt your tactics as the game progresses, learning from each session. Analyze your successes and failures to improve decision-making. Engage with the community for insights and stay flexible to evolving challenges, ensuring long-term success in the dynamic world of guerrilla warfare.

magic mill dehydrator manual

Welcome to the Magic Mill Dehydrator Manual. This guide provides comprehensive instructions for setting up, operating, and maintaining your dehydrator. Learn about its features, safety tips, and best practices to ensure optimal performance and delicious results.

1.1 Overview of the Magic Mill Dehydrator

The Magic Mill Dehydrator is a versatile kitchen appliance designed for drying fruits, vegetables, meats, and herbs. It features multiple trays, adjustable temperature control, and a rear-mounted fan for even heat distribution. The device is known for its quiet operation, easy cleaning, and ability to preserve nutrients in food. With its user-friendly interface and durable design, it is a popular choice for home dehydration, offering a healthy and efficient way to prepare snacks and meals year-round.

1.2 Importance of Reading the Manual

Reading the Magic Mill Dehydrator manual is essential for understanding its features, operation, and maintenance. It provides safety guidelines, such as avoiding wet hands and checking for damage, to ensure safe usage. The manual also offers setup instructions, troubleshooting tips, and best practices for dehydration. By following the manual, you can avoid common mistakes, maintain optimal performance, and achieve the best results for preserving food effectively and efficiently.

Features and Benefits of the Magic Mill Dehydrator

The Magic Mill Dehydrator offers even drying with its rear-mounted fan and air circulation technology. It features adjustable temperature and timer controls for precise food dehydration, ensuring nutrients are preserved. The machine is designed for versatility, handling fruits, vegetables, meats, and herbs efficiently. Its easy-to-clean design and durable construction make it a reliable choice for home use, providing healthy and delicious results consistently.

2.1 Key Features of the Magic Mill Dehydrator

The Magic Mill Dehydrator features a rear-mounted drying fan and advanced air circulation technology for even drying. It includes adjustable temperature and timer controls, allowing precise dehydration. The machine boasts multiple trays for versatile use, accommodating fruits, vegetables, meats, and herbs. Non-stick sheets are included for sticky foods, while the LED screen ensures easy monitoring. Its durable design and easy-to-clean construction enhance user convenience, making it ideal for preserving nutrients and achieving professional results at home.

2.2 Benefits of Using the Magic Mill Dehydrator

The Magic Mill Dehydrator preserves nutrients and flavors, ensuring healthy snacks. It’s cost-effective, allowing you to dry fruits, vegetables, and meats at home. The adjustable temperature and timer offer precision, while the rear-mounted fan ensures even drying. Its versatility supports batch processing, making it ideal for families. Easy cleanup and durable design promote long-term use, encouraging a sustainable and nutritious lifestyle while maintaining food quality and freshness year-round.

2.3 Design and Build Quality

The Magic Mill Dehydrator features a robust design with a rear-mounted fan for superior heat distribution and even drying. Built with durable materials, it ensures long-lasting performance. The appliance includes adjustable temperature and timer controls for precise operation. Its compact and user-friendly interface makes it easy to navigate. The dehydrator also comes with non-stick sheets for effortless food handling. Overall, its sturdy construction and thoughtful design enhance usability and durability, providing a reliable dehydration experience.

How to Use the Magic Mill Dehydrator

This section guides you through setting up, operating, and best practices for using the Magic Mill Dehydrator; Follow these steps for optimal results.

3.1 Setting Up the Dehydrator

Before first use, unpack and clean the dehydrator. Place it on a stable, heat-resistant surface. Ensure proper ventilation and keep it away from water sources. Plug in the power cord and familiarize yourself with the controls. Check for any damage or wear. For initial setup, refer to the manual’s guidelines to ensure safe and optimal operation. Always follow safety precautions when handling electrical appliances.

3;2 Operating the Dehydrator

To operate the Magic Mill Dehydrator, set the timer and temperature according to your recipe. Place food evenly on trays, ensuring proper air circulation. Avoid overcrowding. Monitor progress periodically. Keep the dehydrator on a stable surface away from water. Always unplug when not in use. Follow safety guidelines to prevent accidents and ensure efficient food drying. Refer to the manual for specific temperature settings for different foods.

3.3 Best Practices for Dehydrating Food

  • Clean the dehydrator before and after use to prevent contamination and odors.
  • Slice foods evenly for consistent drying and to avoid undercooked or overcooked areas.
  • Avoid overcrowding trays to ensure proper air circulation and even dehydration.
  • Monitor food periodically to prevent over-drying and achieve desired texture.
  • Use non-stick sheets for sticky foods like fruits or tomatoes to prevent sticking.
  • Store dehydrated foods in airtight containers to maintain freshness and flavor.
  • Keep the dehydrator away from water and moisture during operation for safety.

Safety Guidelines and Precautions

Always operate the Magic Mill Dehydrator with caution. Ensure hands are dry, avoid aggressive cleaning chemicals, and regularly inspect for damage to maintain safe functionality.

4.1 General Safety Tips

Always operate the Magic Mill Dehydrator with dry hands and ensure the power cord is undamaged. Avoid using harsh chemicals for cleaning to prevent surface damage. Keep children and individuals with reduced capabilities under supervision. Regularly inspect the appliance for wear and tear. Follow all guidelines in the manual to ensure safe and efficient operation. Proper precautions will help maintain functionality and prevent accidents.

4.2 Do’s and Don’ts for Safe Operation

  • DO ensure the dehydrator is placed on a stable, heat-resistant surface.
  • DO check the power cord and appliance for damage before use.
  • DO keep the dehydrator out of reach of children and pets.
  • DON’T operate the appliance with wet hands or near water sources.
  • DON’T use abrasive cleaners, as they may damage the surface.
  • DON’T leave the dehydrator unattended during operation.

Maintenance and Cleaning of the Dehydrator

Regularly clean the dehydrator with mild soap and water. Avoid abrasive cleaners to prevent damage. Dry thoroughly after cleaning to prevent rust. Check the power cord and exterior for damage before use.

5.1 Cleaning the Dehydrator

Regular cleaning is essential for maintaining your Magic Mill Dehydrator. Use a soft cloth and mild soap to wipe down the exterior and trays. Avoid harsh chemicals or abrasive cleaners, as they may damage the surfaces. After each use, remove food residue promptly to prevent sticking. For tougher stains, soak trays in warm soapy water before scrubbing gently. Rinse thoroughly and dry with a clean towel to prevent rust or water spots.

5.2 Regular Maintenance Tips

Regular maintenance ensures your Magic Mill Dehydrator operates efficiently. Check the power cord and trays for damage before each use. Store the dehydrator in a dry place to prevent moisture buildup. After cleaning, ensure all parts are dry to avoid rust. Lubricate moving parts if necessary. For optimal performance, avoid overloading trays and use non-stick sheets for sticky foods. Regularly inspect and replace worn-out components to maintain functionality and longevity.

Troubleshooting Common Issues

Check the power cord for damage and ensure the dehydrator is placed on a flat surface. Verify food is prepared correctly and trays are not overloaded. If issues persist, refer to the manual for specific solutions or contact customer support.

6.1 Common Problems and Solutions

Common issues include uneven drying, food sticking to trays, or the dehydrator not turning on. Solutions include checking power cords, ensuring proper air circulation, and using non-stick sheets. Clean filters regularly and avoid overloading trays. If the dehydrator stops working, reset it or consult the manual. For food sticking, lightly spray trays with oil or line them with parchment paper. Ensure even food distribution for consistent results.

6.2 Dehydrator Not Working Properly

If the dehydrator isn’t working, check the power cord and electrical connections. Ensure the rear-mounted fan is functioning for proper air circulation. If the LED screen doesn’t display, verify the timer and temperature settings. Clean the dehydrator regularly to avoid blockages. For persistent issues, refer to the manual or contact customer support. Proper maintenance and troubleshooting can restore functionality and ensure optimal performance for your Magic Mill Dehydrator.

Accessories and Additional Equipment

Enhance your dehydration experience with accessories like non-stick sheets, extra trays, and specialized mats for sticky foods. These additions optimize performance and versatility for various recipes.

7.1 Recommended Accessories

For optimal use, consider non-stick sheets for sticky foods like bananas and tomatoes. Fruit roll trays are ideal for making homemade fruit leather. Additional trays increase capacity, while specialized mats prevent food from sticking. These accessories enhance efficiency and versatility, ensuring a wide range of dehydration possibilities. They are available online or through the manufacturer, making it easy to expand your dehydrator’s functionality.

7.2 Using Non-Stick Sheets and Trays

Non-stick sheets are essential for preventing food from sticking and making cleanup easier. Use them for delicate items like herbs or sticky foods such as bananas and tomatoes. Place food evenly on the trays to ensure consistent drying. Avoid using abrasive cleaners or metal utensils, as they can damage the non-stick surface. Regularly clean and store sheets properly to maintain their quality and longevity for optimal performance.

Comparing Magic Mill Dehydrator to Other Brands

Magic Mill stands out with its rear-mounted fan and even heat distribution. It’s quieter and easier to clean than competitors, making it a top choice for home users seeking quality and simplicity.

8.1 Unique Features of Magic Mill

The Magic Mill Dehydrator boasts a rear-mounted fan and advanced air circulation technology, ensuring even drying and nutrient retention. Its quiet operation and easy-to-clean design set it apart. The LED screen and adjustable timer provide precise control, while the durable build ensures long-term performance. Non-stick sheets simplify food preparation, making it ideal for a variety of uses, from jerky to fruit rolls, providing versatility unmatched by many competitors.

8.2 How It Stands Out in the Market

Magic Mill stands out with its superior heat distribution and user-friendly interface, making it a top choice. The dehydrator’s quiet operation and easy cleaning features enhance user experience. Its affordability and versatile accessories, such as non-stick sheets, cater to diverse needs. With a focus on durability and performance, Magic Mill outshines competitors, offering a balance of quality and value that appeals to both home users and enthusiasts seeking professional-grade results.

Frequently Asked Questions (FAQs)

Discover answers to common questions about the Magic Mill Dehydrator, including operation, maintenance, and troubleshooting. This section ensures smooth usage and addresses user concerns effectively.

9.1 Common Questions About the Magic Mill Dehydrator

Users often inquire about optimal temperature settings, drying times, and noise levels. Many ask how to prevent food from sticking and the best ways to clean the appliance. Others seek advice on dehydrating specific foods like herbs, meats, and fruits. Additionally, questions about warranty, accessories, and troubleshooting common issues are frequently raised by Magic Mill Dehydrator users.

9.2 Where to Download the Manual

The Magic Mill Dehydrator manual can be downloaded for free from the official manufacturer’s website or trusted third-party sources. Simply search for your specific model, such as the MFD-9100 or MFD-7070, and follow the download instructions. Ensure you verify the source for authenticity to avoid incorrect or outdated versions. Printable PDF manuals are also available, making it easy to reference while using your dehydrator.

The Magic Mill Dehydrator Manual is your ultimate guide to mastering food dehydration. With its detailed instructions and expert tips, you’ll unlock endless possibilities for healthy, delicious meals. Start dehydrating today and enjoy the convenience of preserved flavors all year round!

10.1 Final Thoughts on the Magic Mill Dehydrator Manual

The Magic Mill Dehydrator Manual is an essential resource for anyone looking to explore the world of food dehydration. It provides clear, concise instructions and valuable tips to ensure you get the most out of your appliance. By following the manual, you’ll achieve perfect dehydration every time, preserving nutrients and flavors for healthier, tastier meals. Embrace the simplicity and efficiency of your Magic Mill Dehydrator with confidence!

10.2 Encouragement to Start Dehydrating

Begin your dehydration journey with the Magic Mill Dehydrator and unlock a world of healthy, nutritious snacks and meals. Preserve your favorite fruits, vegetables, and meats effortlessly. Enjoy the convenience of homemade jerky, fruit rolls, and crispy herbs. With this easy-to-use appliance, you’ll save time and money while creating delicious, preservative-free treats for the whole family. Start experimenting today and discover the endless possibilities of dehydration!

drive hospital bed manual

Welcome to the Drive Hospital Bed Manual, your comprehensive guide to understanding and operating your medical bed safely and effectively. This manual covers models like the 15030BV Semi-Electric Bed, detailing weight capacity, proper usage, and troubleshooting. Designed for both patients and caregivers, it ensures optimal functionality and safety.

Purpose and Scope of the Manual

This manual provides essential guidance for the safe and effective use of the Drive Hospital Bed, ensuring optimal functionality and patient safety. It covers assembly, operation, and maintenance, addressing weight limits, proper positioning, and troubleshooting. Designed for both patients and caregivers, it serves as a comprehensive resource to maximize the bed’s performance while minimizing risks, ensuring compliance with safety standards and manufacturer recommendations.

Importance of Following Instructions

Adhering to the manual’s guidelines ensures the Drive Hospital Bed operates safely and efficiently. Proper compliance prevents accidents, such as entrapment or structural damage, and safeguards the occupant. Ignoring instructions may void warranties or compromise safety features. Always follow weight limits, assembly steps, and maintenance tips to protect both the user and the equipment, ensuring a secure and reliable experience for everyone involved.

Key Features of the Drive Medical Hospital Bed

The Drive Medical Hospital Bed offers versatility with manual, semi-electric, and full-electric options. It features adjustable height settings, sturdy construction, and a weight capacity of 450 pounds.

  • Manual, semi-electric, and full-electric operation options.
  • Adjustable height and positioning for patient comfort.
  • Durable design with a 450-pound weight capacity.

Weight Capacity and Safety Limits

The Drive Medical Hospital Bed has a total weight capacity of 450 pounds (204 kg), including the occupant, mattress, and accessories. The patient weight limit is 350 pounds (158 kg). Exceeding these limits can compromise safety and bed stability. Always ensure the bed is used as intended, with the mattress properly centered to prevent entrapment risks. Adhere to these limits to maintain safety and optimal performance of the bed.

  • Total weight capacity: 450 pounds (204 kg).
  • Patient weight limit: 350 pounds (158 kg).
  • Proper mattress alignment is crucial for safety.

Manual, Semi-Electric, and Full Electric Options

Drive Medical offers three bed options: manual, semi-electric, and full electric. Manual beds require physical effort for height and position adjustments. Semi-electric models combine manual crank adjustments with electric features, while full electric beds offer motorized controls for effortless adjustments. Each option caters to different needs, ensuring comfort and convenience for both patients and caregivers. Choose the model that best suits your requirements for optimal functionality and ease of use.

Adjustable Height and Positioning Features

The Drive Medical bed offers adjustable height and positioning features, allowing for customizable comfort and support. Models like the 15030BV Semi-Electric Bed provide smooth transitions between positions using motorized controls. Manual crank adjustments ensure precise positioning for patient comfort. Always center the mattress on the bed frame to prevent entrapment hazards. These features cater to diverse patient needs, ensuring safety and ease of use for both caregivers and patients.

Safety Guidelines for Using the Bed

Always ensure the bed is used as intended, with a maximum weight capacity of 450 pounds. Properly position the mattress to prevent entrapment hazards and ensure user safety.

Weight Limits and Proper Usage

The total weight limit of the Drive Medical bed is 450 pounds (204 kg), including the occupant, mattress, and accessories. Never exceed this capacity to ensure safety. Properly position the mattress to fit the bed frame, as misalignment can lead to entrapment hazards. Always use the bed for its intended purpose, avoiding unauthorized attachments or modifications. Adhering to these guidelines ensures optimal performance and minimizes risks for both patients and caregivers.

Ensuring Proper Positioning of the Occupant

Always center the mattress on the bed frame to prevent entrapment between the rails and frame; Use only compatible side rails designed for your Drive Medical bed to ensure safety. Properly adjust the bed height and position to support the occupant’s comfort and prevent falls. Ensure the bed is placed on a firm, level surface and follow the manual’s guidelines for safe patient positioning and transfers using hand controls or manual adjustments.

Preventing Entrapment and Other Hazards

To prevent entrapment, ensure the mattress is centered on the bed frame and use only compatible side rails. Regularly inspect the bed for worn or damaged parts and replace them immediately. Keep the bed on a firm, level surface and avoid placing objects between the mattress and bed frame. Never exceed the weight limit, and always follow the manufacturer’s guidelines for safe operation and maintenance.

Assembly and Setup Instructions

Carefully unpack and inventory all components before starting assembly. Follow the step-by-step guide to ensure proper setup. Securely attach hand cranks and ensure the bed frame is stable.

Unpacking and Inventory of Components

Begin by carefully unpacking all components from the shipping cartons. Check for the bed frame, side rails, mattress, hand cranks, and controls. Ensure all parts are present by cross-referencing with the manual. Inspect each component for damage or defects. Organize the parts in a clean, dry area to avoid misplacement. Verify that all accessories, such as screws or bolts, are included before proceeding with assembly.

Step-by-Step Assembly Process

Start by attaching the side rails to the bed frame using the provided bolts and Allen wrench. Securely tighten all connections to ensure stability. Next, assemble the head and footboards, aligning them properly with the frame. Adjust the bed height according to the manual’s guidelines. Finally, test the bed’s movement to ensure smooth operation and verify all parts are securely fastened before use.

Connecting Accessories and Rails

Attach the side rails to the bed frame using the provided brackets and screws. Ensure all connections are secure and tighten firmly. For semi-electric models, connect the hand control to the designated port. Verify that the mattress is centered to prevent entanglement with rails. Double-check that all accessories, like assist rails, are compatible and properly installed. Ensure the bed’s weight limit is not exceeded for safe operation and stability.

Operating the Bed

Adjust the bed height and position using the hand crank or control panel. Ensure the mattress is centered and rails are securely attached for safe operation.

Manual Adjustment of Height and Position

For manual models, use the hand crank located at the foot end to adjust the bed’s height and position. Ensure the bed is stable before making adjustments. Always center the mattress on the frame to prevent entrapment risks. Operate the crank smoothly to avoid sudden movements. Refer to the weight capacity guidelines to ensure safe usage. Proper manual adjustment ensures comfort and safety for the occupant.

Using the Hand Control for Semi-Electric Models

For semi-electric models, use the hand control to adjust the bed’s height, head, and foot sections. Ensure the control is securely plugged in and within reach of the occupant. Always monitor the bed’s movement during adjustments to avoid sudden shifts. Keep the hand control away from the patient to prevent accidental operation. Regularly inspect the control for damage or wear. Store the control safely when not in use.

Full Electric Bed Controls and Functions

The full electric bed features intuitive controls for seamless operation. Use the hand control to adjust height, head, and foot sections effortlessly. The bed includes preset positions for convenience, such as a flat position or a chair-like posture. Ensure the bed is plugged into a grounded outlet and avoid overloading it beyond the 450-pound weight limit. In case of malfunctions, disconnect and reconnect the power supply. Always prioritize occupant safety during adjustments.

Maintenance and Care

Regularly clean the bed with mild detergents and lubricate moving parts to ensure smooth operation. Inspect components for wear and tear, and store the bed properly when not in use.

Cleaning and Lubricating Moving Parts

Regularly clean the bed using mild detergents and water to prevent dirt buildup. Avoid harsh chemicals or abrasive cleaners, as they may damage the finish. Lubricate moving parts, such as hinges and gears, with silicone-based lubricant to ensure smooth operation. After cleaning, dry all surfaces thoroughly to prevent rust. Inspect and reapply lubricant every 3-6 months or as needed to maintain optimal functionality and longevity of the bed’s components.

Regular Inspection of Components

Inspect all components regularly to ensure proper function and safety. Check side rails, control systems, and moving parts for wear or damage. Verify that the mattress is centered on the frame to prevent entrapment. Ensure all bolts and screws are tightened, and no parts are loose. Inspect electrical components for damage or fraying; Replace any worn or damaged parts immediately. This routine helps maintain the bed’s integrity and ensures patient safety. Refer to troubleshooting if issues arise;

Storing the Bed When Not in Use

When storing the bed, disconnect all electrical components and clean the frame thoroughly. Use the original packaging if available to protect the bed. Store it in a dry, cool place, avoiding extreme temperatures. Ensure the bed is secure and stable to prevent damage or rust. Regularly inspect stored components for wear or corrosion before reuse. Proper storage extends the bed’s lifespan and ensures safety when it is used again.

Troubleshooting Common Issues

Identify common problems like electrical malfunctions or mechanical issues. Check connections, reset systems, and refer to the manual for solutions. Contact support if unresolved.

Resolving Electrical or Mechanical Malfunctions

If the bed experiences electrical issues, first ensure it is properly plugged into a working outlet. If the problem persists, unplug the bed for 30 seconds and reconnect it. For mechanical malfunctions, check for obstructions or misalignments. Lubricate moving parts if necessary. Always refer to the manual for specific troubleshooting steps. If unresolved, contact a healthcare professional or the manufacturer for assistance to ensure safe and proper repair.

Addressing Weight Limit Exceedance

Exceeding the weight limit of 450 pounds (204 kg), including the occupant, mattress, and accessories, can compromise the bed’s structural integrity and safety. Always verify the total weight before use. If the limit is exceeded, immediately stop using the bed and consult a healthcare professional. Ensure the bed is used only as intended and redistribute weight if necessary to maintain safety and prevent potential malfunctions or hazards. Refer to the manual for specific guidelines.

Repair and Warranty Assistance

If your Drive Hospital Bed experiences mechanical or electrical issues, contact the authorized provider or seller for repair or warranty assistance. Ensure all repairs are performed by certified professionals to maintain safety and compliance. Unauthorized modifications or repairs may void the warranty. Refer to the warranty section in your manual for specific terms and conditions. Proper maintenance and adherence to weight limits help prevent damage and ensure optimal performance.

This manual provides essential guidance for the safe and effective use of the Drive Hospital Bed. By following the outlined instructions, users can ensure optimal functionality, safety, and longevity of the bed. Always adhere to weight limits, proper assembly, and maintenance procedures. For any issues, refer to the troubleshooting section or contact authorized support. Keep this manual accessible for future reference to maximize the bed’s performance and ensure a safe environment for both patients and caregivers.

PDF

goodness of god pdf

God’s goodness is a profound concept reflecting His providence and benevolence. It is central to understanding His nature‚ as seen in Scripture‚ where His glory and goodness are intertwined.

1.1 Understanding the Concept of God’s Goodness

God’s goodness encompasses His providence and benevolence‚ reflecting His protective care and kindness toward creation. Moses’ request to see God’s glory was met with a revelation of His goodness‚ emphasizing their inseparability. This divine attribute balances His justice and love‚ fostering trust and appreciation for His character‚ as highlighted in Exodus 33:18-19.

1.2 Importance of Exploring God’s Goodness in Scripture

Exploring God’s goodness in Scripture provides a foundation for understanding His nature and character. Through Moses’ encounter in Exodus 33:18-19‚ God’s goodness is revealed alongside His glory‚ showcasing His balance of justice and mercy. This exploration fosters trust‚ overcomes fear‚ and deepens personal faith‚ offering hope and transforming one’s relationship with Him.

Biblical Perspectives on God’s Goodness

The Bible reveals God’s goodness through His glory‚ as seen in Exodus 33:18-19‚ where Moses encounters His goodness intertwined with justice and mercy‚ shaping His divine character.

2.1 Key Scriptures Highlighting God’s Goodness

Scriptures like Exodus 33:18-19‚ Psalm 107:1‚ and Psalm 23:6 emphasize God’s goodness. Moses sought God’s glory‚ and God revealed His goodness‚ while the Psalms celebrate His enduring mercy and presence.

2.2 The Role of Moses in Revealing God’s Goodness

Moses’ request to see God’s glory led to a profound revelation of His goodness. In Exodus 33:18-19‚ God promised to show His goodness‚ emphasizing its inseparability from His glory. This encounter highlights Moses’ unique role in unveiling God’s benevolent nature‚ reinforcing the biblical theme of His providence and kindness. Moses’ experience underscores the depth of God’s goodness.

2.3 The Psalms: A Celebration of God’s Goodness

The Psalms are a majestic expression of God’s goodness‚ filled with praises that highlight His faithfulness and love. Psalmists often reflect on personal and communal experiences‚ celebrating God’s mercy and providence. These poetic verses serve as a testament to the enduring truth of His benevolence‚ inspiring worship and gratitude in believers. The Psalms beautifully encapsulate the essence of divine goodness.

Theological Considerations

God’s goodness is rooted in His providence and benevolence‚ reflecting His sovereignty and love. These theological truths provide comfort and inspire trust in His divine plan and character.

3.1 God’s Providence and Benevolence

God’s providence encompasses His protective care and divine guidance over creation‚ while His benevolence reflects His boundless kindness and generosity. Together‚ these attributes demonstrate His active involvement in the lives of believers‚ offering comfort and assurance of His faithfulness and love‚ even in challenging circumstances.

3.2 The Balance Between God’s Wrath and Goodness

God’s wrath and goodness coexist in divine harmony‚ reflecting His justice and mercy. While His wrath addresses sin‚ His goodness offers redemption and grace. This balance underscores His holiness and love‚ providing a complete picture of His character‚ where both attributes are essential for understanding His nature and humanity’s relationship with Him.

Personal Reflections on God’s Goodness

Reflecting on God’s goodness enriches faith‚ offering hope and comfort. It transforms lives‚ fostering trust and gratitude‚ and helps overcome fear and despair through His faithfulness.

4.1 Overcoming Fear Through Understanding God’s Goodness

Understanding God’s goodness helps alleviate fear by revealing His faithfulness and benevolence. This knowledge transforms anxiety into trust‚ enabling believers to rely on His providence‚ even in uncertain times‚ fostering peace and confidence in His unchanging character.

4.2 Finding Hope in God’s Faithfulness

God’s faithfulness is a cornerstone of hope‚ offering assurance in challenging times. His consistent nature and promises provide a steadfast foundation‚ reminding believers of His unwavering love and care‚ even when circumstances seem daunting. Reflecting on His past faithfulness strengthens trust and fosters resilience‚ renewing hope in His goodness and provision for the future.

Expressions of God’s Goodness in Worship

Worship is a powerful way to express and celebrate God’s goodness. Through music‚ prayer‚ and praise‚ believers connect with His faithfulness‚ reflecting on His mercy and love.

5.1 The Song “The Goodness of God” by Bethel Music

The song “The Goodness of God” by Bethel Music is a heartfelt expression of devotion‚ highlighting God’s faithfulness and mercy. Its lyrics resonate deeply‚ encouraging believers to trust in His steadfast love and provision‚ making it a popular choice for worship and personal reflection on God’s enduring goodness.

5.2 The Role of Music in Celebrating God’s Goodness

Music serves as a powerful medium to express and celebrate God’s goodness‚ uniting believers in worship. Through songs like “The Goodness of God‚” it conveys His faithfulness and love‚ inspiring gratitude and devotion. Music bridges the emotional and spiritual‚ fostering a deeper connection with God and His benevolent nature.

Cultural and Historical Perspectives

Cultural and historical views on God’s goodness vary‚ shaped by societal norms and traditions. Dr. Westermarck’s work explores the evolution of divine concepts‚ enriching our understanding of God’s benevolence across time and cultures.

6.1 The Evolution of the Concept of God’s Goodness

The concept of God’s goodness has evolved through history‚ shaped by cultural‚ social‚ and theological influences. Early primitive societies viewed divine goodness through natural phenomena and tribal beliefs. Over time‚ this understanding deepened‚ with scholars like Dr. Westermarck tracing its development‚ revealing how societal norms and religious teachings transformed perceptions of God’s benevolence and providence across generations.

6.2 Dr. Westermarck’s Contributions to the Understanding of God

Dr. Westermarck’s work significantly enriched the understanding of God’s nature‚ particularly His goodness. Through his research‚ he traced the concept’s evolution‚ from primitive beliefs to refined theological frameworks. His contributions highlighted how societal development and religious thought shaped perceptions of God’s benevolence‚ providing a comprehensive historical context for understanding divine goodness in various cultures and epochs.

Practical Applications of God’s Goodness

Living centered on God’s goodness involves trusting His faithfulness and sharing His love with others‚ fostering a life of gratitude and service rooted in His benevolence.

7.1 Living a Life Centered on God’s Goodness

Living a life centered on God’s goodness begins with trusting His faithfulness and kindness. Recognizing His providence and benevolence in daily experiences fosters gratitude and worship. Embracing this truth leads to a life of joy and purpose‚ inspiring others to seek His love and goodness.

7.2 Sharing the Goodness of God with Others

Sharing God’s goodness involves expressing His love and faithfulness through actions and words. Testimonies of His benevolence inspire others‚ fostering hope and trust in Him. Songs like “The Goodness of God” spread this message‚ while acts of kindness reflect His character‚ drawing people to experience His grace and mercy in their lives.

Challenges and Misconceptions

Challenges arise reconciling God’s goodness with His justice and wrath. Misconceptions often stem from associating His justice with harshness rather than holiness‚ leading to fear instead of trust.

8.1 Addressing Misconceptions About God’s Goodness

Misconceptions about God’s Goodness often arise from viewing His justice as harshness. However‚ His justice is rooted in holiness and love‚ not cruelty. Understanding His benevolence requires recognizing His mercy and faithfulness‚ even in challenging circumstances. Embracing this balance helps dispel fears and fosters trust.

8.2 The Role of Suffering in Understanding God’s Goodness

Suffering often challenges perceptions of God’s Goodness‚ yet it can deepen understanding; Through trials‚ faith is refined‚ revealing His faithfulness and care; While pain may obscure His benevolence‚ it ultimately highlights His transformative power and purpose‚ fostering trust and appreciation for His enduring love amidst adversity.

The Impact of God’s Goodness on Daily Life

God’s Goodness fosters gratitude‚ transforming lives through trust and hope. It inspires worship‚ strengthens faith‚ and provides comfort‚ guiding believers to reflect His love in their actions.

9.1 How God’s Goodness Inspires Gratitude and Worship

God’s Goodness ignites heartfelt gratitude‚ compelling believers to worship. Through personal experiences and biblical truths‚ His benevolence fosters a deep appreciation‚ leading to sincere praise and adoration‚ reflecting His love and faithfulness in all circumstances.

9.2 The Transformative Power of God’s Goodness

The goodness of God has a profound‚ life-altering impact‚ fostering trust and resilience. It transforms fear into faith‚ despair into hope‚ and doubt into confidence. Experiencing His benevolence reshapes lives‚ inspiring a deeper reflection of His character and fostering spiritual growth. This transformative power not only uplifts individuals but also radiates outward‚ touching hearts and communities worldwide.

The goodness of God is a transformative truth‚ inspiring gratitude and worship. Reflecting on His faithfulness and benevolence‚ we are encouraged to deepen our understanding and trust in Him.

10.1 Summarizing the Key Points

The goodness of God is a central theme in Scripture‚ reflecting His providence and benevolence. Moses’ request to see God’s glory was met with a revelation of His goodness‚ emphasizing its inseparability from His nature. The Psalms celebrate this goodness‚ while modern expressions‚ like the song “The Goodness of God‚” highlight its transformative power in inspiring gratitude‚ hope‚ and worship in daily life.

10.2 Encouragement to Deepen Understanding of God’s Goodness

Embrace the journey of understanding God’s goodness by reflecting on its transformative power. As seen in Moses’ encounter and the Psalms‚ God’s benevolence inspires hope and gratitude. Let songs like “The Goodness of God” remind you of His faithfulness. Dive deeper into Scripture and worship to experience His goodness personally‚ fostering a life centered on trust and devotion.

PDF

allewie queen bed frame assembly instructions pdf

Welcome to the Allewie Queen Bed Frame assembly guide. This comprehensive PDF instructions ensure a smooth, stress-free assembly process. Designed for ease, the sturdy metal frame features an adjustable headboard and ample storage, making it a perfect addition to any bedroom. Follow these steps to achieve a secure and stylish setup.

1.1 Overview of the Allewie Queen Bed Frame

The Allewie Queen Bed Frame is a stylish and durable option designed for modern bedrooms. Featuring a sturdy metal construction, it offers an adjustable headboard and ample storage solutions. The frame combines a romantic and novel design with practicality, ensuring both comfort and functionality. With a weight capacity of 800 lbs, it provides stability and durability. The bed frame includes storage drawers and slats for added convenience. Its sleek design and robust build make it a perfect choice for enhancing your bedroom decor while ensuring long-lasting performance.

1.2 Importance of Following Assembly Instructions

Following the Allewie Queen Bed Frame assembly instructions is crucial for ensuring stability, safety, and proper functionality. Incorrect assembly can lead to structural issues, reduced weight capacity, or even personal injury. The instructions provide a clear, step-by-step guide to help you assemble the bed frame efficiently. By adhering to the guidelines, you can avoid errors, prevent damage to components, and ensure the bed meets its maximum weight capacity of 800 lbs. Proper assembly also guarantees a safe and enjoyable user experience.

Key Features of the Allewie Queen Bed Frame

The Allewie Queen Bed Frame features a sturdy metal construction with 12 metal bars for support, adjustable headboard height, and 12 inches of under-bed storage. It is designed for durability, with a weight capacity of 800 lbs, ensuring stability and safety. The frame also includes rubber bushings for quiet operation and comes with clear assembly instructions, making it easy to set up even for those with no prior experience.

2.1 Design and Construction

The Allewie Queen Bed Frame combines a sleek, romantic design with robust construction. Featuring a black metal headboard and mahogany support, it offers a sturdy base with 12 metal bars for enhanced stability. The frame’s legs are supported in multiple directions, ensuring durability. The design includes an adjustable headboard and 12 inches of under-bed storage, blending functionality with style. Constructed from high-quality materials, it ensures long-lasting performance while maintaining a modern aesthetic appeal.

2.2 Weight Capacity and Durability

The Allewie Queen Bed Frame is built to last, with a maximum weight capacity of 800 lbs. Its durable construction features a sturdy metal base with 12 metal bars for added stability. The frame’s legs are supported in multiple directions, enhancing its structural integrity. Designed for long-term use, it ensures safety and reliability. Always ensure the weight placed on the bed does not exceed the specified limit to maintain its durability and prevent potential damage.

2.3 Storage and Adjustable Headboard Options

The Allewie Queen Bed Frame offers convenient storage solutions, with 12 inches of space underneath for keeping linens or personal items. Additionally, the bed features an adjustable headboard, allowing you to customize its height to suit your preferences. This versatility enhances both functionality and comfort, making it a practical choice for modern bedrooms. The headboard’s height can be adjusted by securing screws in different positions, ensuring a perfect fit for any decor or need.

Components and Tools Required for Assembly

The Allewie Queen Bed Frame includes all necessary components and tools, ensuring assembly is straightforward. Check each part against the provided list to confirm everything is present.

3.1 List of Included Parts

The Allewie Queen Bed Frame includes a headboard, footboard, side rails, wooden slats, screws, bolts, and an Allen wrench. Additional components may vary based on the model, such as storage drawers or adjustable features. Always verify the packaging contents against the provided list to ensure all parts are accounted for before starting assembly. This step ensures a smooth and efficient process without delays.

3.2 Essential Tools for Assembly

The Allewie Queen Bed Frame assembly requires an Allen wrench (provided) and a screwdriver for securing bolts. Pliers may assist with tight fittings, while a rubber mallet can help avoid damage. A tape measure ensures accurate alignment, and clamps can stabilize parts during assembly. Always refer to the instruction manual for specific tool recommendations and verify compatibility with included hardware. Gathering all tools beforehand streamlines the process, saving time and effort.

Safety Precautions and Preparation

Ensure a clear workspace and wear gloves for protection. Follow the manual closely to avoid errors. Never exceed the bed’s weight capacity for stability and safety.

4;1 Safety Tips Before Starting Assembly

Ensure safety by gathering all tools and parts before starting. Lay components on a soft surface to prevent scratching. Wear protective gloves and eyewear. Clear the workspace of tripping hazards. Follow weight capacity guidelines to avoid structural damage. Tighten all bolts securely to ensure stability. Double-check for missing parts before proceeding. Avoid overloading the bed frame beyond its recommended limit. Keep children away during assembly. Proper preparation ensures a safe and successful assembly process.

4.2 Recommended Assembly Environment

Choose a spacious, flat, and stable surface for assembly. Avoid hard or uneven floors to prevent scratching. Assemble on a soft surface, like a carpet or mat, to protect the bed frame. Ensure good lighting to clearly see instructions and parts. Keep all tools and components organized within reach. A clutter-free, well-ventilated area is ideal. Avoid assembling in humid or dusty environments to maintain the bed frame’s quality. Proper workspace preparation ensures efficient assembly and minimizes risks of damage or error.

Step-by-Step Assembly Process

Begin by unpacking and organizing all components. Attach the headboard and side rails, then secure the slats. Finally, assemble drawers if applicable, following instructions carefully for stability.

5.1 Unpacking and Organizing Components

Carefully remove all components from the packaging and set them aside for assembly. Ensure you have all parts listed in the manual, including the headboard, side rails, wooden slats, screws, bolts, and Allen wrench. Organize smaller hardware in a designated area to avoid misplacement. Assemble on a soft surface to prevent scratching. Before starting, verify the integrity of each part and cross-reference with the installation manual for clarity.

5.2 Attaching the Headboard and Side Rails

Begin by aligning the headboard with the side rails, ensuring proper fitment. Use the provided screws to secure the headboard to the side rails. Tighten firmly using the Allen wrench. Next, attach the side rails to the bed frame, ensuring all bolts are snug and evenly tightened. Refer to the manual for specific screw locations and torque requirements. Double-check alignment to ensure stability and prevent wobbling. Once secured, proceed to the next step in the assembly process.

5.3 Securing the Slats and Drawers (if applicable)

Place the wooden slats evenly across the bed frame, ensuring they are aligned with the pre-drilled holes. Secure each slat with screws, tightening firmly. If your model includes drawers, attach the drawer frames to the bed frame using the provided hardware. Ensure all connections are snug and stable. For drawers, install the wheels and handles, aligning them properly. Double-check that all slats and drawers are securely fastened to support the mattress and withstand daily use effectively.

Final Adjustments and Quality Check

Ensure all bolts and screws are tightly secured. Verify the bed’s stability and balance. Double-check for any loose parts. Your bed is now ready for use.

6.1 Tightening All Bolts and Screws

Once all components are assembled, carefully tighten every bolt and screw using the provided tools. Start with the headboard and work your way down to ensure stability. Avoid over-tightening, as this may damage the frame. Double-check all connections for snugness. For added security, revisit each joint after placing the mattress to ensure no bolts have loosened during use. Proper tightening ensures the bed remains sturdy and safe for years to come.

6.2 Ensuring Stability and Leveling

Use a spirit level to ensure the bed frame is perfectly horizontal. Adjust the legs on uneven surfaces by rotating them until the frame is balanced. Once leveled, tighten all bolts securely to maintain stability. Place the mattress gently to test the bed’s firmness and ensure no wobbling. Proper leveling prevents structural strain and ensures long-lasting durability. Double-check all adjustments before final use to guarantee a stable and secure sleeping surface.

Maintenance and Care Tips

Regular maintenance ensures longevity. Clean the frame with a soft cloth and avoid harsh chemicals. Periodically check and tighten all bolts for stability and safety.

7.1 Cleaning and Upkeep

Regular cleaning is essential to maintain the Allewie Queen Bed Frame’s appearance and durability. Use a soft, dry cloth to wipe down metal parts, avoiding harsh chemicals that may damage the finish; For upholstered sections, vacuum gently or spot clean with a mild detergent. Ensure the frame is dry after cleaning to prevent moisture buildup. Avoid placing heavy objects on the bed that exceed the 800-pound weight capacity. Additionally, check for loose screws periodically and tighten them to maintain stability. Proper upkeep ensures the bed remains sturdy and comfortable for years. Always refer to the Allewie Queen Bed Frame Assembly Instructions PDF for specific care recommendations.

7.2 Disassembly Instructions for Moving

Disassembling the Allewie Queen Bed Frame for moving is straightforward. Reverse the assembly steps, starting with removing the drawers and slats. Use an Allen wrench to detach bolts and screws, taking care not to strip them. Organize all parts in labeled bags to prevent loss. Avoid using power tools to ensure safe removal. Once fully disassembled, wrap fragile components in protective material. Store the instruction manual with the parts for easy reassembly later. This method ensures the bed frame remains intact during relocation.

PDF

the luna’s choice ayla free pdf

The Luna’s Choice: Ayla by Kat Silver is a captivating werewolf romance novel. It explores Ayla’s forbidden mate bond with Theo‚ her sister’s fiancé‚ and her struggle between loyalty and self-discovery.

1.1 Overview of the Novel

The Luna’s Choice: Ayla by Kat Silver is a gripping werewolf romance that delves into forbidden love and self-discovery. Ayla‚ burdened by family responsibilities after her father’s death‚ faces a devastating twist when she discovers her fated mate‚ Theo‚ is already bound to her sister‚ Kylee. Torn between loyalty and desire‚ Ayla’s journey explores themes of sacrifice‚ fate‚ and identity‚ captivating readers with its emotional depth and intense conflict.

1.2 Genre and Target Audience

The Luna’s Choice: Ayla falls under the genre of werewolf romance and paranormal fantasy. It appeals to fans of forbidden love stories‚ emotional conflicts‚ and supernatural themes. The target audience includes young adult readers and those drawn to character-driven narratives with deep emotional resonance‚ making it a favorite among enthusiasts of fantasy and romance.

Plot Summary

The Luna’s Choice: Ayla revolves around Ayla’s forbidden mate bond with Theo‚ her sister Kylee’s fiancé. Both reject each other to honor prior commitments‚ leading to emotional turmoil and a fractured pack bond.

2.1 Key Plot Points

Ayla discovers Theo‚ her sister Kylee’s fiancé‚ is her fated mate‚ sparking a moral dilemma. She rejects him to protect Kylee‚ leading to a broken bond and her becoming a rogue. This decision ignites internal conflict and strained family relationships‚ while Theo grapples with his duties as future Alpha. The story explores Ayla’s resilience and the consequences of choosing loyalty over destiny‚ setting the stage for a dramatic showdown of fate versus free will.

2.2 Conflict and Character Dynamics

Ayla faces internal turmoil upon discovering Theo is her fated mate‚ yet bound to her sister Kylee. Her selfless rejection of Theo to protect Kylee leads to Ayla’s isolation and broken pack bonds. Theo‚ future Alpha‚ struggles with duty and desire‚ while Kylee remains unaware of the underlying tension. The story delves into Ayla’s resilience‚ Theo’s conflicted loyalty‚ and the fractured sibling relationship‚ amplifying emotional depth and character complexity throughout the narrative.

Main Characters

Ayla‚ the resilient protagonist‚ supports her family after tragedy; Theo‚ the future Alpha‚ faces a fated bond with Ayla despite being pledged to her sister. Kylee remains oblivious to the tension.

3.1 Ayla

Ayla is a resilient and loyal protagonist‚ dedicating her life to supporting her family after her father’s death. Her discovery of being Theo’s fated mate sparks internal conflict‚ as she prioritizes her sister’s happiness over her own desires. Her decision to break her pack bond showcases her strength and selflessness‚ leading her to embrace a rogue lifestyle. Ayla’s journey is marked by grief‚ loyalty‚ and the struggle for self-discovery.

3.2 Theo

Theo‚ the future Alpha‚ is torn between duty and destiny. Engaged to Kylee‚ he discovers Ayla is his true mate‚ creating an impossible dilemma. His rejection of Ayla stems from a commitment to honor‚ despite his wolf’s resistance. Theo’s internal conflict reflects his struggle to balance leadership responsibilities with personal desires‚ making him a complex and empathetic character in the novel.

3.3 Kylee

Kylee‚ Ayla’s younger sister‚ is betrothed to Theo‚ the future Alpha. Her relationship with Ayla is rooted in sisterly love‚ but also strained by circumstances. Kylee’s engagement to Theo unknowingly places her at the center of a fated conflict‚ highlighting her innocence and the unintended consequences of her union‚ which deeply affects Ayla’s life and decisions in the story.

Themes and Symbolism

The Luna’s Choice: Ayla explores themes of forbidden love‚ loyalty‚ and fate versus free will. The moon symbolizes destiny‚ while Ayla’s journey reflects internal conflict and self-discovery.

4.1 Fate vs. Free Will

The Luna’s Choice: Ayla delves into the conflict between destiny and personal choice. Ayla’s fated bond with Theo‚ her sister’s mate‚ highlights the tension between cosmic design and individual agency. The novel explores how Ayla defies fate to protect her family‚ showcasing the power of self-determination. This theme underscores the struggle between accepting one’s predetermined path and forging an independent future‚ adding depth to Ayla’s emotional journey.

4.2 Loyalty and Sacrifice

Ayla’s decision to reject Theo and break her bond with the pack highlights her unwavering loyalty to her sister‚ Kylee. Her selfless sacrifice‚ though painful‚ underscores the depth of her love and commitment to family. This act of devotion shapes her identity‚ emphasizing the enduring power of loyalty and the profound impact of sacrificing personal happiness for the sake of others.

Availability and Access

The Luna’s Choice: Ayla is available as a free PDF on platforms like MoboReader and other online reading sites‚ offering easy access to the novel.

5.1 Sources for the Free PDF

Readers can access The Luna’s Choice: Ayla as a free PDF through platforms like NovelDrama.org and MoboReader. These sites offer downloadable versions in PDF and text formats‚ making it easy for fans to enjoy the novel without cost. Additionally‚ online communities and forums often share links to the book‚ ensuring widespread availability for enthusiasts of werewolf romance stories.

5.2 Reading Platforms

The Luna’s Choice: Ayla is available for reading on platforms like NovelDrama.org and MoboReader. These sites provide a seamless reading experience‚ allowing fans to access the novel in both PDF and text formats. Additionally‚ the book can be downloaded for offline reading‚ making it convenient for readers to enjoy Ayla’s story anytime‚ anywhere‚ without missing out on the compelling werewolf romance narrative.

Reception and Reviews

The Luna’s Choice: Ayla has captivated readers with its emotional depth and complex character dynamics. Fans praise its engaging storyline‚ while many eagerly anticipate further developments in Ayla’s journey.

6.1 Reader Feedback

Readers have praised The Luna’s Choice: Ayla for its emotional depth and compelling character dynamics. Many fans highlight Ayla’s resilience and the unique twist on werewolf romance. The novel’s ability to evoke strong emotions resonates deeply‚ with readers expressing eagerness for potential sequels and further exploration of the characters’ journeys.

6.2 Critical Analysis

Critics praise The Luna’s Choice: Ayla for its intricate exploration of forbidden love and loyalty. The novel’s emotional depth and complex character dynamics are highlighted‚ with particular emphasis on Ayla’s internal conflict and growth. Reviewers note the author’s ability to weave tension and emotional resonance‚ creating a compelling narrative that keeps readers engaged. The story’s unique take on werewolf lore adds to its appeal.

About the Author‚ Kat Silver

Kat Silver is a rising author known for her emotional storytelling and strong female leads. Her work often explores themes of love‚ loyalty‚ and self-discovery in supernatural contexts.

7.1 Writing Style

Kat Silver’s writing style is emotionally charged and character-driven‚ often blending supernatural elements with heartfelt drama. Her vivid descriptions and deep exploration of inner conflicts create immersive worlds. Silver’s ability to weave complex emotions with fast-paced plots captivates readers‚ making her a standout in the fantasy romance genre.

7.2 Other Works

Kat Silver is known for her compelling storytelling‚ and while details about her other works are scarce‚ fans eagerly anticipate more from her. Her writing often explores themes of forbidden love‚ self-discovery‚ and supernatural conflicts‚ suggesting a consistent style across her novels. Readers of The Luna’s Choice: Ayla hope for future books that delve deeper into werewolf lore and emotional Drama.

Future Prospects and Sequels

The future of The Luna’s Choice: Ayla remains uncertain‚ but fans eagerly await potential sequels or spin-offs. Kat Silver’s engaging storytelling has sparked hope for more werewolf tales.

8.1 Potential for Continuation

The Luna’s Choice: Ayla leaves readers eager for more‚ with its unresolved plotlines and emotional depth. Fans speculate about a sequel‚ hoping to see Ayla’s journey continue. Kat Silver’s success with similar werewolf tales suggests a high potential for future installments‚ satisfying the growing fan base clamoring for additional chapters in Ayla’s story.

8.2 Fan Anticipation

Fans of “The Luna’s Choice: Ayla” are eagerly awaiting more content‚ with vibrant discussions on platforms like Facebook and reading communities. The novel’s emotional depth and unresolved plotlines have fueled anticipation for a sequel or continuation. Readers are particularly invested in Ayla’s journey and the potential for her character’s growth‚ driving a passionate fan base that continues to grow with each new update or rumor about the series’ future.

“The Luna’s Choice: Ayla” leaves readers reflecting on its emotional depth and Ayla’s transformative journey. The novel’s conclusion underscores the complexity of fate‚ love‚ and self-discovery‚ resonating with fans long after the final page.

9.1 Impact of the Novel

“The Luna’s Choice: Ayla” has left a lasting impression on readers‚ sparking discussions about love‚ sacrifice‚ and destiny. Fans praise its emotional depth and relatable characters‚ while critics highlight its unique take on the werewolf genre. The novel’s popularity has grown significantly‚ with many eagerly awaiting future works from Kat Silver. Its themes resonate deeply‚ making it a memorable read.

9.2 Final Thoughts

The Luna’s Choice: Ayla is a tale of forbidden love and self-discovery‚ leaving readers emotionally invested. The novel’s exploration of loyalty‚ sacrifice‚ and fate vs. free will resonates deeply. With its gripping storyline and relatable characters‚ it has become a favorite among werewolf romance fans. The community’s enthusiasm and discussions highlight its impact‚ making it a compelling read for those who enjoy emotional depth and complex relationships.